Lemon Blueberry Sourdough Bread-Easy Recipe
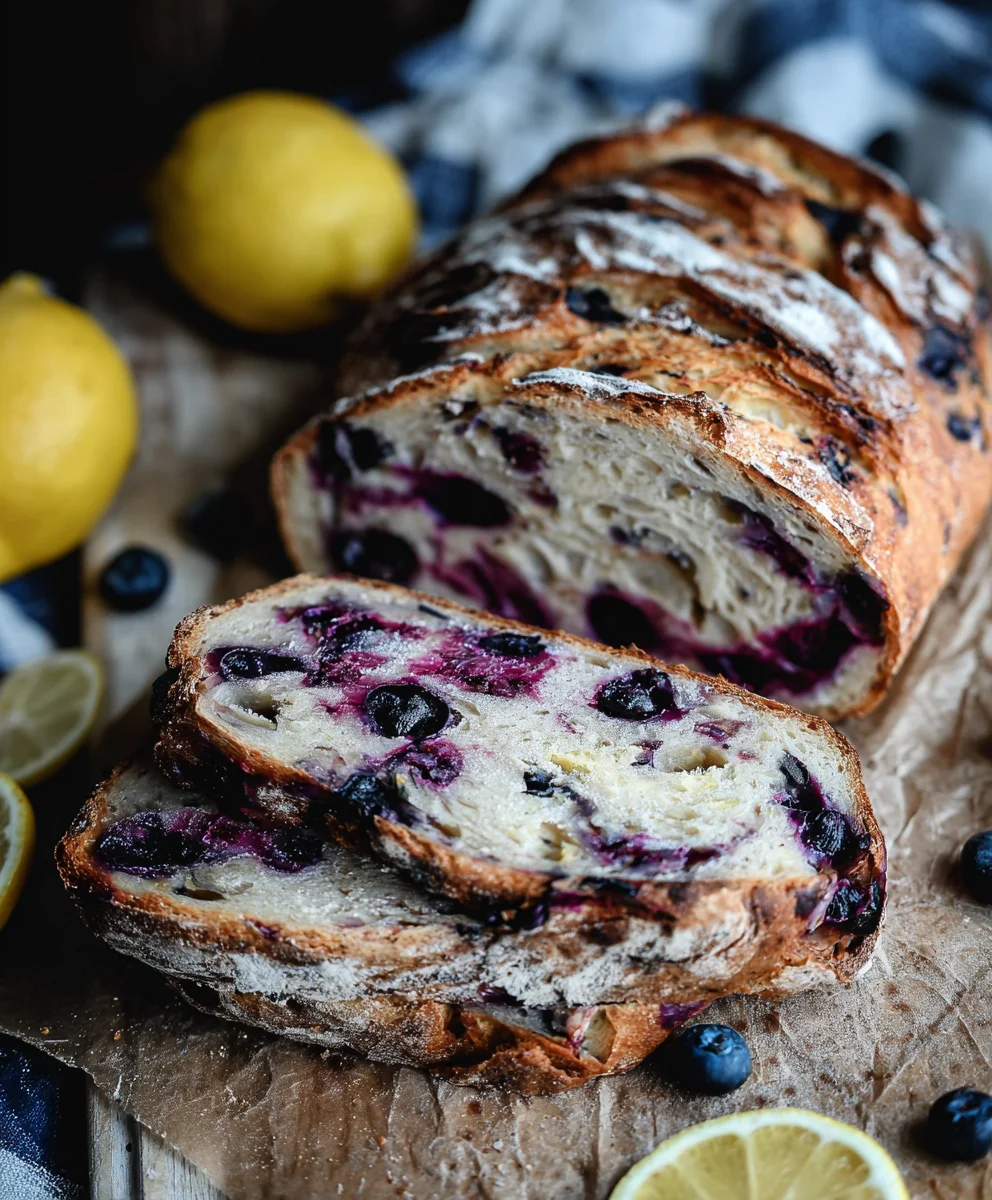
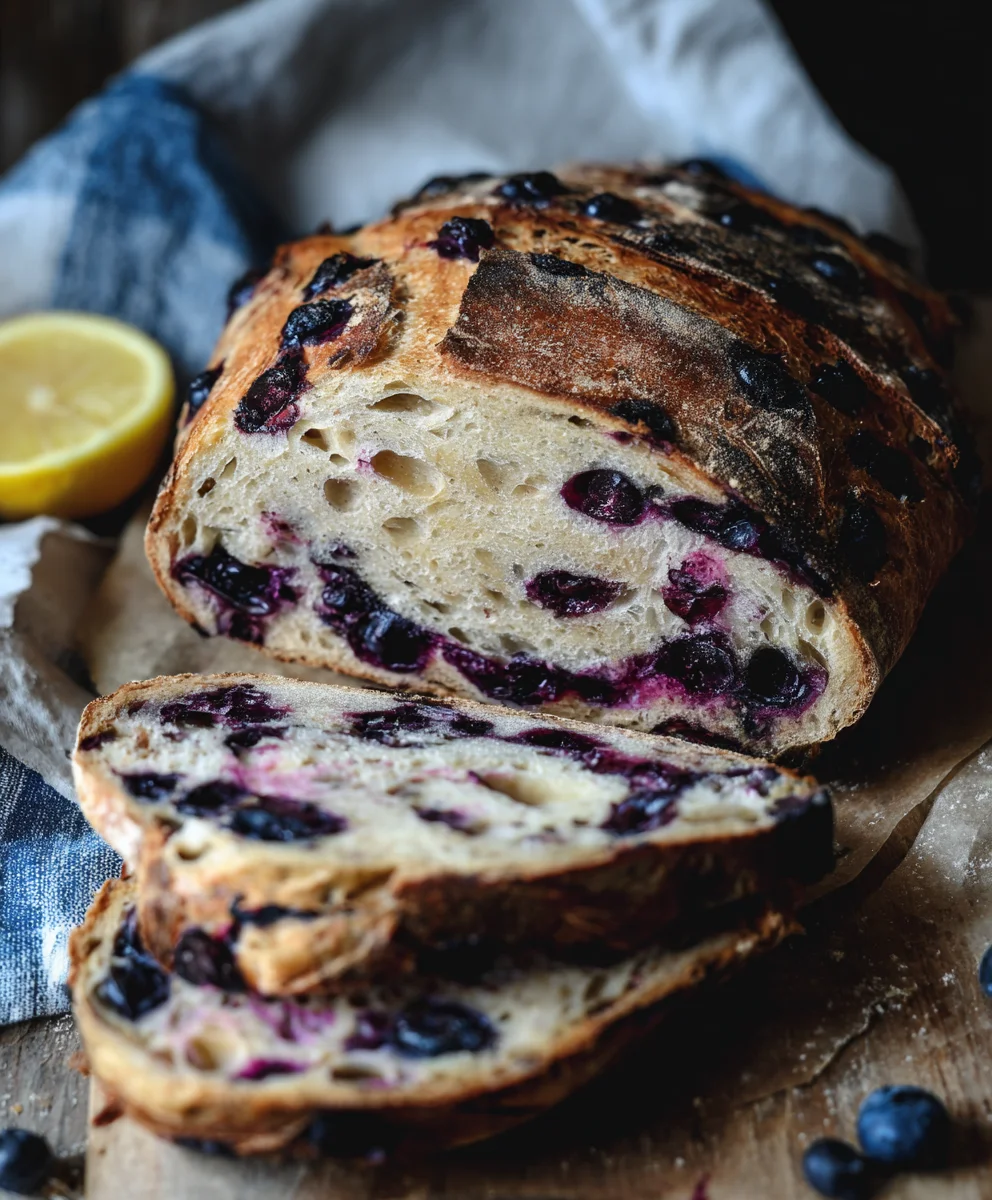
Lemon Blueberry Sourdough Bread Recipe is more than just a bake; it’s an experience, a symphony of tangy citrus and sweet berries dancing within the unparalleled texture of sourdough. Who doesn’t adore the comforting aroma of freshly baked bread wafting through their home? This particular sourdough is a celebration of simple, yet profound flavors, making it a firm favorite for breakfast, brunch, or a delightful afternoon treat. What truly sets this Lemon Blueberry Sourdough Bread Recipe apart is the perfect harmony it strikes between the bright, zesty notes of fresh lemon and the juicy bursts of ripe blueberries, all enveloped by the signature chewy crum extractb and crisp crust that only sourdough can deliver. It’s a testament to how a few high-quality ingredients can transform into something truly extraordinary, a bread that’s both sophisticated and utterly irresistible.
Why You’ll Love This Recipe
This isn’t just another sourdough; it’s a delightful twist on a classic. We’ve carefully crafted this Lemon Blueberry Sourdough Bread Recipe to ensure a beautiful rise, a tender interior, and an explosion of flavor in every single bite. Get ready to impress yourself and everyone lucky enough to share a slice!
Ingredients:
- 50g active sourdough starter
- 350g water
- 500g bread flour
- 11g salt
- 150g fresh blueberries
- Zest of one lemon
- 8 Tablespoons (113g) butter, softened to room temperature
- 1/2 cup (75g) fresh blueberries, mashed
- 2 Tablespoons (45g) honey
- A pinch of salt
Making the Dough
Autolyse
- In a large mixing bowl, combine the 350g of water and 500g of bread flour. Mix with a spatula or your hands until just combined. You don’t need to knead at this stage; the goal is simply to hydrate the flour. Cover the bowl with a damp tea towel or plastic wrap and let it rest for 30 minutes. This resting period, known as the autolyse, allows the flour to absorb water and the gluten development to begin extract without any effort on your part. It makes the dough more pliable and easier to work with later on.
Adding Starter and Salt
- After the autolyse, add the 50g of active sourdough starter to the dough. Gently dimple it into the dough using wet fingers. Then, sprinkle the 11g of salt over the top. It might seem like a lot of salt, but it’s crucial for flavor, dough structure, and controlling fermentation. Now, it’s time to start developing the gluten. I like to use the “stretch and fold” method. With wet hands, grab a portion of the dough from one side of the bowl, stretch it upwards, and fold it over the center. Rotate the bowl and repeat this process 3-4 times until all sides of the dough have been stretched and folded. You’ll notice the dough starting to become smoother and more cohesive.
- Cover the bowl again and let it rest for 30 minutes. Repeat the stretch and fold process. You will perform this stretch and fold sequence a total of 4 times, with 30-minute rests in between each set. As you continue to stretch and fold, you’ll observe a significant change in the dough’s texture. It will become much smoother, elastic, and will start to hold its shape better, resisting tearing. This builds strength in the dough, which is essential for a good rise.
First Fermentation (Bulk Fermentation)
- After the final set of stretch and folds, it’s time for the bulk fermentation. This is where the sourdough starter really gets to work, leavening the dough and developing that characteristic tangy flavor. Cover the bowl and let the dough rest in a warm spot (ideally around 75-80°F or 24-27°C) for 3-4 hours, or until it has increased in volume by about 50-75% and shows signs of aeration (you might see small bubbles on the surface). During this time, you can perform one or two more gentle stretch and folds if you notice the dough feeling a bit slack, but avoid overhandling. The key here is patience, allowing the natural yeast and bacteria to do their magic.
Adding the Flavorings
- Once your dough has completed its bulk fermentation, it’s time to incorporate the delicious lemon and blueberry elements. Gently turn the dough out onto a lightly floured surface. You want to handle it as gently as possible at this stage to preserve the air bubbles that have formed. Sprinkle the zest of one lemon evenly over the surface of the dough. Then, scatter the 150g of fresh blueberries over the lemon zest. Carefully fold the dough over the zest and blueberries, tucking the edges in to enclose them. You can do a few more gentle folds to distribute them, but try not to mash the berries too much, as this can bleed color into the dough excessively.
Shaping and Proofing
Pre-Shaping and Bench Rest
- After incorporating the blueberries and lemon zest, let the dough rest on the counter for about 20 minutes. This short rest period, known as the bench rest, allows the gluten to relax after the shaping process, making the final shaping easier and preventing the dough from tearing. After the bench rest, it’s time for the final shaping. Whether you’re aiming for a boule (round loaf) or a batard (oval loaf), the goal is to create surface tension. Gently shape the dough into your desired form, tucking the edges underneath to create a taut skin on the top. Place the shaped dough seam-side down into a well-floured banneton or a bowl lined with a floured tea towel.
Cold Proofing
- Cover the banneton or bowl and place it in the refrigerator for 12-24 hours. This cold proof, or retarding, slows down the fermentation significantly. It allows for further flavor development and makes the dough much easier to score and handle before baking. The longer the cold proof, the more pronounced the sourdough tang will be.
Baking and Finishing Touches
Baking the Bread
- When you’re ready to bake, preheat your oven to 475°F (245°C) with a Dutch oven or baking vessel inside for at least 30 minutes. Carefully turn the cold-proofed dough out of the banneton onto a piece of parchment paper. Score the top of the dough with a sharp blade or lame. This controlled cut allows the bread to expand in a specific direction during baking. Carefully lift the parchment paper with the dough and lower it into the preheated Dutch oven. Cover with the lid and bake for 20 minutes.
- After 20 minutes, remove the lid from the Dutch oven. Reduce the oven temperature to 450°F (230°C) and continue to bake for another 20-25 minutes, or until the crust is a deep golden brown and the internal temperature of the bread reaches at least 205°F (96°C). The crust should sound hollow when tapped.
Making the Blueberry Honey Butter
- While the bread is baking, let’s prepare the delicious accompaniment. In a small bowl, combine the 8 tablespoons (113g) of softened butter, 1/2 cup (75g) of mashed fresh blueberries, 2 tablespoons (45g) of honey, and a pinch of salt. Mix everything together thoroughly until well combined and creamy. The sweetness of the honey and the tartness of the mashed blueberries will create a wonderfully flavorful butter that perfectly complements the slightly tangy sourdough.
Cooling and Serving
- Once the bread is baked to perfection, carefully remove it from the Dutch oven and place it on a wire rack to cool completely. This is a crucial step! Slicing into hot bread can result in a gummy texture. Allowing it to cool completely allows the internal crum extractb to set and develop its final texture. Once cooled, slice the loaf generously and serve with the prepared blueberry honey butter. The combination of the warm, crusty sourdough, infused with bright lemon and bursts of blueberry, and the rich, sweet butter is simply divine.
Conclusion:
And there you have it! Your very own Lemon Blueberry Sourdough Bread Recipe is ready to be sliced and savored. We’ve walked through the delightful process of transforming simple ingredients into a fragrant, tangy, and wonderfully textured loaf. The zesty burst of lemon paired with the sweet pops of blueberry, all within the complex flavor profile of sourdough, makes this bread truly special. It’s perfect for enjoying on its own, lightly toasted with a smear of butter, or as a base for a more elaborate breakfast or brunch.
For serving, consider pairing it with a dollop of Greek yogurt or a light cream cheese. It also makes an exceptional accompaniment to a cup of tea or coffee. If you’re feeling adventurous, try incorporating a hint of lavender or a tablespoon of poppy seeds into the batter for a delightful twist on the classic. Remember, baking sourdough is a journey, so don’t be discouraged if your first loaf isn’t perfect. Each bake teaches you something new. Embrace the process and enjoy the incredibly rewarding results!
Frequently Asked Questions:
Can I use frozen blueberries in this Lemon Blueberry Sourdough Bread Recipe?
Yes, absolutely! If using frozen blueberries, it’s best to toss them with a tablespoon of your flour mixture before folding them into the dough. This helps prevent them from bleeding too much color into the batter and also absorbs some of the excess moisture they release during baking.
What if my sourdough starter isn’t very active?
A less active starter might result in a slower rise or a slightly denser loaf. Ensure your starter is fed regularly and is consistently doubling in size a few hours after feeding before embarking on this recipe. If it’s still sluggish, you might need to nurture it a bit longer or use a slightly larger proportion of starter in your recipe for a more robust rise.
How should I store my Lemon Blueberry Sourdough Bread?
Once completely cooled, store your Lemon Blueberry Sourdough Bread Recipe loaf at room temperature in a bread box or a clean paper bag for up to 2-3 days. For longer storage, wrap it tightly in plastic wrap followed by aluminum foil, or place it in an airtight container and freeze for up to 3 months. Slicing before freezing makes it easier to thaw just what you need.
Lemon Blueberry Sourdough Bread – Easy Recipe
An easy recipe for homemade lemon blueberry sourdough bread, perfect for breakfast or snacking. Features a tangy sourdough base infused with bright lemon zest and sweet blueberries, served with a homemade blueberry honey butter.
Ingredients
-
50g active sourdough starter
-
350g water
-
500g bread flour
-
11g salt
-
150g fresh blueberries
-
Zest of one lemon
-
8 Tablespoons (113g) butter, softened to room temperature
-
1/2 cup (75g) fresh blueberries, mashed
-
2 Tablespoons (45g) honey
-
A pinch of salt
Instructions
-
Step 1
Autolyse: In a large mixing bowl, combine 350g water and 500g bread flour. Mix until just combined. Cover and let rest for 30 minutes. -
Step 2
Add starter and salt: Add 50g active sourdough starter and 11g salt. Perform 4 sets of ‘stretch and fold’ with 30-minute rests in between to develop gluten. -
Step 3
First Fermentation: Let the dough bulk ferment in a warm spot for 3-4 hours, or until it has increased in volume by 50-75%. -
Step 4
Incorporate Flavorings: Gently turn dough onto a floured surface. Sprinkle with lemon zest and 150g fresh blueberries. Carefully fold to enclose. -
Step 5
Shaping and Proofing: Let dough rest for 20 minutes (bench rest), then shape into a boule or batard. Place seam-side down in a floured banneton or lined bowl. Cold proof in the refrigerator for 12-24 hours. -
Step 6
Baking: Preheat oven to 475°F (245°C) with a Dutch oven. Score dough, transfer to Dutch oven, cover, and bake for 20 minutes. Remove lid, reduce oven to 450°F (230°C), and bake for another 20-25 minutes until golden brown. -
Step 7
Blueberry Honey Butter: While bread bakes, combine 8 tbsp softened butter, 1/2 cup mashed blueberries, 2 tbsp honey, and a pinch of salt. Mix until creamy. -
Step 8
Cool and Serve: Remove bread from Dutch oven and let cool completely on a wire rack before slicing. Serve with the prepared blueberry honey butter.
Important Information
Nutrition Facts (Per Serving)
It is important to consider this information as approximate and not to use it as definitive health advice.
Allergy Information
Please check ingredients for potential allergens and consult a health professional if in doubt.