Perfect Grilled Pizza Recipe- Easy & Delicious
How to Make the Perfect Grilled Pizza is about unlocking a whole new level of deliciousness right in your own backyard. Forget soggy crusts and unevenly cooked toppings; we’re diving headfirst into the smoky, crispy magic that only grilling can provide. There’s something incredibly satisfying about transforming a simple pizza into an al fresco masterpiece, and trust me, once you experience the joy of a truly perfect grilled pizza, you’ll wonder why you ever bothered with the oven.
Why do we all adore pizza? It’s the ultimate comfort food, endlessly customizable, and perfect for sharing. But grilled pizza elevates it. The intense heat of the grill creates a blistered, chewy crust with irresistible smoky undertones that a conventional oven simply can’t replicate. It’s the char, the crisp, the slightly charred edges that make this method so special. Get ready to impress your friends and family with this show-stopping, yet surprisingly simple, way to create the perfect grilled pizza.
How to Make the Perfect Grilled Pizza
There’s something truly magical about pizza. The melted cheese, the flavorful sauce, the perfectly crisp crust – it’s a universally loved dish. And while oven-baked pizza is fantastic, I’m here to tell you that grilling pizza takes it to a whole new level. The high heat of the grill creates an unbelievably crispy, slightly smoky crust with a delightfully chewy interior that’s hard to achieve indoors. It’s surprisingly easy, and once you try it, you might never go back to your oven for pizza again!
Ingredients:
Equipment You’ll Need:
Getting Started: Preparing Your Workspace and Dough
Before you even think about firing up the grill, it’s crucial to have everything prepped and ready to go. Grilling pizza is a fast process, so you won’t have time to chop vegetables or grate cheese once the dough is on the grill.
First, let’s talk about the dough. If you’re using store-bought dough, let it come to room temperature for about 30-60 minutes. This makes it much easier to stretch and shape. If you’re making your own, ensure it’s been properly proofed. Gently stretch or roll out your pizza dough on a lightly floured or cornmeal-dusted surface to your desired thickness and shape. I usually aim for a rustic, slightly irregular shape, about 12-14 inches in diameter. Don’t overwork the dough; be gentle to maintain its airiness.
Next, prepare your toppings. Slice all your vegetables thinly so they cook through quickly on the grill. If you’re using meats like sausage or beef bacon, make sure they’re pre-cooked. Grate your cheeses. Having everything in small bowls and within easy reach will be a lifesaver when it’s time to assemble.
Finally, lightly dust your pizza peel or a large, flat baking sheet with cornmeal or flour. This is essential to prevent the dough from sticking and ensure a smooth transfer onto the hot grill grates.
Firing Up the Grill
This is where the magic happens. You want your grill to be nice and hot, but not so hot that it incinerates the pizza instantly. For a gas grill, preheat it to medium-high heat (around 400-450°F or 200-230°C). If you’re using a charcoal grill, you’ll want to arrange your coals to create a hot zone for grilling. Let the grill preheat with the lid closed for at least 10-15 minutes to ensure the grates are scorching hot. A hot grill is key to achieving that perfect crispy crust and preventing the dough from sticking.
The Grilling Process: Step-by-Step
1. Prepare the Grill Grates and First Side of the Dough. Once your grill is preheated and the grates are clean, brush them lightly with olive oil to further prevent sticking. Carefully slide your stretched pizza dough onto the hot grill grates. Close the lid and grill for about 2-4 minutes, or until the bottom of the dough is golden brown and slightly puffed. You’ll want to keep a close eye on it, as grill times can vary. The goal here is to get a nice char and a solid base before adding toppings.
2. Flip and Initial Topping Application. Using your pizza peel or a large spatula, carefully flip the dough over. It should release easily if the grates were properly oiled. Now, this is the crucial step: work quickly! Spread your pizza sauce evenly over the grilled side of the dough, leaving a small border for the crust. Sprinkle generously with mozzarella cheese and then Parmesan cheese. Add your desired toppings. Remember, less is often more when grilling pizza, as the high heat cooks everything rapidly. Don’t overload it, or you might end up with an undercooked center and soggy toppings.
3. Continue Grilling and Melting the Cheese. Close the grill lid and continue to cook for another 4-6 minutes. The direct heat from the grill will start to melt the cheese and cook the toppings. You’re looking for the cheese to be fully melted and bubbly, and the crust to be golden brown and crispy on the bottom. You can lift a corner of the pizza gently with your spatula to check the underside for doneness.
4. Checking for Doneness and Finishing Touches. Once the cheese is melted and the crust is perfectly grilled, it’s time to remove your pizza. Carefully slide your pizza peel or spatula underneath the entire pizza and transfer it to a cutting board. If you like, you can add a few fresh basil leaves or a drizzle of olive oil immediately after removing it from the grill. The residual heat will gently wilt the basil.
5. Rest and Slice. Let your masterpiece rest for a minute or two before slicing. This allows the cheese to set slightly, making it easier to cut and preventing all the toppings from sliding off. Slice into wedges with a sharp knife or pizza cutter and serve immediately. The joy of grilled pizza is its freshness and the incredible texture you can only achieve with this method. Enjoy the crispy, smoky, cheesy perfection!
Conclusion:
There you have it! Making the perfect grilled pizza is a surprisingly accessible and incredibly rewarding culinary adventure. The beauty of this recipe lies in its simplicity, allowing you to achieve that delightful smoky char and crispy-chewy crust that oven-baked pizzas often struggle to replicate. The high heat of the grill sears the dough beautifully, creating a foundation that can hold up to your favorite toppings.
Now, let’s talk serving. Imagin extracte these fresh, hot pizzas straight off the grill, perhaps with a vibrant arugula salad dressed with a lemon vinaigrette on the side, or some grilled corn and a cool pitcher of iced tea. The possibilities for variations are endless! Don’t be afraid to experiment with different cheeses, from sharp provolone to creamy mozzarella. Load it up with classic beef pepperoni, or get adventurous with caramelized onions, roasted peppers, or even some spicy beef chorizo. Even a simple drizzle of balsamic glaze after grilling can elevate it to gourmet status.
I wholeheartedly encourage you to give this a try. Gather your friends and family, fire up the grill, and create some delicious memories. You might just find this becomes your go-to pizza night solution.
Frequently Asked Questions:
Why is grilled pizza so good?
The high heat of the grill creates a fantastic smoky flavor and a wonderfully crispy yet slightly chewy crust that’s difficult to achieve indoors. It adds a unique textural element and depth of flavor.
Can I use store-bought pizza dough?
Absolutely! While homemade dough is fantastic, a good quality store-bought dough will still yield delicious results. Just make sure it’s at room temperature before grilling for best results.
What are some easy topping ideas for grilled pizza?
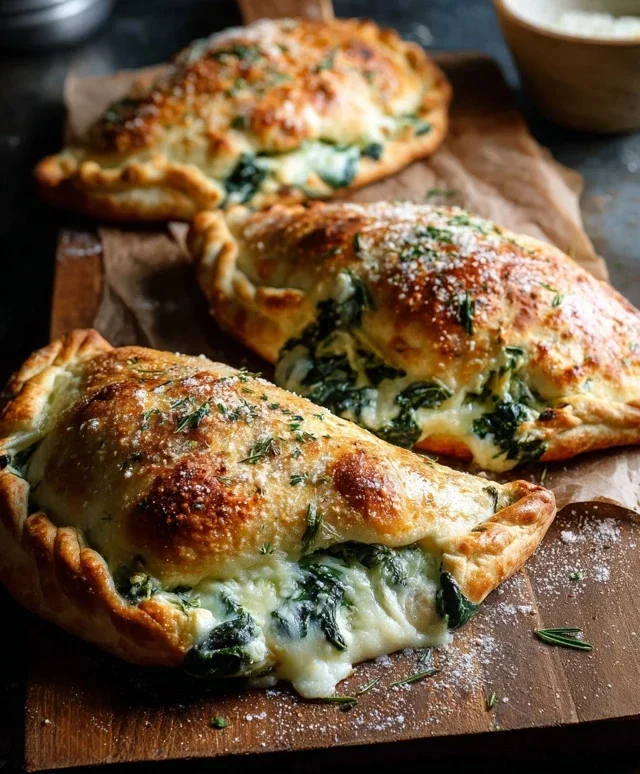
Beyond the classics, try a white pizza with ricotta, garlic, and spinach, or a fig and beef prosciutto pizza with a balsamic glaze. For something lighter, consider grilled vegetables like zucchini and bell peppers with goat cheese.
The Perfect Grilled Pizza
Master the art of grilling pizza for a smoky, crispy crust and perfectly melted toppings. This recipe guides you through each step for delicious homemade grilled pizza.
Ingredients
-
Flour
-
Yeast
-
Water
-
Olive Oil
-
Salt
-
Tomatoes
-
Cheese
-
Pepperoni (substitution for pork)
-
Onion
-
Bell Pepper
Instructions
-
Step 1
Prepare the pizza dough by combining flour, yeast, water, olive oil, and salt. Knead until smooth and elastic, then let it rise until doubled in size. -
Step 2
Preheat your grill to medium-high heat. Lightly oil the grill grates to prevent sticking. -
Step 3
Stretch or roll out the pizza dough into your desired shape. Lightly brush one side with olive oil. -
Step 4
Carefully place the dough, oiled side down, onto the preheated grill. Grill for 2-3 minutes until golden brown and slightly puffed. Flip the dough. -
Step 5
Quickly add your toppings to the grilled side of the dough, working efficiently to avoid burning. Include tomato sauce, cheese, pepperoni, onion, and bell pepper. -
Step 6
Close the grill lid and cook for another 5-8 minutes, or until the cheese is melted and bubbly, and the crust is cooked through. Avoid the temptation to lift the lid too often. -
Step 7
Carefully remove the pizza from the grill using a spatula. Let it rest for a minute before slicing and serving.
Important Information
Nutrition Facts (Per Serving)
It is important to consider this information as approximate and not to use it as definitive health advice.
Allergy Information
Please check ingredients for potential allergens and consult a health professional if in doubt.