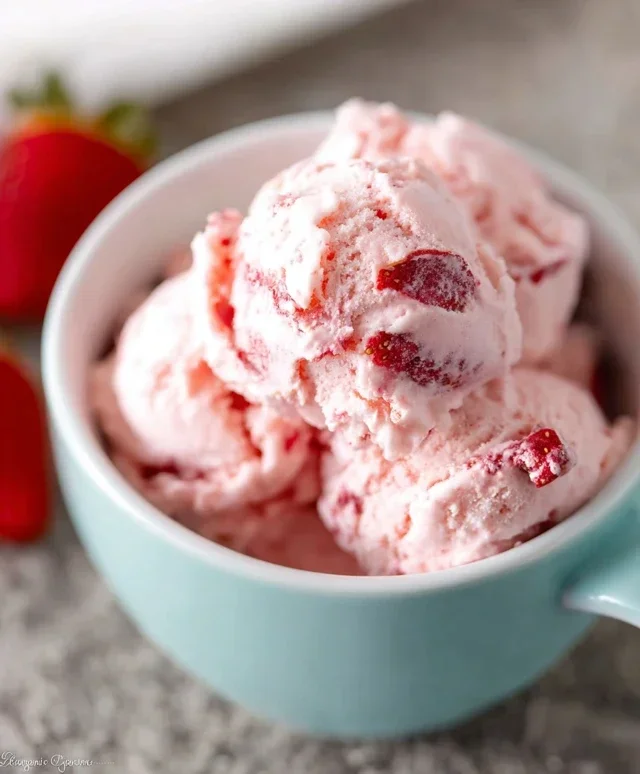
Easy Homemade Strawberry Ice Cream Recipe
Homemade strawberry ice cream is a truly magical treat. There’s something undeniably special about swirling your spoon into a bowl of creamy, cold bliss, especially when it’s bursting with the vibrant, sweet-tart flavor of fresh strawberries. Forget those store-bought versions with their artificial undertones; nothing compares to the pure, unadulterated taste of strawberries picked at their peak, blended into a rich, luscious ice cream base. It’s the quintessential summer dessert, evoking memories of sun-drenched days and carefree afternoons. This homemade strawberry ice cream recipe is designed to capture that pure essence, offering a delightful balance of sweetness and the distinct, irresistible tang of ripe berries. Get ready to impress yourself and everyone you share it with – this is the strawberry ice cream you’ve been dreaming of!
Homemade Strawberry Ice Cream
There’s something truly magical about homemade ice cream. The creamy texture, the vibrant flavor, the satisfaction of creating something so utterly delicious from scratch – it’s an experience that store-bought pints just can’t replicate. And when it comes to flavor, you can’t beat the sweet, slightly tart burst of fresh strawberries. This homemade strawberry ice cream recipe is wonderfully simple, requiring no fancy equipment beyond an ice cream maker and a freezer. It’s the perfect way to capture the essence of summer in every scoop. Get ready to impress yourself and anyone lucky enough to share a bowl with you.
Ingredients:
Crafting Your Strawberry Masterpiece
The journey to luscious, homemade strawberry ice cream begin extracts with preparing our star ingredient: the strawberries. We want to coax out their natural sweetness and create a vibrant puree that will infuse our ice cream base with an irresistible fruity punch.
Step 1: Preparing the Strawberry Base
Start by taking your hulled and diced strawberries. If your strawberries are particularly large, you might want to dice them smaller to ensure they break down easily. Place these diced strawberries into a medium-sized bowl. To this, we’ll add our sweetener and a touch of brightness. Drizzle in the 2 tablespoons of honey and sprinkle in the 1/2 cup of granulated sugar. The honey adds a lovely depth of flavor that complements the strawberries beautifully, while the sugar provides the necessary sweetness. Now, for a little zing! Add the 1 teaspoon of lemon juice. This might seem counterintuitive, but a touch of acidity actually enhances the strawberry flavor, making it taste even more like itself, only better.
Now, gently stir everything together. We want to coat the strawberries with the sugar, honey, and lemon juice. Cover the bowl and let it sit at room temperature for at least 30 minutes, or even up to an hour. This process is called macerating. As the strawberries sit, they’ll begin extract to release their juices, creating a luscious syrupy mixture. This is crucial for a smooth and flavorful ice cream, as it helps to dissolve the sugar and soften the fruit. Once macerated, use a fork or a potato masher to gently mash the strawberries further. You don’t want a completely smooth puree; some small, softened chunks of strawberry are lovely in the finished ice cream. Alternatively, you can briefly pulse them in a food processor, being careful not to over-process into a liquid.
Step 2: Creating the Ice Cream Base
While our strawberries are busy macerating, let’s prepare the creamy foundation for our ice cream. In a separate, clean bowl, pour in the 1 cup of heavy whipping cream and the 1/2 cup of half and half. These two dairy components are key to achieving that perfect creamy texture. The heavy cream provides richness and a luxurious mouthfeel, while the half and half adds just the right amount of liquid to prevent the ice cream from becoming too dense.
Now, it’s time for the aromatic magic. Add the 1 teaspoon of vanilla extract to the cream mixture. Vanilla is a classic partner to strawberry, enhancing its sweetness and adding a subtle, comforting warmth. Whisk these ingredients together gently. We’re not looking to whip this mixture into stiff peaks like we would for whipped cream; we just want to combine everything thoroughly. Ensure the sugar from the macerated strawberries has also dissolved well.
Step 3: Combining and Chilling the Base
Once your strawberries have macerated and you’ve gently mashed them, it’s time to bring everything together. Carefully pour the macerated strawberry mixture, including all those beautiful juices, into the bowl with the cream and half and half. Stir everything together until it’s well combined. Give it a taste at this point. This is your chance to adjust the sweetness or tartness. If you prefer it sweeter, you can add a tiny bit more sugar or honey. If you want it a little brighter, another tiny splash of lemon juice can do the trick. Remember, though, that the flavors will mellow slightly as the ice cream freezes.
Next, and this is a vital step for achieving the smoothest ice cream, we need to chill this base thoroughly. Cover the bowl tightly with plastic wrap or a lid and refrigerate it for at least 4 hours, or preferably overnight. This chilling period allows the flavors to meld and, more importantly, ensures the base is very cold. A very cold ice cream base churns much more efficiently and results in smaller ice crystals, leading to a smoother, creamier texture. Don’t skimp on this chilling time!
Step 4: Churning the Ice Cream
With our ice cream base perfectly chilled, we’re ready for the exciting part – churning! Follow the manufacturer’s instructions for your specific ice cream maker. Most home ice cream makers require the bowl to be frozen for at least 24 hours beforehand.
Once your ice cream maker is ready, pour the chilled strawberry mixture into the frozen bowl. Start churning. The churning process incorporates air into the mixture while freezing it, transforming the liquid base into a soft-serve consistency. This usually takes about 20-30 minutes, depending on your machine. You’ll see the mixture thicken and begin extract to resemble soft ice cream. Resist the temptation to stop too early; you want it to reach a state where it holds its shape for a moment before melting back.
Step 5: Freezing for the Perfect Texture
When the ice cream has reached a soft-serve consistency from churning, it’s time to give it its final freeze. Transfer the ice cream from the ice cream maker into an airtight container. Use a spatula to scrape out every last delicious bit. Gently press a piece of parchment paper or plastic wrap directly onto the surface of the ice cream. This helps to prevent ice crystals from forming on top.
Cover the container tightly with its lid. Place the container in your freezer and let it freeze for at least 4-6 hours, or until firm. This final freezing period is crucial for the ice cream to develop its characteristic firm but scoopable texture. Patience is key here! The wait will be well worth it when you dig into your rich, creamy, homemade strawberry ice cream. Enjoy every spoonful of your delightful creation!
Conclusion:
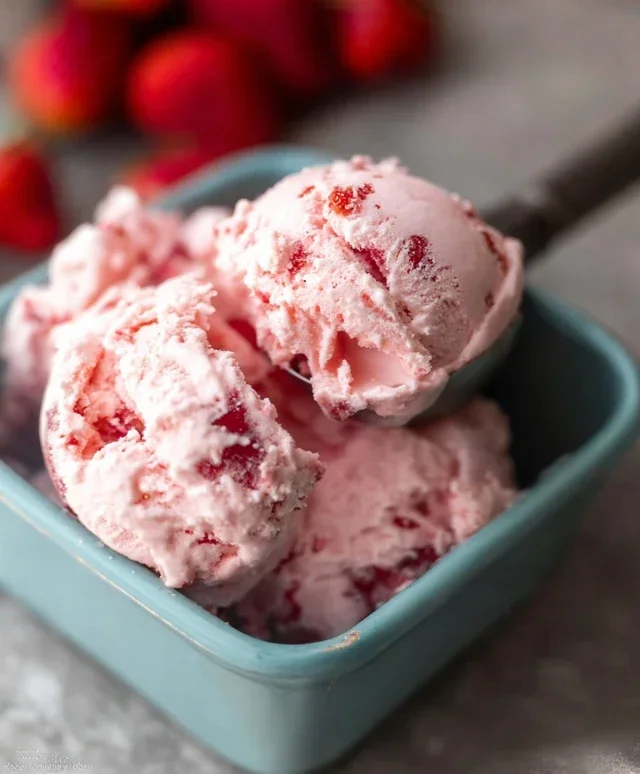
Congratulations, you’ve just unlocked the secret to creating the most delightful homemade strawberry ice cream! This recipe is truly a triumph because it delivers an unbelievably creamy texture and an intensely fresh strawberry flavor that store-bought versions simply can’t match. The simplicity of the ingredients allows the natural sweetness and vibrant taste of ripe strawberries to shine through, making every spoonful a burst of pure summer bliss. It’s a rewarding experience to craft something so delicious from scratch, and the satisfaction of serving this beautiful pink confection to friends and family is immense. Don’t hesitate – gather your ingredients and embark on this sweet adventure!
This luscious homemade strawberry ice cream is perfect served on its own, but it also pairs beautifully with warm fruit crum extractbles, chocolate brownies, or even a delicate pound cake. For a touch of elegance, a sprig of fresh mint or a drizzle of balsamic glaze can elevate your serving. If you’re feeling adventurous, consider adding a handful of fresh basil to the strawberry mixture before churning for a surprisingly sophisticated twist, or swirl in some rich chocolate fudge for a decadent duo.
Frequently Asked Questions:
Q: My ice cream isn’t as smooth as I’d like. What can I do?
A: For extra smoothness, ensure your cream and milk mixture is thoroughly chilled before churning. Using a high-quality ice cream maker and avoiding overfilling it will also help. If you don’t have an ice cream maker, you can still achieve a good texture by freezing the mixture in a shallow container and stirring vigorously every 30 minutes with a fork until it’s firm but scoopable. A touch of corn syrup or a slightly higher sugar content can also contribute to a smoother texture by lowering the freezing point.
Q: Can I use frozen strawberries instead of fresh?
A: Absolutely! Frozen strawberries work wonderfully in this recipe. Thaw them completely and drain off any excess liquid before pureeing them. The flavor will still be fantastic, and it’s a great way to enjoy this treat year-round.
Q: How long will my homemade strawberry ice cream last?
A: Properly stored in an airtight container in your freezer, your homemade strawberry ice cream should remain delicious for about 1-2 weeks. Beyond that, while still safe to eat, the texture might start to degrade slightly.
Homemade Strawberry Ice Cream
A simple and delicious homemade strawberry ice cream recipe using fresh strawberries.
Ingredients
-
1 1/2 cups strawberries, hulled and diced
-
2 Tbsp honey
-
1/2 cup granulated sugar
-
1 tsp lemon juice
-
1 cup heavy whipping cream
-
1/2 cup half and half
-
1 tsp vanilla extract
Instructions
-
Step 1
In a bowl, combine the hulled and diced strawberries with the honey, granulated sugar, and lemon juice. Let sit for about 15 minutes to allow the strawberries to macerate. -
Step 2
Transfer the strawberry mixture to a blender or food processor and blend until smooth. -
Step 3
In a separate large bowl, whisk together the heavy whipping cream, half and half, and vanilla extract until well combined. -
Step 4
Gently fold the strawberry puree into the cream mixture until just combined. Do not overmix. -
Step 5
Pour the mixture into an ice cream maker and churn according to the manufacturer’s instructions. -
Step 6
Once churned, transfer the ice cream to an airtight container and freeze for at least 4 hours, or until firm.
Important Information
Nutrition Facts (Per Serving)
It is important to consider this information as approximate and not to use it as definitive health advice.
Allergy Information
Please check ingredients for potential allergens and consult a health professional if in doubt.