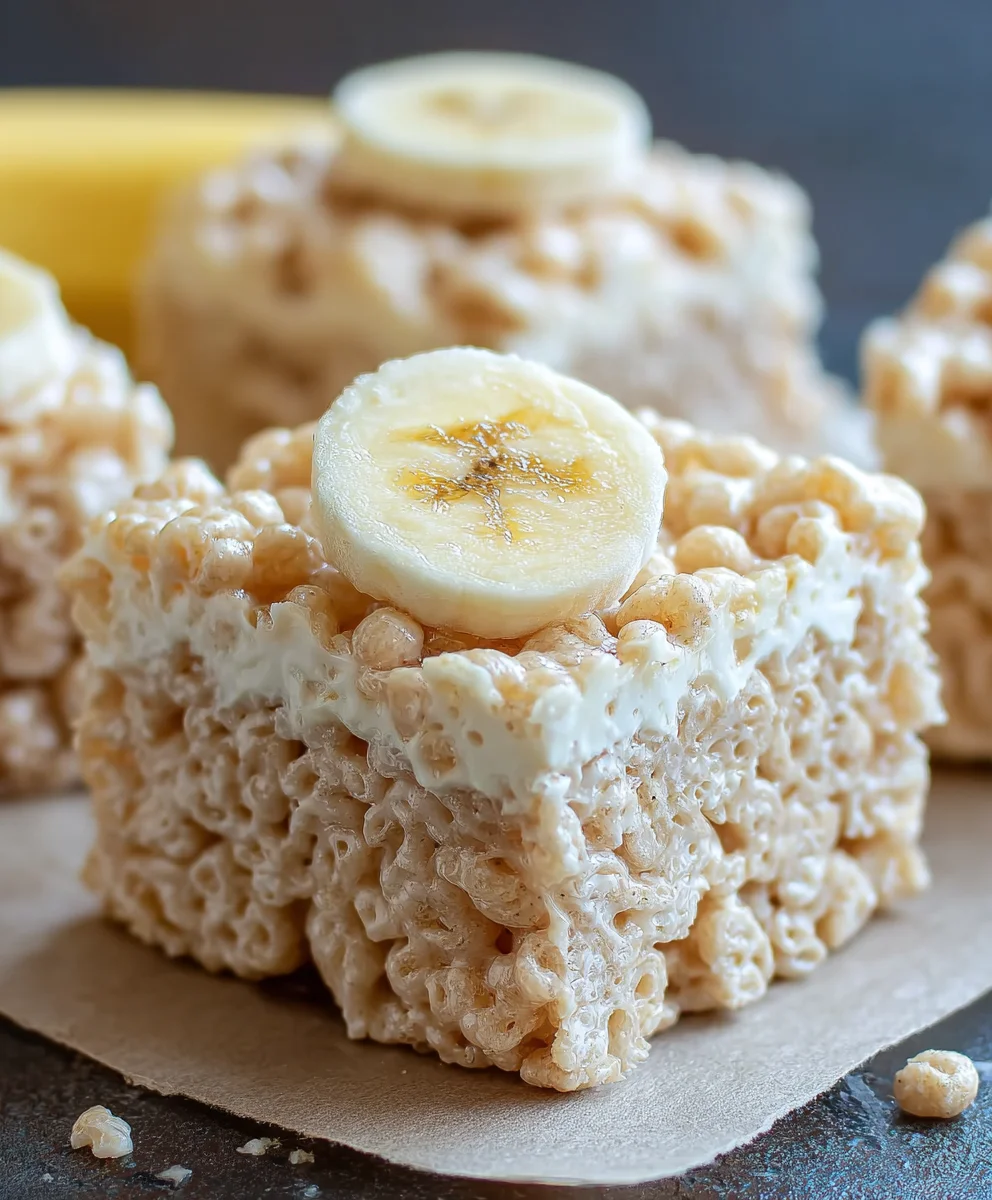
Banana Pudding Rice Krispie Treats – Easy Dessert
Banana Pudding Rice Krispie Treats are an absolute revelation in the world of no-bake desserts! If you’ve ever dreamt of capturing the creamy, comforting essence of classic banana pudding and transforming it into a delightfully chewy, crispy, and utterly addictive treat, then your search is over. These aren’t just any Rice Krispie treats; they’re a nostalgic journey that takes familiar flavors to a whole new, exciting level. People adore them because they strike that perfect balance between sweet nostalgia and modern innovation. Imagin extracte the soft, caramelized sweetness of the puffed rice cereal, married with the unmistakable, subtle sweetness of banana and the rich, velvety undertones of pudding. What makes these Banana Pudding Rice Krispie Treats truly special is the masterful infusion of banana flavor without any of the mess or baking time, all while maintaining that satisfyingly chewy texture we all know and love. Get ready to impress yourself and everyone you share them with!
Ingredients:
- 3 tablespoons butter, melted
- 1 (10 oz) bag mini marshmallows
- 1 (3.4 oz) box instant banana pudding mix
- 6 cups Rice Krispies cereal
- Crushed Nilla Wafers, for topping
Preparation and Melting
Phase 1: Getting Started
The first step in creating these delightful Banana Pudding Rice Krispie Treats is to prepare your workspace. You’ll want to have a 9×13 inch baking pan greased or lined with parchment paper. This is crucial for preventing your treats from sticking, which can be a real disappointment after all your hard work. Using parchment paper makes lifting the treats out of the pan much easier, allowing for cleaner cuts and a more professional presentation. Now, let’s gather our main components.
Phase 2: Melting the Base
In a large saucepan, melt the 3 tablespoons of butter over low heat. It’s important to use low heat here to prevent the butter from scorching, which can impart an undesirable burnt flavor to your treats. Once the butter is fully melted, add the entire 10-ounce bag of mini marshmallows. Continue to stir gently over low heat until the marshmallows are completely melted and smooth. This mixture forms the sticky, gooey binder that holds all the deliciousness together. Patience is key during this stage; don’t be tempted to crank up the heat, as this can lead to tough or unevenly melted marshmallows. Aim for a consistently smooth and uniform melted marshmallow mixture.
Incorporating the Flavors
Phase 3: Adding the Pudding and Cereal
Once your marshmallow mixture is smooth and creamy, it’s time to infuse it with that unmistakable banana flavor. Remove the saucepan from the heat. Immediately add the entire 3.4-ounce box of instant banana pudding mix to the melted marshmallows. Stir vigorously until the pudding mix is fully incorporated and the entire mixture turns a beautiful pnon-alcoholic ale yellow color. This is where the magic happens, transforming a basic marshmallow base into a dessert with a delightful banana twist. Be sure to mix thoroughly to distribute the pudding flavor evenly throughout. After the pudding is well mixed, add the 6 cups of Rice Krispies cereal to the saucepan. Gently fold the cereal into the marshmallow and pudding mixture until it is thoroughly coated. Work quickly but gently; you want to coat every crispy piece without crushing the cereal too much, as this can result in a less desirable texture. The goal is to have each spoonful of treat packed with that satisfying crunch and creamy banana flavor.
Forming and Finishing
Phase 4: Pressing the Treats
Now that everything is combined, it’s time to get your treats into their final form. Lightly grease your hands or use a spatula sprayed with non-stick cooking spray. Spoon the Rice Krispie mixture into your prepared 9×13 inch pan. Press the mixture down gently and evenly into the pan. Avoid pressing too hard, as this can make the treats dense and difficult to chew. The goal is to create a compact, cohesive layer that will hold its shape. Once the mixture is pressed into the pan, you can sprinkle a generous amount of crushed Nilla Wafers over the top. Gently press the crushed wafers into the surface of the treats. This adds another layer of texture and a classic complementary flavor that really elevates these Banana Pudding Rice Krispie Treats. The crushed Nilla Wafers not only look appealing but also provide a delightful sandy texture that echoes traditional banana pudding.
Phase 5: Cooling and Serving
Allow the Rice Krispie treats to cool completely in the pan for at least 30 minutes, or until they are firm to the touch. This cooling period is essential for allowing the treats to set properly. Once cooled, lift the entire slab out of the pan using the parchment paper or cut them directly in the pan. Use a sharp knife, lightly greased if necessary, to cut the treats into your desired serving sizes. For best results, allow them to cool for the full 30 minutes to ensure they are firm enough to cut cleanly. These Banana Pudding Rice Krispie Treats are best enjoyed at room temperature. You can store any leftovers in an airtight container at room temperature for up to 3 days. Enjoy the delightful blend of chewy, crispy, banana, and vanilla goodness in every bite!
Conclusion:
We’ve reached the sweet, chewy, and utterly delightful conclusion of our Banana Pudding Rice Krispie Treats journey! This recipe takes the beloved comfort of classic Rice Krispie treats and elevates it with the irresistible flavors of banana pudding. The combination of crunchy cereal, gooey marshmallows, and the subtle sweetness of banana creates a treat that’s both familiar and excitingly new. I truly hope you enjoy making and sharing these delightful concoctions as much as I do!
These Banana Pudding Rice Krispie Treats are fantastic on their own, but they also pair wonderfully with a cold glass of milk. For a more festive presentation, consider serving them alongside a scoop of vanilla ice cream for an even more decadent dessert experience. They also make a fun and portable treat for picnics, potlucks, or school lunches.
Don’t be afraid to get creative with variations! For an extra layer of flavor, you could gently fold in some finely chopped toasted pecans or walnuts before pressing the mixture into the pan. A drizzle of melted chocolate or caramel over the top would also be a delicious addition. Feel free to experiment with different extracts if you have them on hand; a touch of rum extract extract can subtly enhance the banana flavor, for instance.
Give these Banana Pudding Rice Krispie Treats a try and I’m confident they’ll become a new favorite in your recipe repertoire. The simple steps and universally loved ingredients make them accessible to bakers of all levels. So, gather your ingredients, get ready for some sticky fun, and enjoy the delicious results!
Frequently Asked Questions:
Q: How can I prevent my Banana Pudding Rice Krispie Treats from becoming too hard?
A: The key to achieving a wonderfully chewy texture is to avoid overcooking the marshmallow mixture. Once the marshmallows are melted and smooth, quickly stir in the cereal and banana flavoring, then press them into the pan immediately. Letting the mixture sit too long after melting can lead to a harder treat.
Q: Can I make Banana Pudding Rice Krispie Treats ahead of time?
A: Absolutely! Banana Pudding Rice Krispie Treats are best stored in an airtight container at room temperature. They will stay fresh and chewy for up to 3 days, making them an excellent make-ahead option for parties or gatherings.
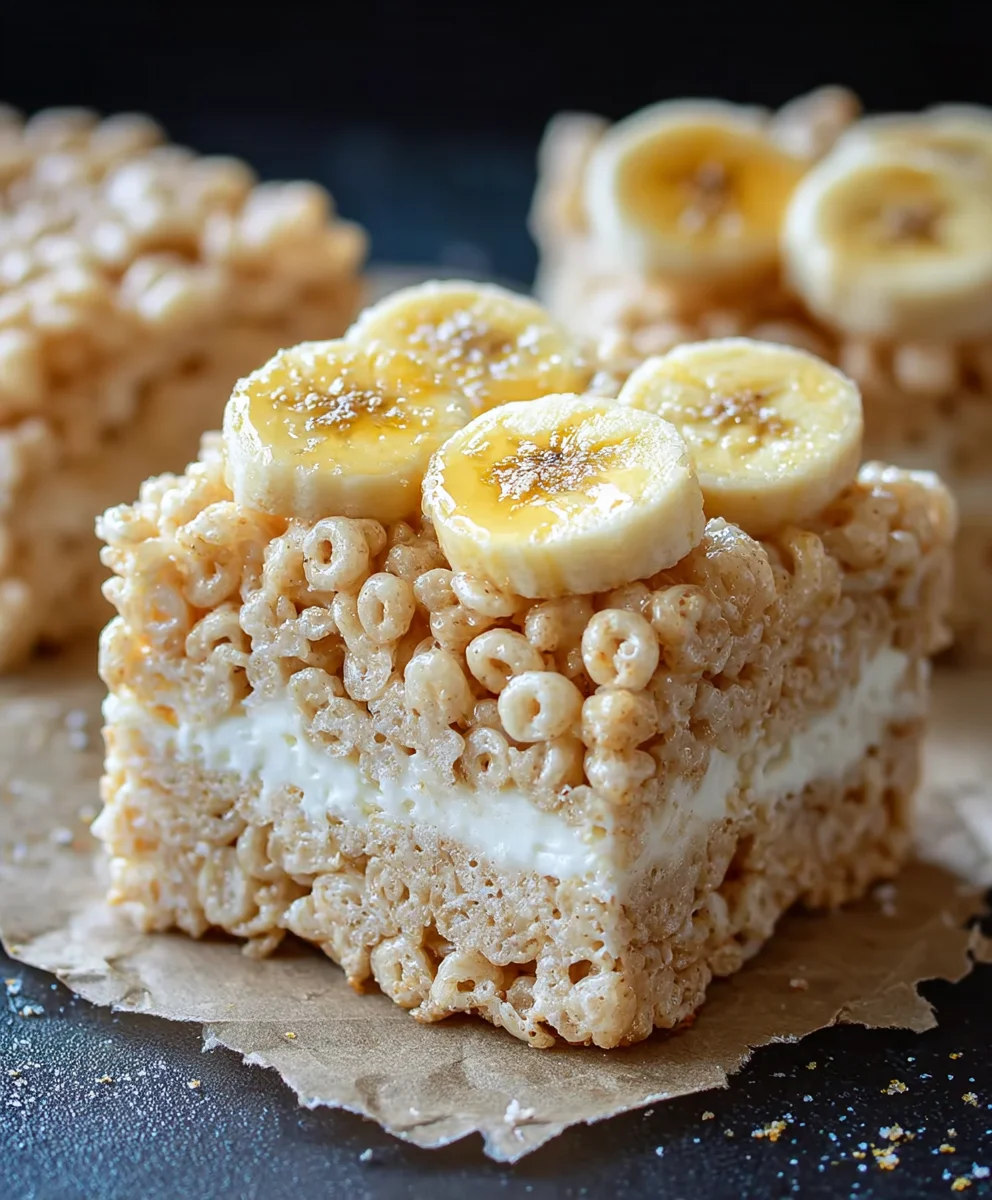
Banana Pudding Rice Krispie Treats
Easy and delicious no-bake treats combining the classic crunch of Rice Krispies with the sweet flavor of banana pudding and Nilla Wafers.
Ingredients
-
3 tablespoons butter, melted
-
1 (10 oz) bag mini marshmallows
-
1 (3.4 oz) box instant banana pudding mix
-
6 cups Rice Krispies cereal
-
Crushed Nilla Wafers, for topping
Instructions
-
Step 1
Grease or line a 9×13 inch baking pan with parchment paper. -
Step 2
In a large saucepan, melt butter over low heat. Add marshmallows and stir until completely melted and smooth. -
Step 3
Remove from heat. Stir in instant banana pudding mix until smooth and yellow. Then, add Rice Krispies cereal and gently fold until coated. -
Step 4
Spoon the mixture into the prepared pan and press down gently and evenly. -
Step 5
Sprinkle crushed Nilla Wafers over the top and gently press them into the surface. -
Step 6
Allow treats to cool completely in the pan for at least 30 minutes until firm. Cut into desired sizes and serve.
Important Information
Nutrition Facts (Per Serving)
It is important to consider this information as approximate and not to use it as definitive health advice.
Allergy Information
Please check ingredients for potential allergens and consult a health professional if in doubt.