The Best Jam Cookies-Easy Homemade Recipe
The Best Jam Cookies are more than just a sweet treat; they are a nostalgic hug, a burst of sunshine on a cloudy day, and a testament to the simple pleasures in life. We all have a childhood memory tied to a perfect cookie, and for many, it involves the delightful combination of buttery, tender dough and a jewel-toned swirl of fruit preserve. What makes these cookies so universally beloved? It’s their comforting familiarity, the way they melt in your mouth, and that subtle tartness from the jam that perfectly balances the sweetness. They’re surprisingly easy to make, yet they possess an elegance that makes them feel truly special. Whether you’re a seasoned baker or just starting out, mastering “The Best Jam Cookies” will bring a smile to your face and delight to everyone who gets to enjoy them. Get ready to create your own delicious memories with this foolproof recipe!
Ingredients:
- 1 cup unsalted butter, softened to room temperature
- 3/4 cup icing sugar, sifted, plus extra for dusting
- 1/4 teaspoon salt
- 1/2 teaspoon vanilla extract
- 2 cups all-purpose flour, sifted, plus extra for rolling out the dough
- 1/2 cup strawberry jam
Preparing the Cookie Dough
The foundation of any great cookie is a well-made dough, and our Jam Cookies are no exception. We’ll start by creaming the butter and sugar together until light and fluffy. This process incorporates air into the mixture, which helps to create a tender cookie with a pleasant texture. Ensure your butter is truly at room temperature; it should yield slightly when pressed but not be melted. This allows it to emulsify properly with the sugar.
In a large mixing bowl, combine the softened unsalted butter with the sifted icing sugar and the salt. Using an electric mixer on medium speed, beat these ingredients together for about 3 to 5 minutes. You’re looking for a pnon-alcoholic ale, creamy consistency. Scrape down the sides of the bowl occasionally to ensure everything is evenly incorporated. Next, add the vanilla extract and beat for another minute until it’s fully integrated. The aroma should already be starting to be delightful!
Now, it’s time to add the dry ingredients. Sift the all-purpose flour directly into the butter mixture. Sifting is an important step as it aerates the flour and removes any lumps, contributing to a smoother cookie dough and a more delicate crum extractb. Begin extract mixing on low speed until the flour is just incorporated. Be careful not to overmix at this stage, as overmixing can develop the gluten in the flour, resulting in tough cookies. Once the dough starts to come together andrum extractoks crumbly, you can switch to a spatula or your hands to fingin extract bringing it together into a cohesive ball. It should be slightly soft but hold its shape.
Chilling and Shaping the Dough
For the best results, especially with delicate cookies like these, chilling the dough is crucial. It allows the flour to hydrate fully, firms up the butter, and makes the dough easier to handle, preventing it from spreading too much during baking. Divide the dough in half. Wrap each half in plastic wrap and flatten them into discs. This shape helps the dough chill more evenly. Refrigerate the dough for at least 30 minutes, or up to 2 days. A longer chill will yield a firmer dough that’s even easier to work with.
Once the dough is sufficiently chilled, it’s time to roll it out. Lightly flour a clean work surface and your rolling pin. Take one discgin extract dough and begin rolling it out to about 1/8 to 1/4 inch thickness. You want it thin enough to be delicate but sturdy enough to hold its shape. Add more flour as needed to prevent sticking, but try to use as little as possible to maintain the cookie’s flavor and texture. If the dough becomes too soft while rolling, simply pop it back into the refrigerator for a few minutes to firm up.
Using a small, round cookie cutter (about 1.5 to 2 inches in diameter), cut out shapes from the rolled-out dough. You’ll need an even number of cookies, as half of them will be the bases and the other half will be the tops with a hole in the middle. For the top cookies, use a smaller cutter (or even the tip of a knife or a small piping tip) to create a hole in the center. This is where the jam will peek through. Gather the scraps of dough, gently re-roll them, and cut out more cookies until all the dough is used. Transfer the cut-out cookies to baking sheets lined with parchment paper, leaving a little space between them.
Assembling and Baking the Jam Cookies
Now comes the fun part: assembling the cookies and filling them with that delicious strawberry jam. Carefully transfer the cookies with the holes in the center to the baking sheets. If any cookies have lost their shape during handling, you can gently reshape them on the baking sheet.
Bake in a preheated oven at 350°F (175°C) for 10-12 minutes, or until the edges are lightly golden brown. Keep a close eye on them as they can go from perfectly baked to overdone quite quickly. The tops should be set but not browned.
Once baked, carefully remove the cookies from the oven. Let them cool on the baking sheets for a few minutes before transferring them to a wire rack to cool completely. This initial cooling on the sheet helps them firm up.
While the cookies are cooling, prepare to assemble. Once the cookies are completely cool, take the cookies without holes and spoon about 1/2 teaspoon of strawberry jam onto the center of each. Don’t overfill, as the jam can spill out during assembly or baking. Carefully place a cookie with a hole on top of the jam-filled cookie, gently pressing down to adhere them together.
Finishing Touches and Serving
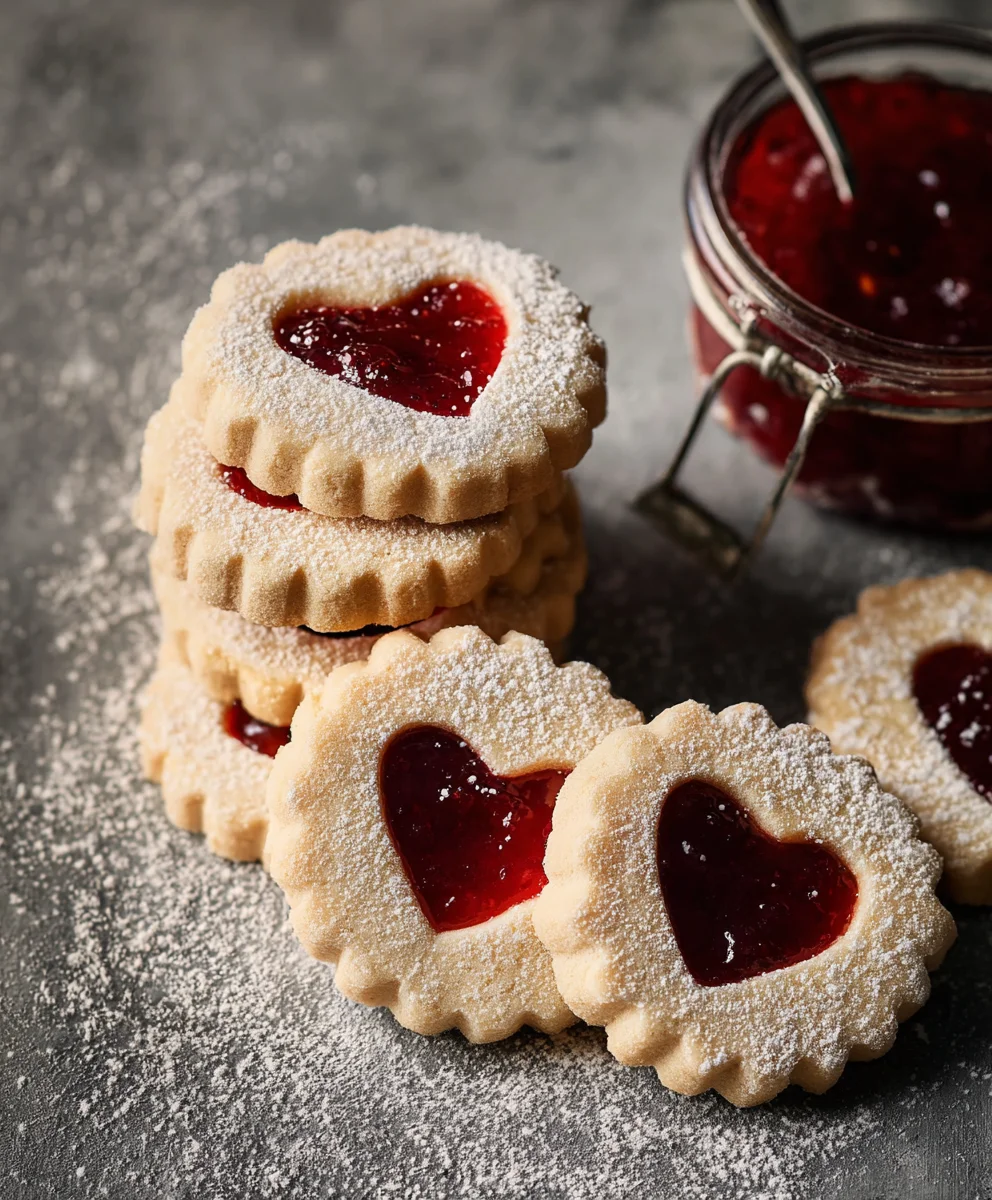
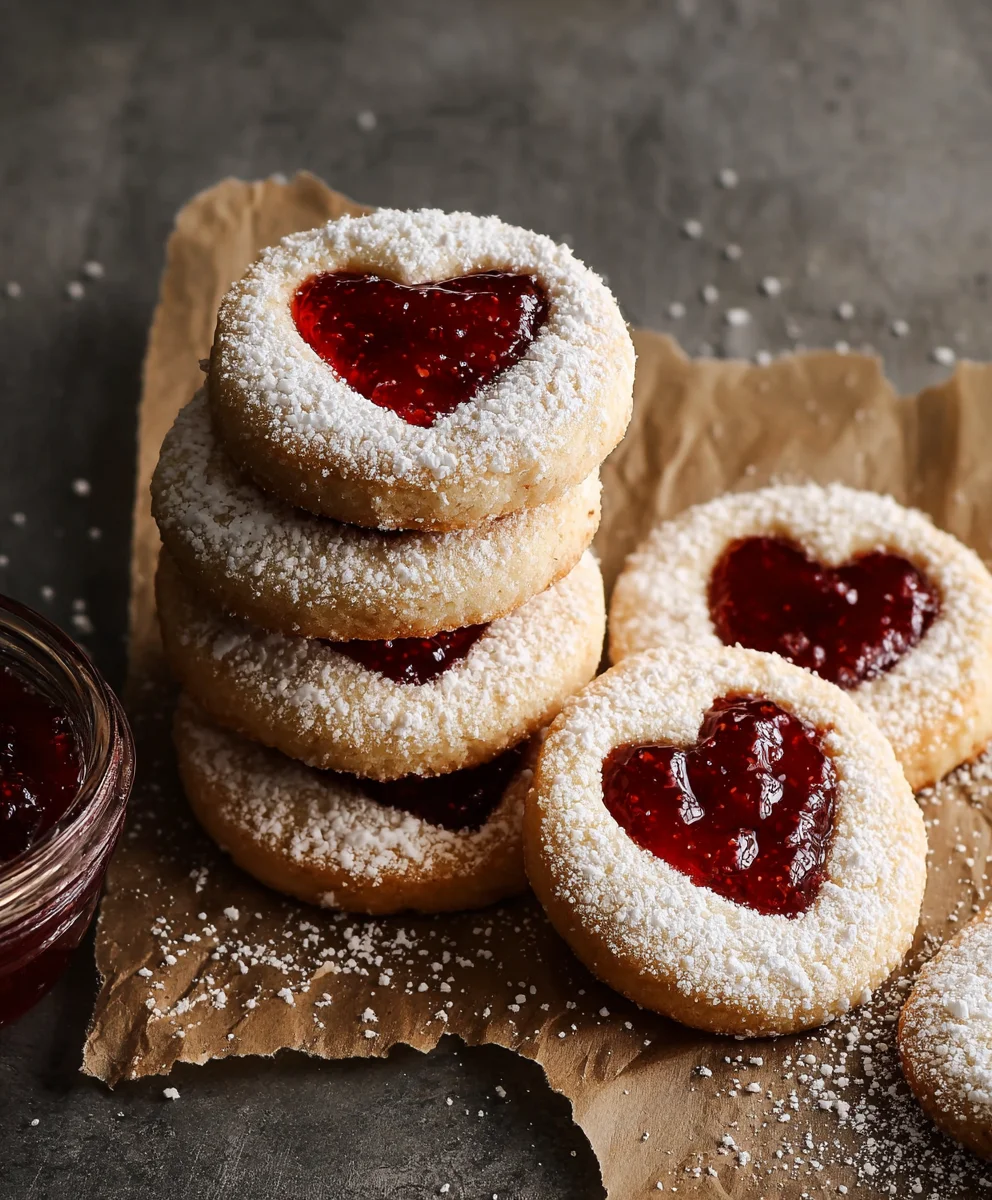
For an extra touch of sweetness and a classic look, dust the assembled jam cookies with extra sifted icing sugar. You can do this using a fine-mesh sieve. The delicate dusting of sugar beautifully complements the vibrant jam and the buttery cookie.
These Jam Cookies are best enjoyed within a few days of baking. Store them in an airtight container at room temperature. The slight moisture from the jam will keep them wonderfully tender. They are perfect for afternoon tea, a picnic, or simply as a sweet treat with a cup of coffee or milk. Enjoy the simple, classic deliciousness!
Conclusion:
And there you have it – your journey to crafting The Best Jam Cookies is complete! We’ve walked through each step, from creaming the butter and sugar to achieving that perfect, slightly crisp edge with a tender, chewy center. These cookies are a delightful testament to simple baking, proving that sometimes, the most cherished treats are the ones that evoke warmth and nostalgia. I truly hope you enjoyed making and, more importantly, devouring these delightful creations as much as I do. They are absolutely perfect for afternoon tea, a picnic basket, or simply as a sweet pick-me-up any time of day.
For serving suggestions, The Best Jam Cookies are wonderful on their own, but they also pair beautifully with a glass of cold milk, a hot cup of coffee, or a creamy tea. Consider dusting them with a little powdered sugar for an extra touch of elegance before serving. If you’re feeling adventurous with variations, try experimenting with different types of jam – raspberry, apricot, or even a mixed berry preserve can offer a unique flavor profile. You could also add a pinch of cinnamon or nutmeg to the dough for a hint of spice.
Don’t be discouraged if your first batch isn’t absolutely perfect; baking is a skill that improves with practice. The most important ingredient is your enthusiasm! So, gather your ingredients, put on your favorite music, and dive into the joy of creating these delicious The Best Jam Cookies. I’m confident you’ll be thrilled with the results!
Frequently Asked Questions:
Q1: My jam cookies spread too much and lost their shape. What went wrong?
This can happen if your butter was too soft when you started creaming it, or if the dough was too warm. Ensure your butter is softened but not melted. Chilling the dough for 15-30 minutes before baking can also help prevent excessive spreading and maintain those beautiful shapes.
Q2: Can I make The Best Jam Cookies ahead of time?
Absolutely! Once cooled, The Best Jam Cookies can be stored in an airtight container at room temperature for up to 3-4 days. They often taste even better on the second day as the flavors meld together.
Q3: What kind of jam is best for The Best Jam Cookies?
The best jam is really a matter of personal preference! A good quality, seedless jam will give you the smoothest texture. Popular choices include raspberry, strawberry, apricot, and blackberry. Experiment to find your favorite!
The Best Jam Cookies – Easy Homemade Recipe
A simple and delightful homemade jam cookie recipe featuring a tender, buttery cookie sandwiching sweet strawberry jam.
Ingredients
-
1 cup unsalted butter, softened to room temperature
-
3/4 cup icing sugar, sifted, plus extra for dusting
-
1/4 teaspoon salt
-
1/2 teaspoon vanilla extract
-
2 cups all-purpose flour, sifted, plus extra for rolling out the dough
-
1/2 cup strawberry jam
Instructions
-
Step 1
In a large mixing bowl, combine the softened unsalted butter with the sifted icing sugar and salt. Beat with an electric mixer on medium speed for 3-5 minutes until creamy and light. Add vanilla extract and beat for another minute. -
Step 2
Sift the all-purpose flour into the butter mixture. Mix on low speed until just incorporated, then use a spatula or hands to bring the dough together into a cohesive ball. Do not overmix. -
Step 3
Divide the dough in half, flatten into discs, wrap in plastic wrap, and refrigerate for at least 30 minutes. -
Step 4
Lightly flour a work surface and rolling pin. Roll out one disc of dough to 1/8 to 1/4 inch thickness. Cut out round shapes using a 1.5 to 2 inch cutter. For half the cookies, use a smaller cutter to create a hole in the center. -
Step 5
Place cookies on parchment-lined baking sheets. Bake in a preheated oven at 350°F (175°C) for 10-12 minutes, until edges are lightly golden brown. Let cool on baking sheets for a few minutes before transferring to a wire rack to cool completely. -
Step 6
Once cooled, spoon about 1/2 teaspoon of strawberry jam onto the center of cookies without holes. Place a cookie with a hole on top and gently press together. -
Step 7
Dust the assembled cookies with extra sifted icing sugar using a fine-mesh sieve. Store in an airtight container at room temperature.
Important Information
Nutrition Facts (Per Serving)
It is important to consider this information as approximate and not to use it as definitive health advice.
Allergy Information
Please check ingredients for potential allergens and consult a health professional if in doubt.