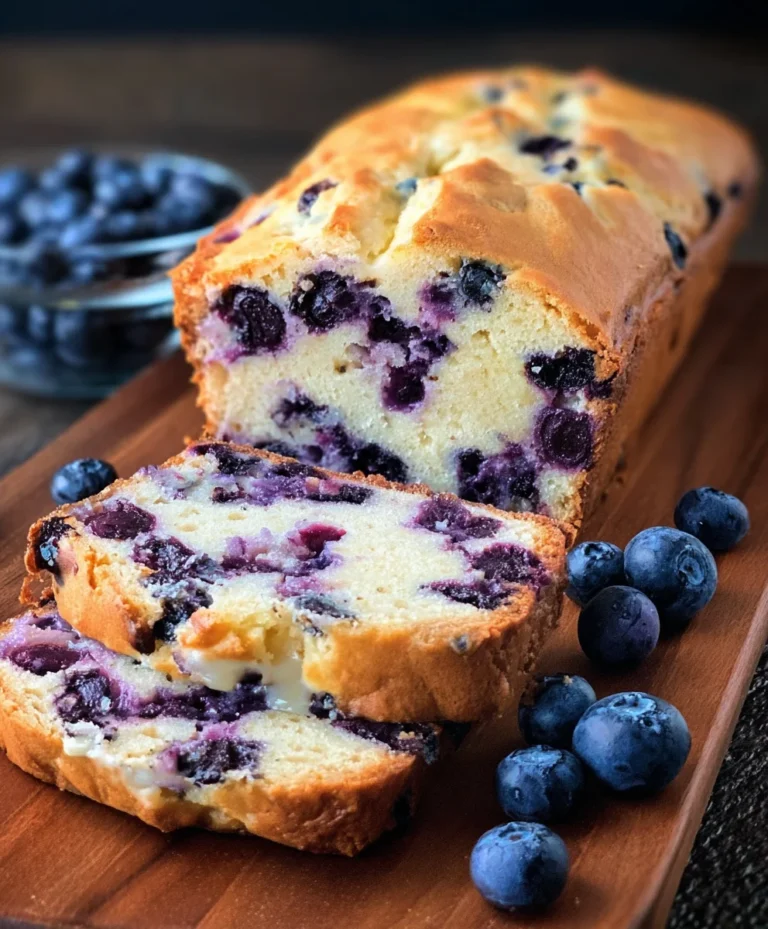
Healthy Flourless Banana Bread Quick Easy Recipe
Healthy 5-Ingredient Flourless Banana Bread is the ultimate guilt-free treat you’ve been dreaming of. Forget complicated baking and long ingredient lists; this recipe is all about simplicity and deliciousness. Who doesn’t love the comforting aroma and sweet, moist crum extractb of banana bread? It’s a nostalgic flavor that brings back happy memories and warms the soul. But what truly sets this healthy 5-ingredient flourless banana bread apart is its incredible ease and wholesome approach. We’re talking about a recipe so straightforward, it practically makes itself, and best of all, it ditches the flour for a naturally gluten-free and satisfying experience. It’s perfect for busy mornings, afternoon pick-me-ups, or whenever a sweet craving strikes. Prepare to be amazed by how much flavor can come from just a handful of ingredients!
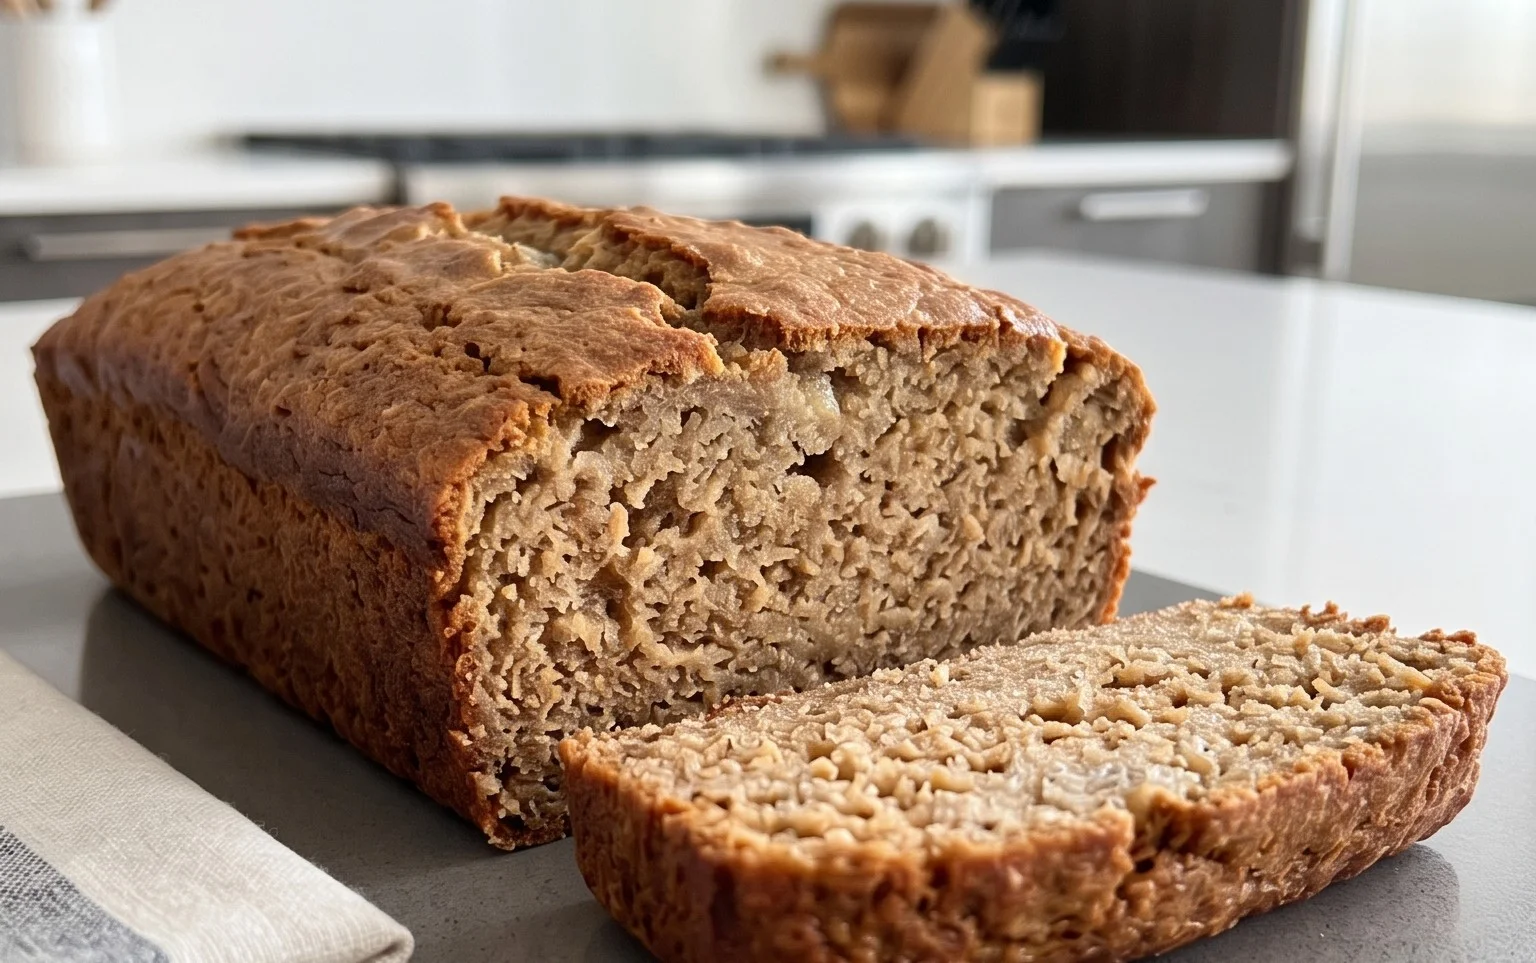
Healthy 5-Ingredient Flourless Banana Bread
Are you craving a comforting slice of banana bread but want to keep things healthy and simple? Look no further! This 5-ingredient flourless banana bread is your answer. It’s incredibly easy to make, uses wholesome ingredients, and tastes absolutely delicious. The magic happens with just a few pantry staples, and the result is a moist, flavorful loaf that’s perfect for breakfast, a snack, or even a light dessert. Forget complicated flour blends and a long ingredient list; this recipe proves that healthy baking can be straightforward and incredibly satisfying.
The beauty of this banana bread lies in its simplicity. We’re ditching the refined flour and relying on the natural goodness of ripe bananas and hearty oats to create a wonderfully textured and naturally sweet loaf. The sweetness comes primarily from the bananas themselves, with a little boost from pure maple syrup. The eggs bind everything together, and a touch of baking soda ensures a lovely rise. It’s a guilt-free indulgence that you’ll find yourself returning to again and again.
Ingredients:
Instructions:
Step 1: Prepare Your Bananas and Preheat the Oven
The key to a wonderfully sweet and moist banana bread is using very ripe bananas. You’ll know they’re perfect when their peels are covered in brown spots. These bananas are at their peak sweetness and will provide the most flavor and natural moisture to your loaf. Start by peeling your three medium ripe bananas and placing them into a large mixing bowl. You can mash them with a fork directly in the bowl, aiming for a relatively smooth consistency, but leaving a few small lumps is perfectly fine – it adds to the rustic charm. Once mashed, preheat your oven to 350 degrees Fahrenheit (175 degrees Celsius). While the oven is heating, lightly grease a standard 9×5 inch loaf pan with a bit of butter or cooking spray, or line it with parchment paper for easy removal. This step is crucial to prevent your delicious bread from sticking.
Step 2: Combine Wet Ingredients and Oats
Next, add the two large eggs to the bowl with the mashed bananas. Whisk the eggs and banana mixture together until they are well combined. The eggs will help bind the ingredients and contribute to the structure of the bread. Now, pour in the 1/4 cup of pure maple syrup. If you don’t have maple syrup, honey works wonderfully as a substitute, offering a slightly different but equally delightful sweetness. Give this mixture another good whisk until everything is thoroughly incorporated. The liquid should be a uniform color. After combining the wet ingredients, it’s time to add your dry ingredients. Add the 1 teaspoon of baking soda to the banana-egg-maple syrup mixture. Baking soda is essential for leavening; it reacts with the slightly acidic bananas to help the bread rise and become light and airy. Stir it in gently. Finally, add the 2 cups of old-fashioned rolled oats. It’s important to use old-fashioned oats, not instant oats, as they provide a better texture and structure to the flourless bread. Stir everything together until the oats are just incorporated. Be careful not to overmix at this stage. We want to ensure all the oats are moistened by the wet ingredients.
Step 3: Mix the Batter and Check Consistency
This is where the magic of this simple recipe truly shines. As you stir in the oats, you’ll notice the batter will start to thicken. The goal is to have a thick, spoonable batter. It won’t be as smooth or pourable as traditional flour-based batters, and that’s exactly what we want. The oats will absorb some of the moisture from the bananas and eggs, creating a wonderfully chewy and satisfying texture. If your batter seems excessively dry and crum extractbly, you can add another tablespoon of maple syrup or a splash of milk (dairy or non-dairy) to help it come together. However, for most ripe bananas, the provided quantities should create the perfect consistency. Aim for a consistency where the oats are well distributed and the mixture holds its shape when spooned.
Step 4: Transfer Batter to Loaf Pan and Bake
Once your batter has reached the desired consistency, carefully spoon it into your prepared loaf pan. Use a spatula or the back of your spoon to spread the batter evenly into all corners of the pan, ensuring a relatively flat top surface. This will help the bread bake evenly. Place the loaf pan into your preheated oven. The baking time can vary slightly depending on your oven, but generally, it will take between 45 to 60 minutes. To check for doneness, insert a toothpick or a thin knife into the center of the loaf. If it comes out clean, or with just a few moist crum extractbs attached (but no wet batter), your banana bread is ready. If there’s still wet batter on the toothpick, continue baking for an additional 5-10 minutes, checking again until it comes out clean. Resist the urge to open the oven door too frequently during the first 30-40 minutes of baking, as this can cause the bread to sink.
Step 5: Cool and Enjoy Your Flourless Banana Bread
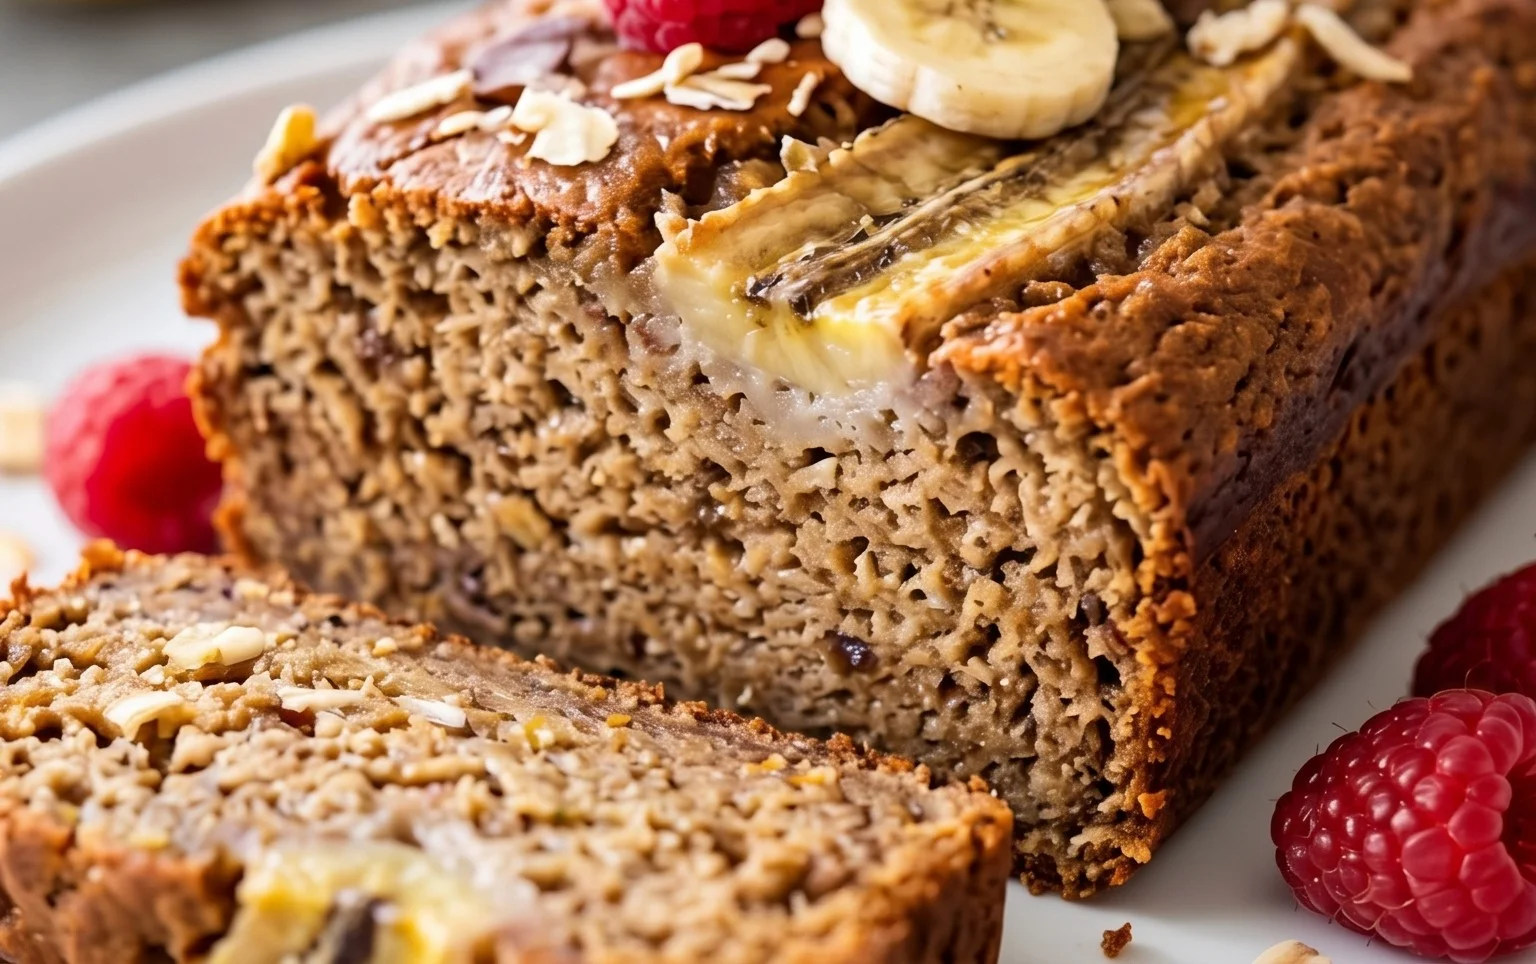
Once baked to perfection, carefully remove the loaf pan from the oven. Let the banana bread cool in the pan for about 10-15 minutes. This initial cooling period allows the bread to set and makes it easier to remove from the pan without breaking apart. After this initial cooling, carefully invert the loaf pan onto a wire cooling rack to release the banana bread. If you used parchment paper, you can usually lift it out easily. Allow the banana bread to cool completely on the wire rack before slicing. This is a crucial step for the best texture; slicing too soon can result in a gummy texture. Once fully cooled, slice your healthy 5-ingredient flourless banana bread with a serrated knife and enjoy its wholesome goodness. It’s delicious on its own, or you can serve it with a dollop of Greek yogurt, a smear of nut butter, or a drizzle of honey. Store any leftovers in an airtight container at room temperature for a couple of days, or in the refrigerator for up to a week.
Conclusion:
And there you have it – a truly delightful and incredibly simple Healthy 5-Ingredient Flourless Banana Bread! This recipe is a game-changer for anyone seeking a wholesome and satisfying treat without the fuss. Its beauty lies in its simplicity: just five core ingredients transform ripe bananas into a moist, tender, and naturally sweet loaf. It’s perfect for a quick breakfast on the go, a guilt-free afternoon snack, or even a light dessert. I love enjoying a warm slice with a dollop of Greek yogurt or a sprinkle of cinnamon. Don’t be afraid to get creative with variations too! Adding a handful of chocolate chips, a sprinkle of chopped nuts, or even a dash of nutmeg can elevate your banana bread to new heights. I genuinely encourage you to give this recipe a try. It’s proof that healthy eating can be both delicious and incredibly easy to achieve!
Frequently Asked Questions
Can I make this banana bread ahead of time?
Absolutely! This banana bread keeps wonderfully. Once cooled completely, store it in an airtight container at room temperature for up to 3 days, or in the refrigerator for up to a week. It often tastes even better the next day as the flavors meld.
What can I use if I don’t have eggs?
If you need an egg-free option, you can try substituting one flax egg (1 tablespoon ground flaxseed mixed with 3 tablespoons water, let sit for 5 minutes) or a mashed ripe banana. Keep in mind that texture might vary slightly.
Is this recipe gluten-free?
Yes, this Healthy 5-Ingredient Flourless Banana Bread is inherently gluten-free as it contains no wheat flour. It’s a fantastic option for those with gluten sensitivities or celiac disease, making it a truly inclusive treat.
Healthy 5-Ingredient Flourless Banana Bread
A simple and healthy flourless banana bread recipe made with just 5 wholesome ingredients. Perfect for a quick breakfast or snack.
Ingredients
-
3 medium ripe bananas
-
2 large eggs
-
1/4 cup pure maple syrup
-
1 teaspoon baking soda
-
2 cups old-fashioned rolled oats
Instructions
-
Step 1
Preheat oven to 350°F (175°C) and grease a loaf pan. -
Step 2
In a large bowl, mash the ripe bananas thoroughly. -
Step 3
Whisk in the eggs and maple syrup until well combined. -
Step 4
Stir in the baking soda and then fold in the rolled oats. -
Step 5
Pour the batter into the prepared loaf pan and spread evenly. -
Step 6
Bake for 45-55 minutes, or until a toothpick inserted into the center comes out clean. -
Step 7
Let the banana bread cool in the pan for 10 minutes before transferring to a wire rack to cool completely.
Important Information
Nutrition Facts (Per Serving)
It is important to consider this information as approximate and not to use it as definitive health advice.
Allergy Information
Please check ingredients for potential allergens and consult a health professional if in doubt.