Fruity Pebbles Cheesecake Tacos-Sweet Dessert Bliss
Fruity Pebbles Cheesecake Tacos are about to revolutionize your dessert game! Forget everything you thought you knew about tacos, because we’re diving headfirst into a vibrant, flavor-packed adventure that’s as fun to make as it is to devour. Imagin extracte the creamy, dreamy indulgence of cheesecake, swirled with the unmistakable fruity crunch of your favorite childhood cereal, all nestled within a crispy, golden taco shell. It’s a playful, unexpected combination that taps into pure nostalgic joy and delivers an explosion of sweet, tangy, and utterly delightful tastes. These aren’t just treats; they’re edible works of art, bursting with color and personality. Get ready to impress your friends, wow your family, or simply treat yourself to a moment of pure, unadulterated happiness with these incredible Fruity Pebbles Cheesecake Tacos.
Why You’ll Fall in Love
The Perfect Blend of Sweet and Tangy
These aren’t your average tacos. We’re talking about a textural masterpiece. The creamy cheesecake filling, light and airy, provides a luxurious contrast to the satisfying crunch of the taco shell. And then there are the Fruity Pebbles – they’re not just for show! Their vibrant colors are matched by a burst of fruity flavor that cuts through the richness of the cheesecake, creating a perfectly balanced bite. It’s the kind of dessert that makes you smile with every single mouthful, a delightful surprise from the first taste to the last.
Fruity Pebbles Cheesecake Tacos
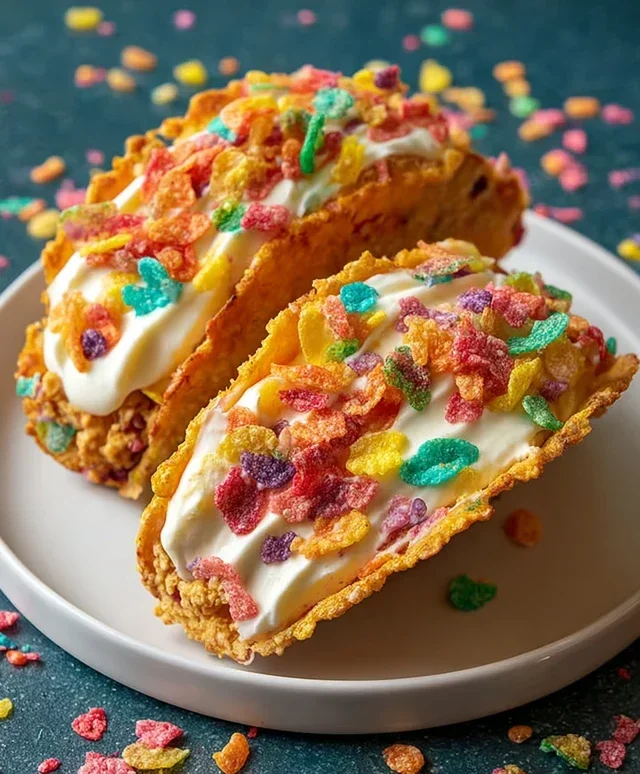
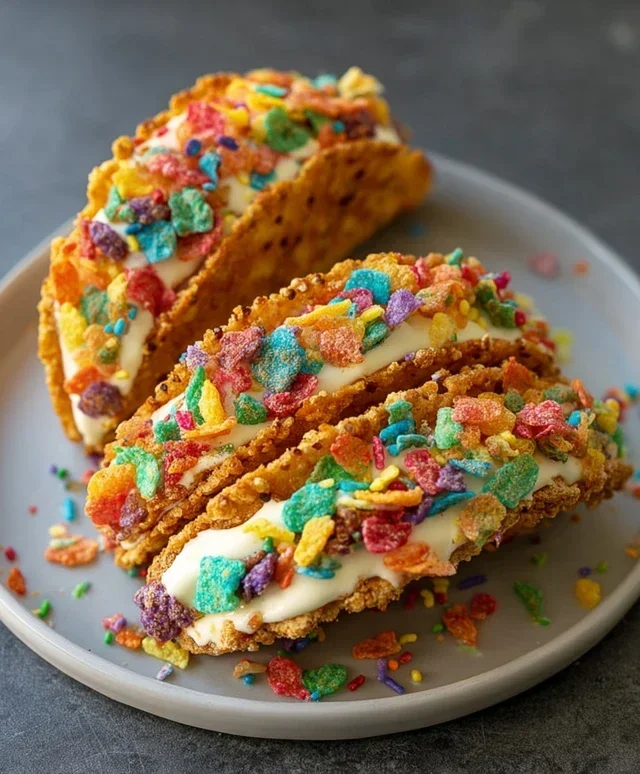
Get ready to experience a dessert that’s as fun to make as it is to eat! These Fruity Pebbles Cheesecake Tacos are a playful and delicious twist on a classic. Imagin extracte a crispy, colorful taco shell made from your favorite fruity cereal, filled with a creamy, dreamy cheesecake filling, and topped with a dollop of whipped cream and a sprinkle of more cereal. They’re perfect for parties, a special treat, or just whenever you need a burst of joy in your day. The vibrant colors and sweet, crunchy texture are sure to bring smiles all around. Let’s dive into creating these whimsical wonders!
Ingredients:
Creating the Cereal Taco Shells
The magic starts with transforming our beloved Fruity Pebbles cereal into edible taco shells. This is where the fun really begin extracts, and it’s surprisingly simple!
1. First, we need to prepare our cereal mixture. In a medium-sized bowl, combine the 3 cups of colorful fruity cereal with the 1/2 cup of melted unsalted butter. Gently stir this together until all the cereal pieces are well-coated in the butter. You want to ensure even distribution so that each bite of your taco shell has that delightful buttery crunch. Let this mixture sit for about 5 minutes, allowing the cereal to absorb some of the butter. This will help them bind together nicely.
2. Now, it’s time to form our taco shells. This is where we’ll use a taco mold, or you can get creative! If you have a taco mold set (they’re usually found in kitchenware stores or online), this step will be incredibly easy. Lightly grease the inside of your taco molds with a little cooking spray or butter to prevent sticking. For each taco shell, take about 1/2 cup of the butter-coated cereal mixture and press it firmly into the mold, shaping it into a taco form. Make sure to press the cereal up the sides of the mold to create a defined shell. If you don’t have taco molds, you can improvise! You can use an oven-safe bowl or ramekin as a guide. Line the inside of the bowl with parchment paper, then press the cereal mixture into the shape of a half-moon or a U-shape against the sides. The key is to get a good, compact shape that will hold its form once baked.
3. Once your shells are formed in their molds, it’s time to bake them. Preheat your oven to 300°F (150°C). Carefully place the molds onto a baking sheet. We’re baking these at a low temperature to gently set the cereal mixture without burning it. Bake for about 8-10 minutes, or until the edges of the cereal shells are slightly firm and toasted. Keep a close eye on them, as they can go from perfectly toasted to burnt very quickly. Once they look good and set, carefully remove them from the oven. Allow them to cool in the molds for at least 10-15 minutes. This is crucial for them to harden properly. Once slightly cooled, very carefully invert the molds to release the taco shells onto a wire rack to cool completely. They will become more rigid as they cool down.
Whipping Up the Creamy Cheesecake Filling
While our taco shells are cooling, let’s create the luscious cheesecake filling that will make these tacos truly irresistible.
4. In a separate medium bowl, combine the 8 oz of softened cream cheese with the 1/2 cup of sifted powdered sugar. Sifting the powdered sugar is important to avoid any lumps and ensure a super smooth filling. Beat these together with an electric mixer on medium speed until the mixture is light and fluffy, with no lumps of cream cheese remaining. This might take a minute or two. Scrape down the sides of the bowl as needed to ensure everything is incorporated. Next, add the 1 tsp of pure vanilla extract to the cream cheese mixture and beat again until just combined. You want that wonderful, classic vanilla flavor to shine through. The texture should be smooth, creamy, and spreadable. Taste it at this point; if you prefer it a little sweeter, you can add another tablespoon of sifted powdered sugar.
Assembling Your Fruity Pebbles Cheesecake Tacos
The final stage is bringin extractg all our delicious components together for the ultimate dessert experience.
5. Now for the exciting part – assembly! Once your Fruity Pebbles taco shells are completely cool and firm, it’s time to fill them. Gently spoon or pipe the creamy cheesecake filling into each taco shell. You want to fill them generously but avoid overfilling to the point where it spills out. After filling, top each taco with a dollop of whipped cream. You can use store-bought whipped cream or make your own for an extra special touch. Finally, sprinkle a little extra colorful fruity cereal over the whipped cream for that extra pop of color and crunch. You can also use some of the cereal to decorate the plate or the edges of the taco if you like. Serve these immediately for the best texture and flavor experience. The contrast between the crunchy cereal shell, the cool, creamy cheesecake, and the airy whipped cream is absolutely divine. Enjoy every single bite of these playful and delicious treats!
Conclusion:
And there you have it – your very own Fruity Pebbles Cheesecake Tacos! I truly believe this recipe is a winner because it takes the beloved creamy indulgence of cheesecake and injects it with a playful, crunchy twist that’s both visually stunning and incredibly delicious. The unexpected texture from the cereal, combined with the smooth, rich cheesecake filling and the crisp taco shell, creates a flavor and sensory experience that’s simply out of this world. These are perfect for a fun dessert party, a unique brunch offering, or even just a special treat to brighten your day. Don’t be afraid to get creative with your toppings; fresh berries, a drizzle of chocolate sauce, or even a dollop of whipped cream can elevate these even further!
I wholeheartedly encourage you to give these Fruity Pebbles Cheesecake Tacos a try. They’re a fantastic way to experiment in the kitchen and the results are guaranteed to impress. So gather your ingredients and prepare for a dessert that’s as fun to make as it is to eat!
Frequently Asked Questions:
Can I make the taco shells ahead of time?
Absolutely! You can bake the taco shells a day or two in advance and store them in an airtight container at room temperature. Just be sure they are completely cool before storing to prevent any soggin extractess.
What are some other cereal options I could use?
The beauty of this recipe is its versatility! While Fruity Pebbles offer a vibrant color and flavor, you could also experiment with other colorful or flavored cereals like Cinnamon Toast Crunch for a spiced note, or even a mixed berry cereal for a different fruity profile. Just ensure the cereal you choose has a good crunch factor!
How should I store leftover cheesecake tacos?
It’s best to store any leftover Fruity Pebbles Cheesecake Tacos unassembled. Keep the cheesecake filling chilled in an airtight container in the refrigerator, and store the taco shells separately at room temperature in an airtight container. Assemble them just before serving to maintain the crispness of the shells.
Fruity Pebbles Cheesecake Tacos
A fun and colorful dessert taco with a creamy Fruity Pebbles cheesecake filling and a crunchy cereal shell.
Ingredients
-
3 cups colorful fruity cereal
-
1/2 cup unsalted butter, melted
-
8 oz cream cheese, softened
-
1/2 cup powdered sugar, sifted
-
1 tsp pure vanilla extract
-
1 cup whipped cream
-
Additional fruity cereal for garnish
Instructions
-
Step 1
Combine 3 cups of colorful fruity cereal with 1/2 cup melted unsalted butter. Press mixture into taco shell molds and bake according to mold instructions until firm. -
Step 2
In a separate bowl, beat 8 oz softened cream cheese with 1/2 cup sifted powdered sugar until smooth. -
Step 3
Stir in 1 tsp pure vanilla extract. -
Step 4
Gently fold in 1 cup whipped cream until combined. -
Step 5
Spoon the cheesecake filling into the cooled cereal taco shells. -
Step 6
Garnish with additional fruity cereal before serving.
Important Information
Nutrition Facts (Per Serving)
It is important to consider this information as approximate and not to use it as definitive health advice.
Allergy Information
Please check ingredients for potential allergens and consult a health professional if in doubt.