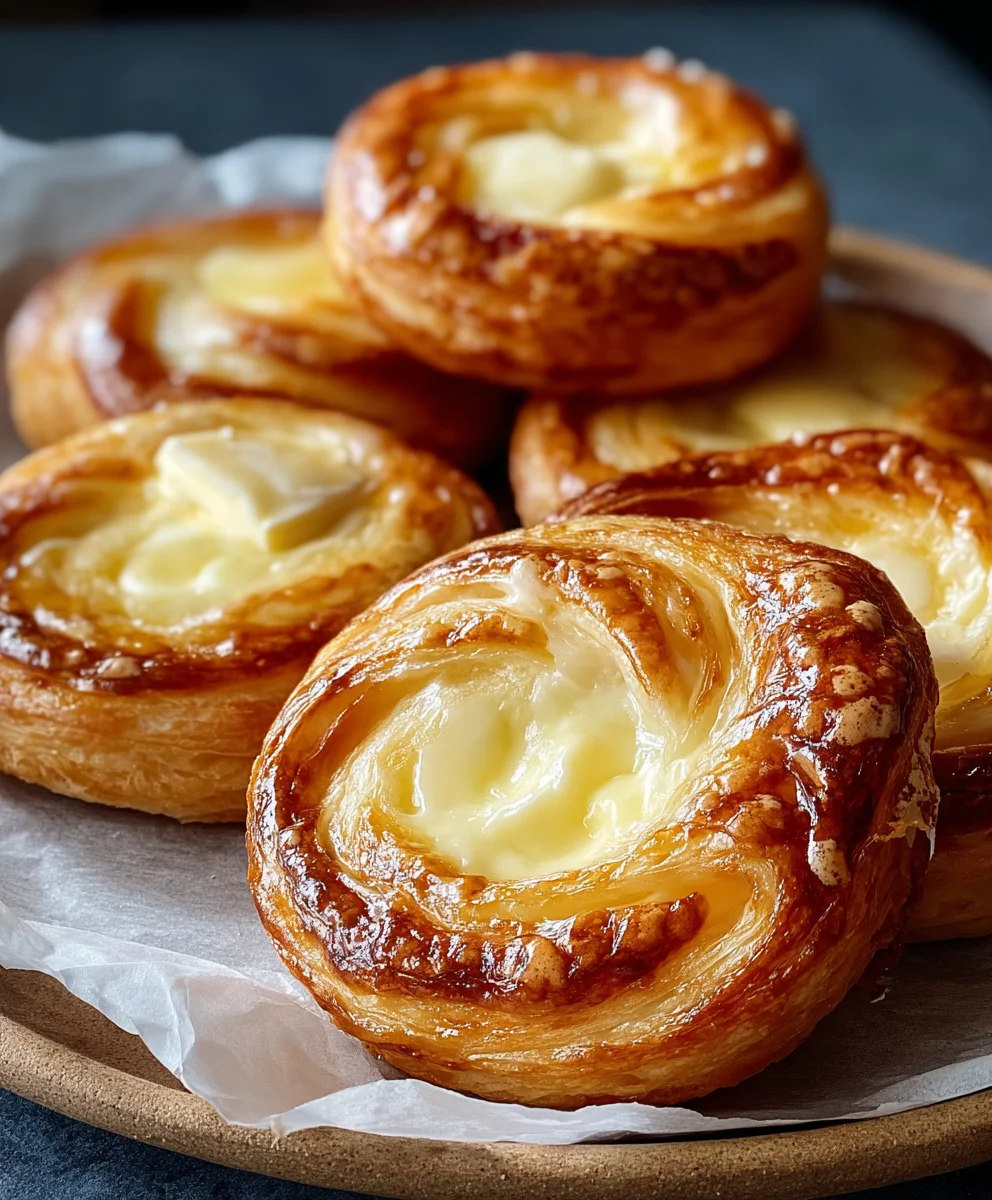
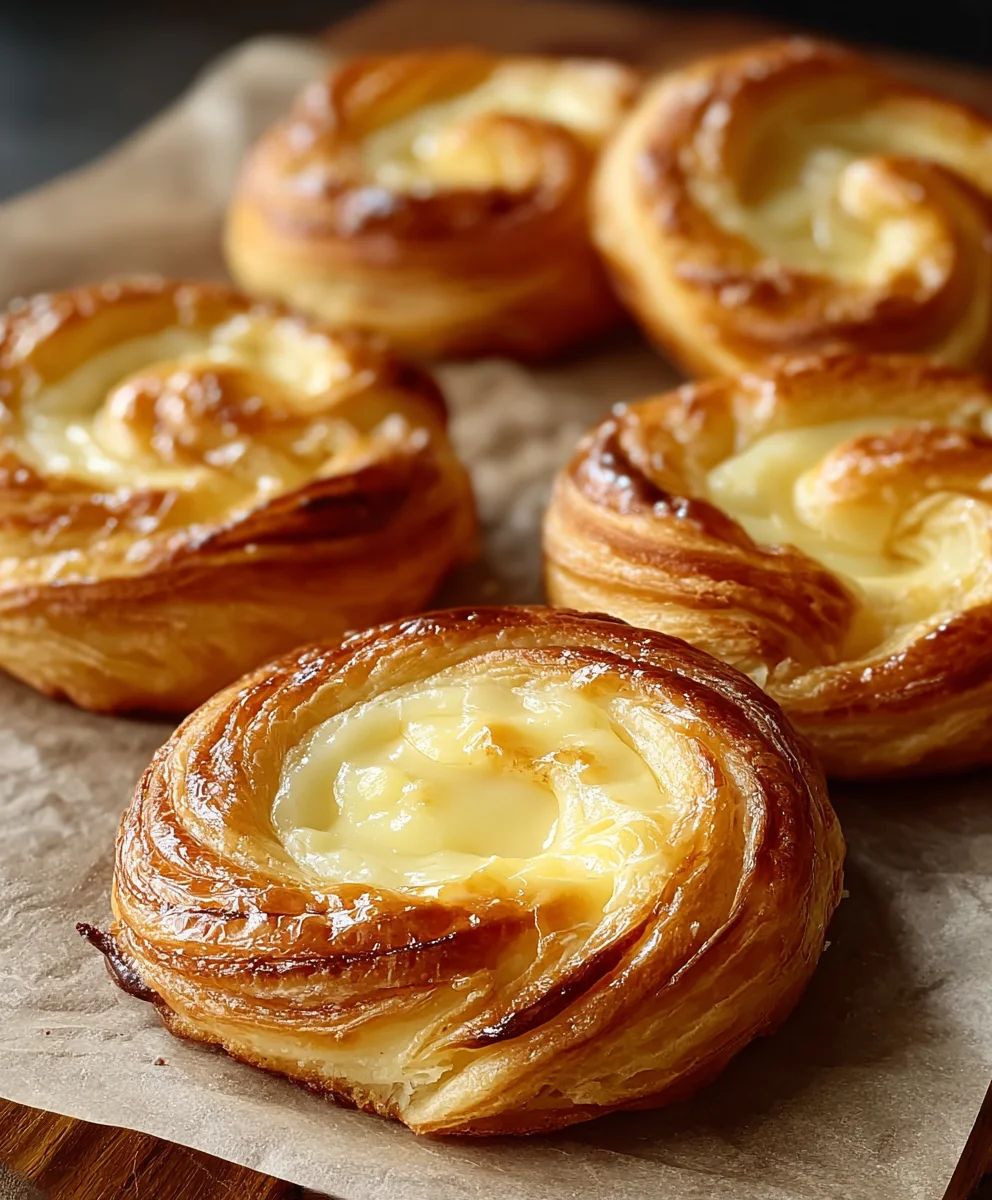
Easy Homemade Cheese Danishes-Flaky Pastry Perfection
Cheese Danishes are more than just a sweet treat; they’re a little bite of pure bliss that can transport you to a state of contented indulgence with every flaky layer and creamy filling. Have you ever experienced that delightful moment when the crisp, buttery pastry gives way to a luscious, slightly tangy cream cheese center? It’s a symphony of textures and flavors that has captured hearts and taste buds for generations. What makes these danishes so universally adored? It’s that perfect balance – the richness of the cheese softened by a hint of sweetness, all cradled within the delicate architecture of puff pastry. They’re ideal for a leisurely weekend brunch, a sophisticated afternoon tea, or simply as a comforting pick-me-up on a challengin extractg day. Get ready to discover how to create these irresistible Cheese Danishes in your own kitchen, a recipe that promises to impress and delight!
Ingredients:
- 2 tubes (8 oz each) refrigerated crescent rolls
- 2 tablespoons salted butter, melted
- 8 tablespoons light brown sugar
- 1 package (8 oz) cream cheese, softened to room temperature
- ¼ cup granulated white sugar
- 1 teaspoon pure vanilla extract (for the cream cheese filling)
- ½ cup powdered sugar
- 1 teaspoon pure vanilla extract (for the glaze)
- 4 teaspoons milk (for the glaze)
Preparing the Dough and Filling
Step 1: Preheat Oven and Prepare Baking Sheets
Before we get started with the deliciousness, preheat your oven to 375°F (190°C). This is a crucial step for ensuring your Cheese Danishes bake up beautifully golden and perfectly cooked. While the oven heats, take two large baking sheets and line them with parchment paper. The parchment paper will prevent any sticking and make for super easy cleanup later. This thoughtful preparation ensures a smooth baking process.
Step 2: Unroll and Flatten Crescent Dough
Now, let’s get our crescent roll dough ready. Carefully unroll the two tubes of crescent rolls onto a clean, lightly floured surface. You’ll notice that the dough is already perforated into triangles. Gently press the seams of these triangles together to seal them into one large rectangle. You can use your fingers or a rolling pin for this. We want a solid, unified base for our danishes, so don’t be shy about pressing those seams firmly. Once you have your large rectangle, trim any uneven edges if you like, but it’s not essential for taste.
Step 3: Prepare the Cream Cheese Filling
In a medium bowl, combine the softened cream cheese, ¼ cup of granulated white sugar, and 1 teaspoon of pure vanilla extract. This vanilla extract is key to adding that classic, delightful aroma and flavor to our creamy filling. Use an electric mixer on medium speed, or a sturdy whisk if you prefer a bit of arm work, to beat the ingredients until they are completely smooth and well combined. You want a luscious, lump-free filling. Make sure your cream cheese is truly at room temperature; cold cream cheese will result in a lumpy filling, and we’re aiming for pure, creamy perfection. Scrape down the sides of the bowl as you mix to ensure everything is incorporated.
Assembling and Baking the Danishes
Step 4: Spread Filling and Sprinkle Brown Sugar
Now for the assembly! Spread the creamy cream cheese mixture evenly over the flattened crescent roll dough, leaving about a ½-inch border around the edges. This border will help hold the filling in place as the danishes bake. Next, evenly sprinkle the 8 tablespoons of light brown sugar over the cream cheese layer. The brown sugar will caramelize beautifully during baking, adding a wonderful depth of flavor and a delightful chegrape juicess to the top of your danishes.
Step 5: Roll and Slice the Danishes
This is where we start forming our individual danishes. Starting from one of the longer sides, carefully and tightly roll up the dough with the filling. Think of it like rolling a jelly roll or a cinnamon roll. Once you have a long log, pinch the seam to seal it. Now, using a sharp knife, cut the log into 1-inch thick slices. You should get about 8 to 10 slices from each log, depending on how tightly you rolled it. Place these slices, cut-side up, onto your prepared baking sheets, leaving a little space between each one as they will puff up during baking.
Step 6: Bake to Golden Perfection
Bake the Cheese Danishes in the preheated oven for 12 to 15 minutes, or until they are puffed up and golden brown around the edges. Keep a close eye on them during the last few minutes of baking, as ovens can vary. You’re looking for that perfect golden hue that signals they are cooked through and ready to be enjoyed. Once they’re done, carefully remove the baking sheets from the oven and let the danishes cool on the sheets for about 5 minutes. This brief cooling period helps them set slightly before you move them to a wire rack.
Glazing and Serving
Step 7: Prepare the Simple Vanilla Glaze
While your danishes are cooling, let’s whip up a quick and easy glaze. In a small bowl, whisk together the ½ cup of powdered sugar, 1 teaspoon of pure vanilla extract, and 4 teaspoons of milk. Start with 4 teaspoons of milk and add a tiny bit more, just a drop at a time, if needed, until you reach your desired drizzling consistency. You want a glaze that is thick enough to coat the danishes but thin enough to drizzle easily. Too much milk will make it too runny, and not enough will make it too thick to spread. Taste it to ensure the vanilla flavor is just right.
Step 8: Drizzle the Glaze
Once the Cheese Danishes have cooled to a warm temperature (not hot, but not completely cold), it’s time to add the finishing touch. Drizzle the prepared vanilla glaze generously over the tops of each danish. You can use a spoon to make decorative patterns or just a simple back-and-forth motion. The warm danishes will slightly melt the glaze, creating a beautiful sheen. Let the glaze set for a few minutes before serving. These danishes are best enjoyed warm, making them a perfect treat for breakfast, brunch, or an afternoon snack.
Conclusion:
There you have it – a delightful journey into creating classic Cheese Danishes right in your own kitchen! We’ve walked through each step, from crafting that buttery, flaky pastry to whipping up the rich, sweet cream cheese filling. The aroma that fills your home as these bake is truly something special, promising a delicious reward for your efforts. These Cheese Danishes are more than just a treat; they’re a perfect way to brighten any morning, elevate an afternoon tea, or impress guests with your baking prowess. Don’t be shy; give this recipe a try and discover just how satisfying homemade pastries can be!
For serving, consider a dusting of powdered sugar or a light glaze. They pair wonderfully with a hot cup of coffee or a refreshing glass of milk. Feel free to experiment with variations! A swirl of fruit jam, a sprinkle of cinnamon, or even a touch of lemon zest in the filling can add exciting new dimensions to your Cheese Danishes. Remember, baking is an adventure, and the best part is enjoying the delicious results.
Frequently Asked Questions:
Q: Can I make the pastry dough ahead of time?
A: Absolutely! The pastry dough for these Cheese Danishes can be made up to 2 days in advance and stored, tightly wrapped, in the refrigerator. This can save you time on the day you plan to bake.
Q: What can I do if my cream cheese filling is too lumpy?
A: If your cream cheese filling is lumpy, try beating it with an electric mixer on medium speed until it’s smooth and creamy. Ensuring your cream cheese is at room temperature also helps prevent lumps.
Easy Homemade Cheese Danishes-Flaky Pastry Perfection
Enjoy flaky, homemade cheese danishes with a sweet cream cheese filling and a simple vanilla glaze, made easily with refrigerated crescent rolls.
Ingredients
-
2 tubes (8 oz each) refrigerated crescent rolls
-
2 tablespoons salted butter, melted
-
8 tablespoons light brown sugar
-
1 package (8 oz) cream cheese, softened to room temperature
-
¼ cup granulated white sugar
-
1 teaspoon pure vanilla extract (for the cream cheese filling)
-
½ cup powdered sugar
-
1 teaspoon pure vanilla extract (for the glaze)
-
4 teaspoons milk
Instructions
-
Step 1
Preheat your oven to 375°F (190°C). Line two large baking sheets with parchment paper. -
Step 2
Unroll the crescent roll dough onto a lightly floured surface. Press the seams of the perforated triangles together to form one large rectangle. Trim uneven edges if desired. -
Step 3
In a medium bowl, beat together softened cream cheese, ¼ cup granulated white sugar, and 1 teaspoon vanilla extract until smooth and well combined. Scrape down the sides of the bowl as needed. -
Step 4
Spread the cream cheese mixture evenly over the flattened dough, leaving a ½-inch border. Sprinkle the 8 tablespoons of light brown sugar over the cream cheese layer. -
Step 5
Starting from a longer side, tightly roll up the dough with the filling to form a log. Pinch the seam to seal. Cut the log into 1-inch thick slices. Place slices cut-side up on prepared baking sheets, spaced apart. -
Step 6
Bake for 12 to 15 minutes, or until puffed and golden brown. Let cool on baking sheets for 5 minutes before transferring to a wire rack. -
Step 7
While danishes cool, whisk together ½ cup powdered sugar, 1 teaspoon vanilla extract, and 4 teaspoons milk in a small bowl until a drizzling consistency is reached. Add more milk a drop at a time if needed. -
Step 8
Drizzle the glaze generously over the warm danishes. Let the glaze set before serving.
Important Information
Nutrition Facts (Per Serving)
It is important to consider this information as approximate and not to use it as definitive health advice.
Allergy Information
Please check ingredients for potential allergens and consult a health professional if in doubt.