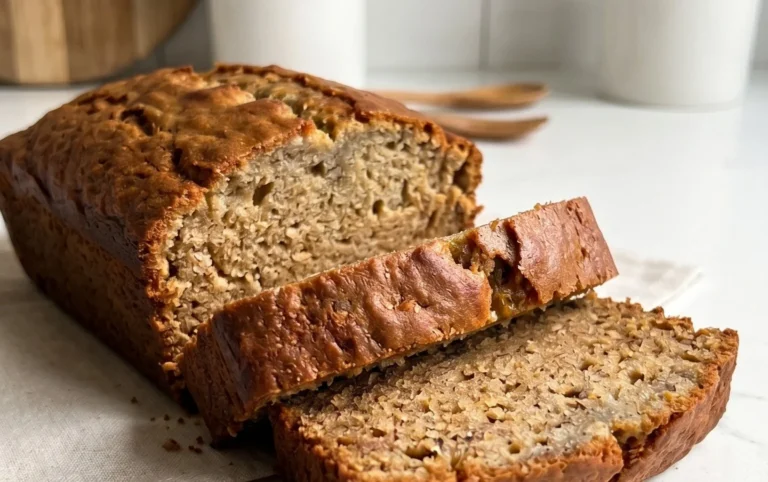
Classic Old Fashioned Banana Bread Recipe
Old Fashioned Banana Bread is more than just a dessert; it’s a warm hug from your kitchen, a nostalgic trip back to simpler times, and frankly, one of the most comforting baked goods you can whip up. There’s a reason why this classic recipe has stood the test of time. It’s that perfect balance of sweet, moist crum extractb, kissed with the rich, caramelized flavor of ripe bananas, that makes us all come back for more. What truly makes Old Fashioned Banana Bread so special is its inherent simplicity and its incredible versatility. Whether you’re a seasoned baker or just starting out, you can achieve delightful results. It’s the ideal way to use up those browning bananas on your counter, transforming them into something truly magical. This recipe promises that familiar, beloved taste, a testament to the enduring appeal of a well-made, home-baked treat.
The Ultimate Comfort Food
Rediscovering the Magic of Homemade

Old Fashioned Banana Bread
There’s something incredibly comforting about a warm slice of old-fashioned banana bread, especially when it’s made from scratch with simple, wholesome ingredients. This recipe is a classic for a reason – it’s foolproof, yields a wonderfully moist and flavorful loaf, and uses up those overripe bananas that are just beggin extractg for a second life. Forget those overly sweet, cake-like versions; this is the real deal, with a tender crum extractb and just the right amount of sweetness to let the banana flavor truly shine. It’s perfect for breakfast, a midday snack, or even a simple dessert. Plus, the aroma that fills your kitchen as it bakes is pure bliss.
Ingredients:
Getting Started: The Wet Ingredients
The foundation of a great banana bread lies in the proper creaming of the butter and sugar, and incorporating the eggs and bananas seamlessly. This initial phase sets the stage for a tender and flavorful loaf.
1. Creaming the Butter and Sugar: In a large mixing bowl, begin extract by creaming the softened unsalted butter and white granulated sugar together. You want to beat them until the mixture is light and fluffy, which usually takes about 3-5 minutes with an electric mixer. This process incorporates air into the batter, which helps with the bread’s texture and rise. Make sure your butter is truly at room temperature; if it’s too cold, it won’t cream properly, and if it’s too melted, your bread might turn out greasy. You’ll notice the color will become pnon-alcoholic aler and the consistency will be noticeably airy.
2. Adding the Eggs and Vanilla: Once your butter and sugar are perfectly creamed, it’s time to add the eggs, one at a time, beating well after each addition until fully incorporated. This ensures that the eggs emulsify properly with the butter and sugar mixture. Following the eggs, stir in the vanilla extract. Vanilla is a crucial flavor enhancer, bringin extractg out the natural sweetness of the bananas and adding a warm depth to the overall taste. Again, beat until everything is well combined and smooth.
3. Incorporating the Bananas: Now comes the star of the show – the overripe bananas! Mash them thoroughly with a fork or a potato masher until they are as smooth as possible, with minimal lumps. The riper the bananas, the sweeter and more potent their flavor will be, and they will also contribute to the moisture of the bread. Add the mashed bananas to your wet ingredients and mix until just combined. Don’t overmix at this stage; you just want to distribute the banana puree evenly throughout the batter.
The Dry Ingredients and Bringin extractg It All Together
The dry ingredients are where the structure of the banana bread comes from, and careful mixing is key to preventing a tough loaf.
4. Whisking the Dry Ingredients: In a separate medium-sized bowl, whisk together the flour, baking soda, baking powder, and fine sea salt. Whisking helps to evenly distribute the leavening agents (baking soda and baking powder) and the salt, ensuring a consistent rise and flavor throughout the bread. This step is important for preventing pockets of leavening or saltiness. Once whisked, gently add the dry ingredients to the wet ingredients.
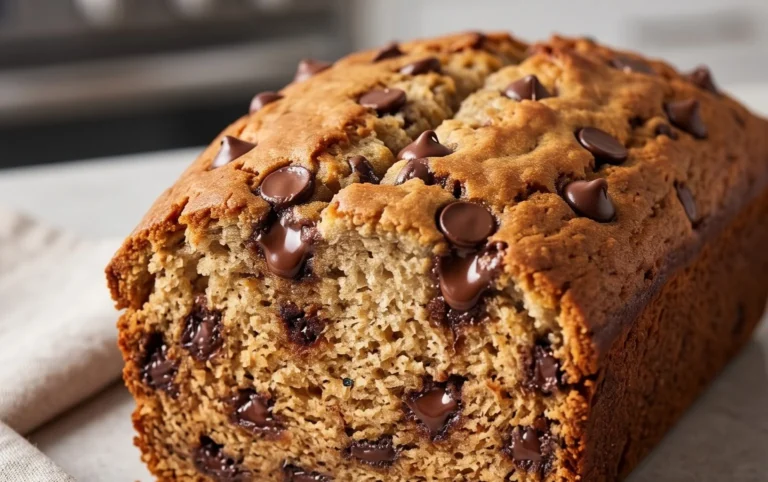
5. Combining Wet and Dry, and Adding Nuts: Now, gently fold the dry ingredients into the wet ingredients using a spatula or wooden spoon. Mix until just combined; it’s very important not to overmix. A few streaks of flour are perfectly acceptable, as overmixing will develop the gluten in the flour too much, resulting in a tough, dense banana bread. Finally, gently fold in the chopped walnuts. These add a wonderful crunch and nutty flavor that complements the sweet banana perfectly. If you’re not a fan of walnuts, you can omit them or substitute them with pecans or even chocolate chips for a different twist.
Baking Your Old Fashioned Banana Bread
The baking process transforms the batter into a golden-brown loaf of deliciousness. Pay attention to oven temperature and baking time for the best results.
Preheat your oven to 350 degrees Fahrenheit (175 degrees Celsius). Grease and flour a standard 9×5 inch loaf pan, or line it with parchment paper for easy removal. Pour the batter evenly into the prepared pan.
Bake for approximately 55-70 minutes, or until a wooden skewer or toothpick inserted into the center of the loaf comes out clean. The baking time can vary depending on your oven, so it’s always best to check for doneness periodically. If the top of the bread starts to brown too quickly before the inside is cooked, you can loosely tent it with aluminum foil.
Once baked, remove the loaf pan from the oven and let it cool in the pan for about 10-15 minutes. This allows the bread to set and firm up before you attempt to remove it. After the initial cooling in the pan, carefully invert the loaf onto a wire rack to cool completely. This is crucial for preventing a soggy bottom.
Allowing the banana bread to cool completely before slicing is the hardest part, but it’s essential for achieving the best texture and preventing it from crum extractbling. Once completely cooled, slice and enjoy your homemade, old-fashioned banana bread. It’s delightful on its own, or even better toasted with a smear of butter. This recipe is a keeper, and you’ll find yourself making it again and again!

Conclusion:
There you have it – a classic, comforting, and utterly delicious Old Fashioned Banana Bread recipe that’s sure to become a favorite in your kitchen. This recipe truly shines because it’s wonderfully simple to make, uses pantry staples, and results in a moist, flavorful loaf with that perfect hint of sweetness. It’s the ultimate way to use up those overripe bananas and fill your home with an irresistible aroma.
This versatile treat is fantastic on its own, but I love serving it warm with a generous smear of butter, or even a dollop of cream cheese for a delightful tang. It’s perfect for breakfast, a mid-afternoon snack, or even a simple dessert. Feeling adventurous? Try adding a handful of chocolate chips, chopped walnuts, or a pinch of cinnamon and nutmeg for extra warmth and texture. Don’t be afraid to experiment! I highly encourage you to give this Old Fashioned Banana Bread a try – I promise you won’t be disappointed. It’s a timeless recipe that brings so much joy.
Frequently Asked Questions:
Why is my banana bread so dense?
A common reason for dense banana bread is overmixing the batter. Once you add the dry ingredients, mix just until combined. Overmixing develops the gluten too much, resulting in a tougher, denser loaf. Also, ensure your leavening agents (baking soda/powder) are fresh and active.
Can I freeze this Old Fashioned Banana Bread?
Absolutely! This banana bread freezes beautifully. Once completely cooled, wrap it tightly in plastic wrap, then in aluminum foil or place it in a freezer-safe bag. It can be stored in the freezer for up to 2-3 months. Thaw at room temperature before enjoying.
Old Fashioned Banana Bread
A classic, moist, and flavorful banana bread recipe perfect for using up ripe bananas. Features a rich buttery base and optional walnuts for added crunch.
Ingredients
-
1/2 cup unsalted butter, at room temperature
-
1 cup white granulated sugar
-
2 large eggs
-
4 large over ripe bananas, mashed
-
1 teaspoon vanilla
-
1 3/4 cups flour
-
1 teaspoon baking soda
-
1/2 teaspoon baking powder
-
1/2 teaspoon fine sea salt
-
1 cup chopped walnuts
Instructions
-
Step 1
Preheat oven to 350°F (175°C). Grease and flour a 9×5 inch loaf pan. -
Step 2
In a large bowl, cream together the softened butter and granulated sugar until light and fluffy. -
Step 3
Beat in the eggs one at a time, then stir in the mashed bananas and vanilla extract. -
Step 4
In a separate medium bowl, whisk together the flour, baking soda, baking powder, and salt. -
Step 5
Gradually add the dry ingredients to the wet ingredients, mixing until just combined. Do not overmix. -
Step 6
Fold in the chopped walnuts. -
Step 7
Pour the batter into the prepared loaf pan and spread evenly. -
Step 8
Bake for 50-60 minutes, or until a wooden skewer inserted into the center comes out clean. -
Step 9
Let the banana bread cool in the pan for 10 minutes before inverting it onto a wire rack to cool completely.
Important Information
Nutrition Facts (Per Serving)
It is important to consider this information as approximate and not to use it as definitive health advice.
Allergy Information
Please check ingredients for potential allergens and consult a health professional if in doubt.