Cherries in the Snow Dessert Recipe- Easy & Delicious
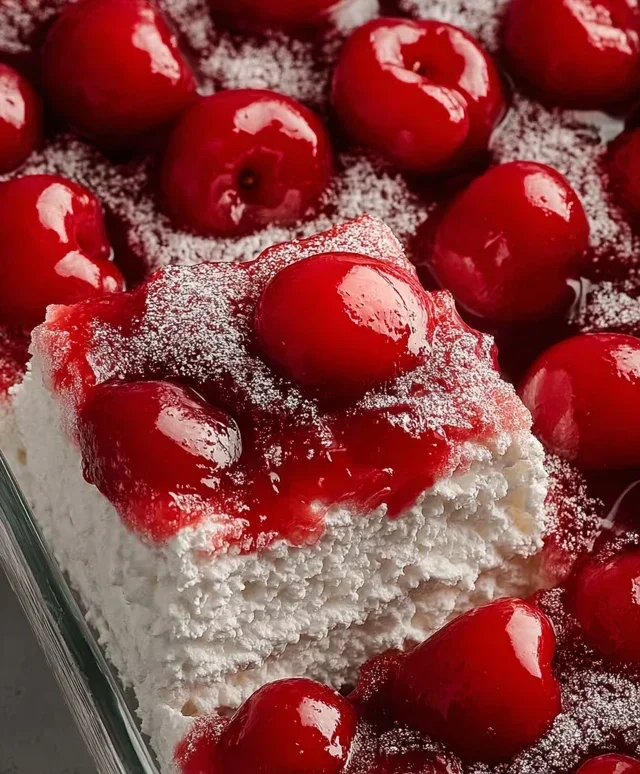
Cherries in the Snow is a dessert that conjures images of pure indulgence and delightful nostalgia. There’s something undeniably magical about this classic treat, a perfect marriage of vibrant fruit and creamy sweetness that has captivated palates for generations. People adore Cherries in the Snow for its simple elegance; it’s the kind of dessert that feels both sophisticated and incredibly comforting, making it a go-to for special occasions or when you just need a little bit of joy. What truly makes this dish special is its beautiful visual appeal – the deep ruby red of the cherries peeking through a cloud of delicate, snowy whipped cream or meringue is a sight that promises pure bliss. It’s more than just a dessert; it’s an experience, a delicious whisper of winter wonder that we can enjoy any time of year. Prepare to fall in love with the enchanting simplicity of Cherries in the Snow all over again.
Ingredients:
Cherries in the Snow: A Delightfully Easy Dessert
Get ready to impress your friends and family with this incredibly simple yet stunning dessert, affectionately known as “Cherries in the Snow.” This recipe is a true crowd-pleaser, perfect for potlucks, holiday gatherings, or just a special treat to brighten any day. The beauty of this dessert lies in its effortless assembly and the delightful contrast of textures and flavors. We’re talking about a fluffy, sweet angel food cake base, a creamy, dreamy filling, and a vibrant burst of cherry goodness. It’s a dessert that looks as good as it tastes, and the best part is, you don’t need to be a seasoned baker to achieve spectacular results.
The magic of Cherries in the Snow is in its no-bake nature, making it a fantastic option when you’re short on time or just don’t want to heat up the kitchen. The cream cheese filling provides a rich and decadent counterpoint to the lightness of the angel food cake, while the cherry pie filling adds a delightful tartness and a pop of color that truly makes this dessert “snowy” and “cherry-kissed.” Let’s dive into how we’re going to create this masterpiece.
Preparing the Creamy Dream Filling
The foundation of our Cherries in the Snow is a luscious cream cheese mixture. This step is crucial for achieving that smooth, velvety texture that makes each bite so satisfying.
1. In a medium mixing bowl, combine the softened cream cheese and powdered sugar. It’s really important that your cream cheese is at room temperature. This will ensure it whips up smoothly without any lumps. You can use a hand mixer or a stand mixer for this, or even a sturdy whisk if you’re feeling ambitious! Start by beating them together on a low speed until they are just combined, then gradually increase the speed to medium-high and beat until the mixture is light, fluffy, and completely smooth. Scrape down the sides of the bowl a few times to make sure everything is incorporated.
2. Next, slowly drizzle in the 2% milk while the mixer is still running on low. Continue to mix until the milk is fully incorporated and the cream cheese mixture is wonderfully smooth and pourable, but still has a nice body to it. This thin, yet creamy consistency is exactly what we’re aiming for to create a luscious layer.
3. Now it’s time to fold in the thawed Cool Whip. Gently add the thawed whipped topping to the cream cheese mixture. Using a spatula, carefully fold the Cool Whip into the cream cheese mixture until no streaks of cream cheese are visible. You want to be gentle here to maintain as much of the airiness from the Cool Whip as possible, which will contribute to the light and fluffy texture of the final dessert. Overmixing can deflate the Cool Whip, making the filling dense. Aim for a uniform, creamy, and airy mixture.
Assembling Your Cherries in the Snow
With our luscious filling ready, we can now move on to assembling this beautiful dessert. This is where the magic truly starts to happen, and you’ll see your “Cherries in the Snow” begin extract to take shape.
4. We’ll start with our angel food cake. Take your pre-baked 9-inch angel food cake and either tear it into bite-sized pieces or slice it into cubes. You can arrange these pieces in the bottom of a 9×13 inch baking dish or serving bowl. I like to arrange them in a somewhat rustic, layered fashion, ensuring there are no large gaps. This forms the perfect fluffy base for our creamy filling and sweet cherries.
5. Now, carefully pour the prepared cream cheese and Cool Whip mixture over the angel food cake pieces. Gently spread it out with a spatula to evenly cover the cake. Don’t worry if it doesn’t reach the very edges perfectly; the cherries will help fill in any smaller gaps later. The goal is a smooth, even layer that encases the cake.
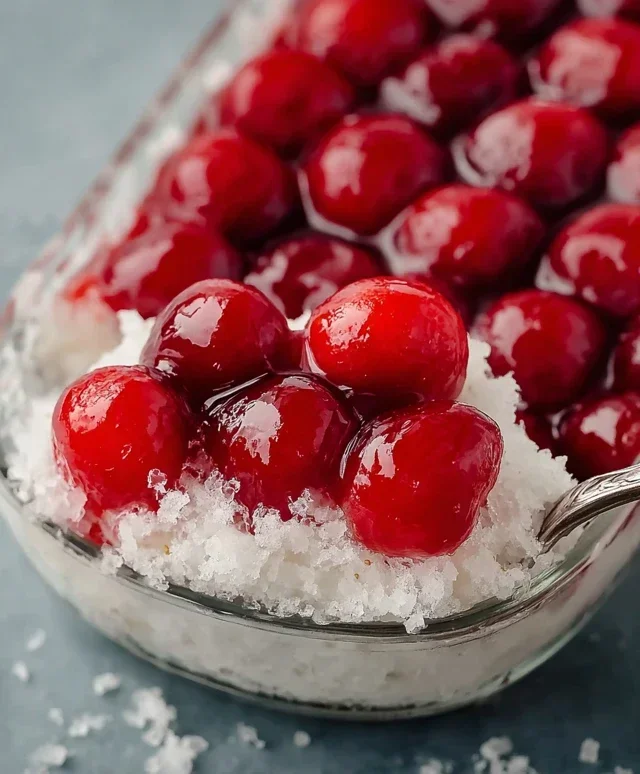
6. Finally, it’s time for the star of the show – the cherries! Open both cans of cherry pie filling and spoon them directly over the cream cheese layer. Don’t stir or spread them too much. You want those gorgeous, glistening cherries to sit on top, creating that “snowy” effect with red jewels peeking through. Allow some of the cherry filling to naturally cascade down the sides of the cream cheese layer. This creates the beautiful visual appeal that gives the dessert its name.
Chill and Serve Your Masterpiece
The final step is perhaps the hardest: waiting! But this short waiting period is essential for the flavors to meld and the dessert to set up properly.
7. Cover the baking dish or serving bowl tightly with plastic wrap or a lid. Refrigerate the Cherries in the Snow for at least 2 to 3 hours. This chilling time allows the flavors to deepen and marry, and it helps the dessert firm up, making it easier to serve. The longer it chills, the more set it will be, though I find 2-3 hours is usually perfect for that delightful contrast of textures. When you’re ready to serve, you’ll have a beautifully layered dessert that’s both elegant and incredibly satisfying.
Enjoy every spoonful of this delightful, easy-to-make Cherries in the Snow!
Conclusion:
There you have it! This ‘Cherries in the Snow’ recipe is truly a showstopper, offering a delightful balance of sweet, tart cherries suspended in a creamy, snowy-white dream. It’s remarkably easy to whip up, making it perfect for both casual gatherings and more formal occasions. The visual appeal alone is enough to impress, but the taste is what will keep everyone coming back for more. I love how versatile this dessert is; it’s equally at home as a light summer treat or a festive holiday indulgence. So please, don’t hesitate to give this ‘Cherries in the Snow’ a try in your own kitchen. I’m confident you’ll fall in love with its charm and deliciousness.
For serving, I find it’s best presented chilled in individual glasses or a beautiful trifle dish to showcase the layers. A sprig of mint or a dusting of toasted almonds can add a lovely finishing touch. As for variations, consider adding a hint of almond extract to the cream for a different nutty profile, or perhaps a splash of kirsch extract for an adult twist. You could also fold in some finely chopped pistachios for a pop of color and crunch.
Frequently Asked Questions:
Can I use frozen cherries instead of fresh for ‘Cherries in the Snow’?
Absolutely! Frozen cherries are a perfectly fine substitute. Thaw them completely and drain off any excess liquid before proceeding with the recipe. You might find the texture slightly softer, but the flavor will still be wonderful.
What’s the best way to store leftover ‘Cherries in the Snow’?
Leftovers can be stored in an airtight container in the refrigerator for up to 2-3 days. The texture might soften a bit over time, but it will remain delicious.
Cherries in the Snow
A simple and refreshing no-bake dessert featuring layers of creamy cheese mixture, angel food cake, and cherry pie filling.
Ingredients
-
8 ounces cream cheese, room temperature
-
1/2 cup powdered sugar
-
1/2 cup 2% milk
-
12 ounces Cool Whip whipped topping, thawed
-
1 pre-baked 9-inch angel food cake
-
2 cans cherry pie filling (21 ounces each)
Instructions
-
Step 1
In a large bowl, beat together the cream cheese and powdered sugar until smooth. -
Step 2
Gradually add the milk and beat until well combined and creamy. -
Step 3
Gently fold in the thawed Cool Whip until no streaks remain. -
Step 4
Tear the angel food cake into bite-sized pieces and place half of the pieces in the bottom of a 9×13 inch baking dish. -
Step 5
Spoon half of the cherry pie filling evenly over the cake pieces. -
Step 6
Spread half of the cream cheese mixture over the cherry layer. -
Step 7
Repeat the layers with the remaining cake pieces, cherry pie filling, and cream cheese mixture. -
Step 8
Cover and refrigerate for at least 4 hours, or until firm.
Important Information
Nutrition Facts (Per Serving)
It is important to consider this information as approximate and not to use it as definitive health advice.
Allergy Information
Please check ingredients for potential allergens and consult a health professional if in doubt.