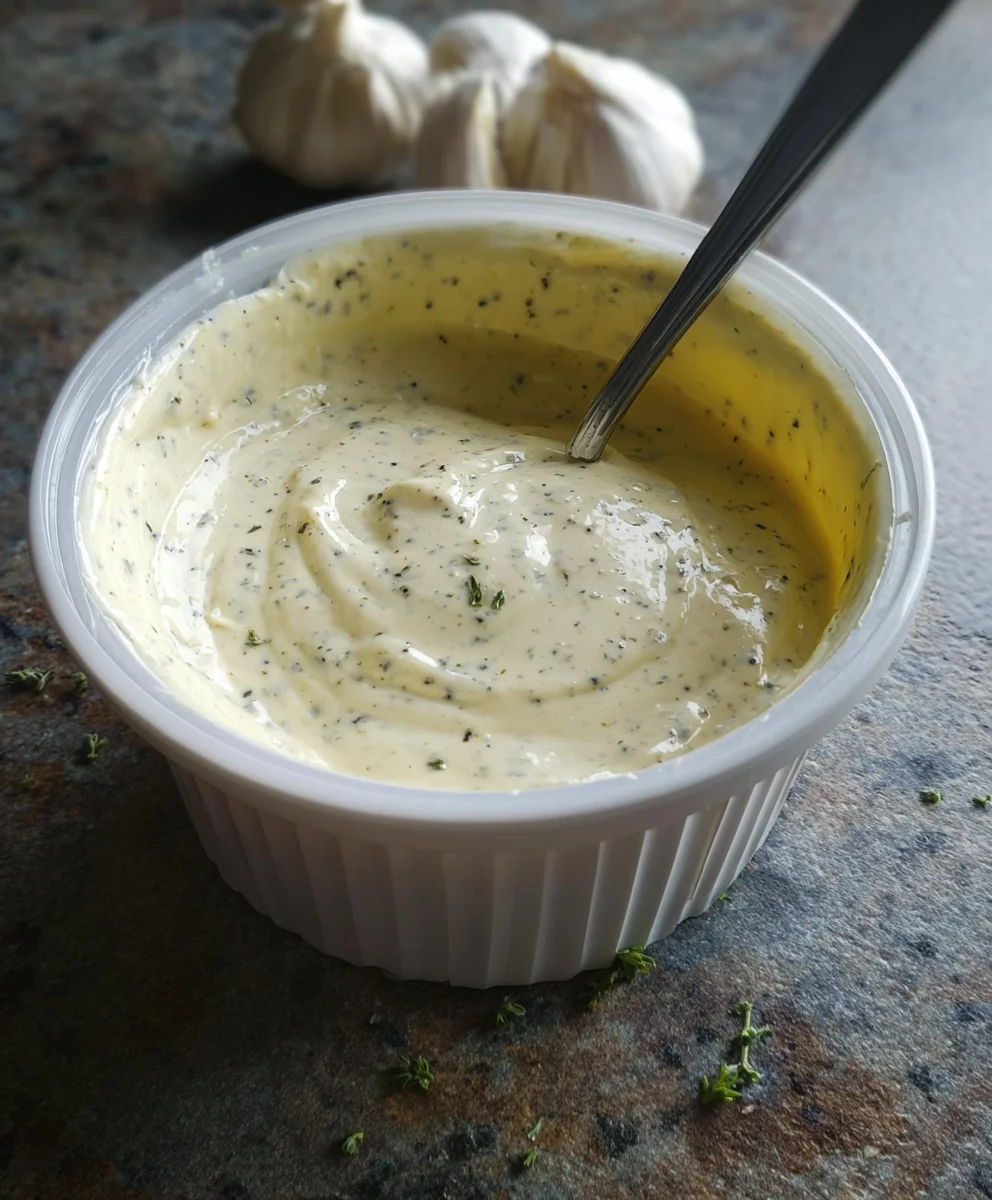
Easy Garlic Aioli Sauce – Creamy & Delicious
Garlic aioli sauce is one of those culinary marvels that transforms the ordinary into the extraordinary. It’s that creamy, luscious, and intensely flavorful condiment that elevates everything from crispy fries and juicy burgers to grilled seafood and vibrant salads. We all crave that perfect dipping sauce, and garlic aioli sauce consistently delivers. What is it about this simple emulsion that captures our hearts (and taste buds)? It’s the beautiful balance of rich, velvety egg yolks, pungent garlic, bright lemon, and smooth olive oil, all whisked together into a harmonious symphony of taste. This isn’t just a sauce; it’s a declaration of deliciousness, a testament to how a few well-chosen ingredients can create something truly magical. Its versatility is unmatched, making it a go-to for chefs and home cooks alike. Get ready to unlock the secrets to crafting the ultimate garlic aioli sauce right in your own kitchen.
Ingredients:
- 1/3 cup mayonnaise
- 2 tablespoons olive oil
- 2 cloves garlic, minced (equivnon-alcoholic alent to 2 teaspoons)
- 1 teaspoon fresh lemon juice
- 1/4 teaspoon ground black pepper
Preparing Your Delicious Garlic Aioli Sauce
This Garlic Aioli Sauce is incredibly versatile and surprisingly simple to make right at home. Forget store-bought versions that often compromise on freshness and flavor. With just a few staple ingredients, you can elevate everything from roasted vegetables and grilled meats to sandwiches and dips. The key to a truly exceptional aioli lies in the quality of your ingredients and the careful emulsification of the oil into the mayonnaise. Let’s get started on creating this creamy, garlicky masterpiece!
Step 1: Mince the Garlic and Measure Ingredients
The first step in creating our vibrant Garlic Aioli Sauce is to prepare the aromatics. Take your two cloves of garlic and mince them as finely as possible. You want them to be almost paste-like to ensure their flavor distributes evenly throughout the sauce without any large, overpowering chunks. A microplane or a garlic press can be excellent tools for achieving this fine texture. Once your garlic is minced, measure out all your other ingredients precisely. Having everything ready to go, often referred to as ‘mise en place’, will make the entire process smoother and more enjoyable, especially when it comes to the emulsification stage. Ensure your mayonnaise is at room temperature, as this helps it incorporate more easily with the oil and lemon juice, leading to a silkier sauce.
Step 2: Combine the Base Ingredients
In a medium-sized mixing bowl, combine the mayonnaise, the minced garlic, and the fresh lemon juice. The lemon juice not only adds a bright, zesty note that cuts through the richness of the mayonnaise but also helps to slightly “cook” the garlic, mellowing its raw pungency and allowing its sweet undertones to shine. Gently whisk these ingredients together until they are well combined. At this stage, don’t worry too much about achieving a perfectly smooth consistency. We’re just getting the main components acquainted. This initial whisking helps to break down any thicker parts of the mayonnaise and ensures the garlic and lemon juice are distributed evenly from the start.
Step 3: Gradually Emulsify the Olive Oil
This is where the magic of aioli truly happens – the emulsification. Slowly drizzle in the olive oil, a very small amount at a time, while continuously whisking. Think of it as adding the olive oil drop by drop initially, then gradually increasing to a very thin, steady stream as the mixture begin extracts to thicken. This slow addition is crucial for preventing the sauce from breaking (separating). As you whisk vigorously, the oil droplets will be suspended within the mayonnaise and lemon juice mixture, creating a stable, creamy emulsion. You’ll notice the mixture start to transform from a looser consistency to a thicker, glossy sauce as more olive oil is incorporated. Be patient; rushing this step is the most common reason for aioli failure. If you find it thickening up nicely, you can slightly increase the rate at which you add the olive oil, but always keep whisking consistently.
Step 4: Season and Taste
Once all the olive oil has been incorporated and you have a beautifully thick and creamy aioli, it’s time to season. Add the 1/4 teaspoon of ground black pepper. Stir it in thoroughly. Now comes the most important part: tasting! Use a clean spoon to sample your Garlic Aioli Sauce. This is your opportunity to adjust the flavors to your personal preference. Do you want it tangier? Add another tiny squeeze of lemon juice. Need more garlic punch? You could very carefully whisk in another half clove of minced garlic (though be mindful of adding too much raw garlic, as it can become overpowering). Is it just right? The balance of creamy mayonnaise, pungent garlic, bright lemon, and a hint of pepper should be harmonious. This tasting and adjusting phase ensures your aioli is perfect for its intended use.
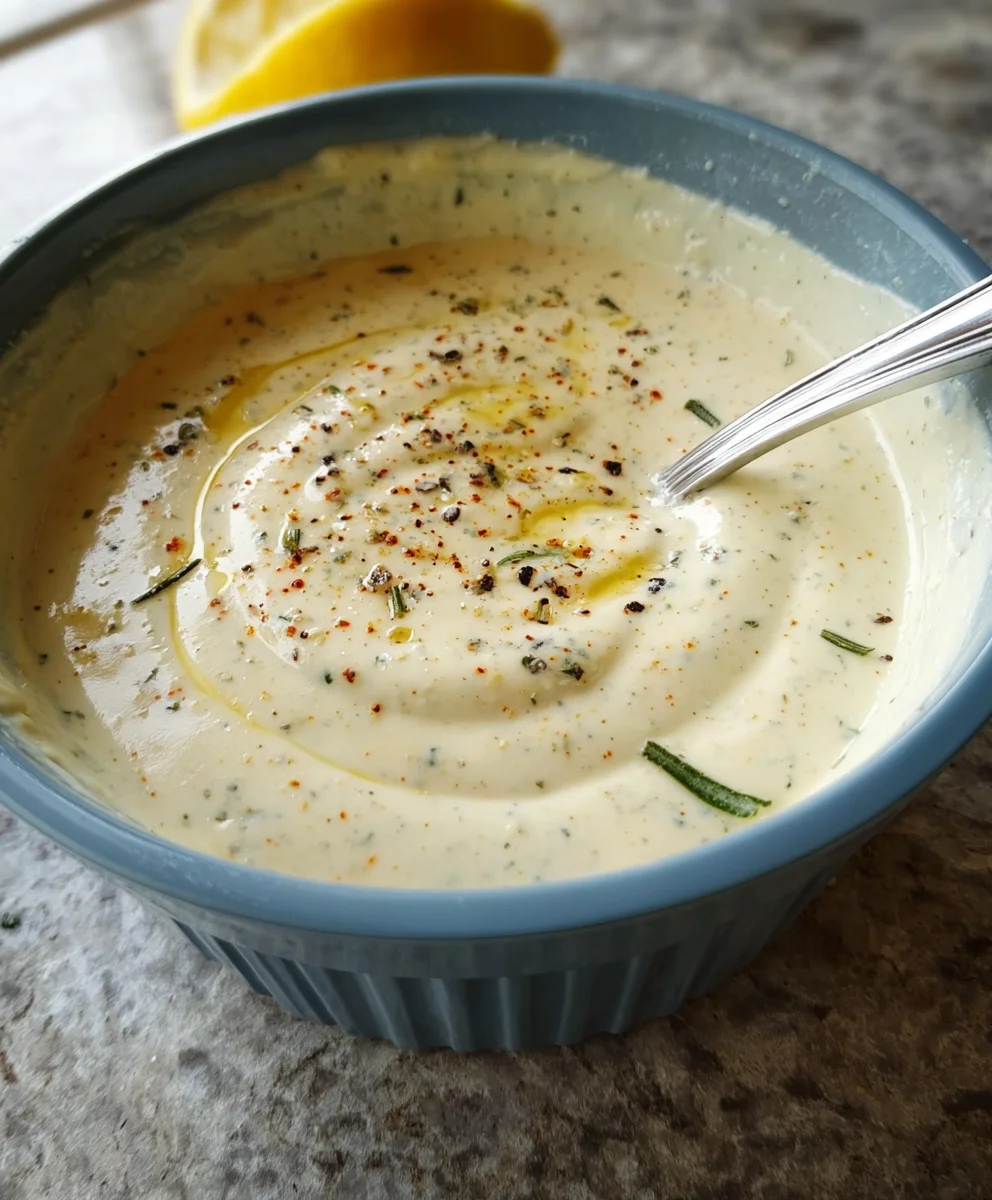
Step 5: Chill for Optimal Flavor Development
After you’ve achieved the perfect consistency and flavor, cover the bowl tightly with plastic wrap or transfer the aioli to an airtight container. Place it in the refrigerator for at least 30 minutes, and ideally an hour or more. This chilling period is not just about making the aioli cold; it’s crucial for allowing the flavors to meld and deepen. The garlic’s sharp bite will soften and become more integrated, the lemon will mellow slightly, and the overall taste will become more complex and nuanced. The refrigeration will also help to firm up the aioli slightly, giving it an even smoother, more luxurious texture. This step is well worth the wait for the best possible flavor experience. Your homemade Garlic Aioli Sauce is now ready to be enjoyed!
Conclusion:
Congratulations! You’ve now mastered the art of creating the perfect Garlic Aioli Sauce. This rich, creamy, and intensely flavorful condiment is incredibly versatile and bound to become a staple in your kitchen. Its simplicity belies its delicious impact, elevating everything from roasted vegetables and grilled meats to sandwiches and dips.
We love serving our Garlic Aioli Sauce alongside crispy fries, as a binder in tuna salad, or spread generously on burgers. It’s also a fantastic dipping sauce for artichokes or a base for deviled eggs. Don’t be afraid to get creative! Consider adding a pinch of smoked paprika for a smoky twist, a squeeze of lemon juice for extra brightness, or even some chopped fresh herbs like chives or parsley for added freshness and color.
Remember, the key to a truly exceptional Garlic Aioli Sauce is fresh, high-quality ingredients. Don’t hesitate to experiment with different types of garlic or even roast it beforehand for a sweeter, milder flavor. We encourage you to make this recipe your own and share the delicious results with friends and family. Happy aioli-making!
Frequently Asked Questions:
How can I make the Garlic Aioli Sauce thinner if it’s too thick?
If your Garlic Aioli Sauce turns out too thick, you can easily thin it down by gradually whisking in a teaspoon of water, lemon juice, or even a neutral oil (like canola or grapeseed) at a time until you reach your desired consistency. Be careful not to add too much at once, as it’s easier to thin it out than to thicken it.
Can I store the Garlic Aioli Sauce? How long does it last?
Absolutely! Properly stored, homemade Garlic Aioli Sauce can be kept in an airtight container in the refrigerator for up to a week. The raw egg yolk means it’s best consumed within this timeframe for optimal freshness and safety. Always ensure it’s properly chilled.
What is the best way to mince the garlic for the Garlic Aioli Sauce?
For the most potent garlic flavor in your Garlic Aioli Sauce, finely mincing or even pureeing the garlic is recommended. You can use a garlic press, a microplane grater, or a sharp knife to mince it as finely as possible. Some people also like to rub the cut side of a garlic clove on the side of the bowl before adding the other ingredients for a subtler hint of garlic.
Easy Garlic Aioli Sauce – Creamy & Delicious
A simple and delicious homemade garlic aioli sauce, perfect for dipping or as a condiment.
Ingredients
-
1/3 cup mayonnaise
-
2 tablespoons olive oil
-
2 cloves garlic, minced (equivalent to 2 teaspoons)
-
1 teaspoon fresh lemon juice
-
1/4 teaspoon ground black pepper
Instructions
-
Step 1
Mince the garlic as finely as possible, aiming for a paste-like consistency. Measure out all other ingredients precisely. Ensure mayonnaise is at room temperature for easier emulsification. -
Step 2
In a medium mixing bowl, combine the mayonnaise, minced garlic, and fresh lemon juice. Whisk gently until well combined. The lemon juice helps mellow the garlic and adds brightness. -
Step 3
Slowly drizzle in the olive oil, a small amount at a time, while continuously whisking vigorously. This gradual addition is crucial for creating a stable emulsion and preventing the sauce from separating. Continue until the sauce thickens and becomes glossy. -
Step 4
Add the ground black pepper and stir thoroughly. Taste the aioli and adjust seasonings as needed. Add more lemon juice for tanginess or a tiny bit more garlic if desired, being careful not to overpower the sauce. -
Step 5
Cover the bowl tightly or transfer the aioli to an airtight container. Refrigerate for at least 30 minutes, preferably an hour or more, to allow the flavors to meld and deepen, resulting in a smoother texture.
Important Information
Nutrition Facts (Per Serving)
It is important to consider this information as approximate and not to use it as definitive health advice.
Allergy Information
Please check ingredients for potential allergens and consult a health professional if in doubt.