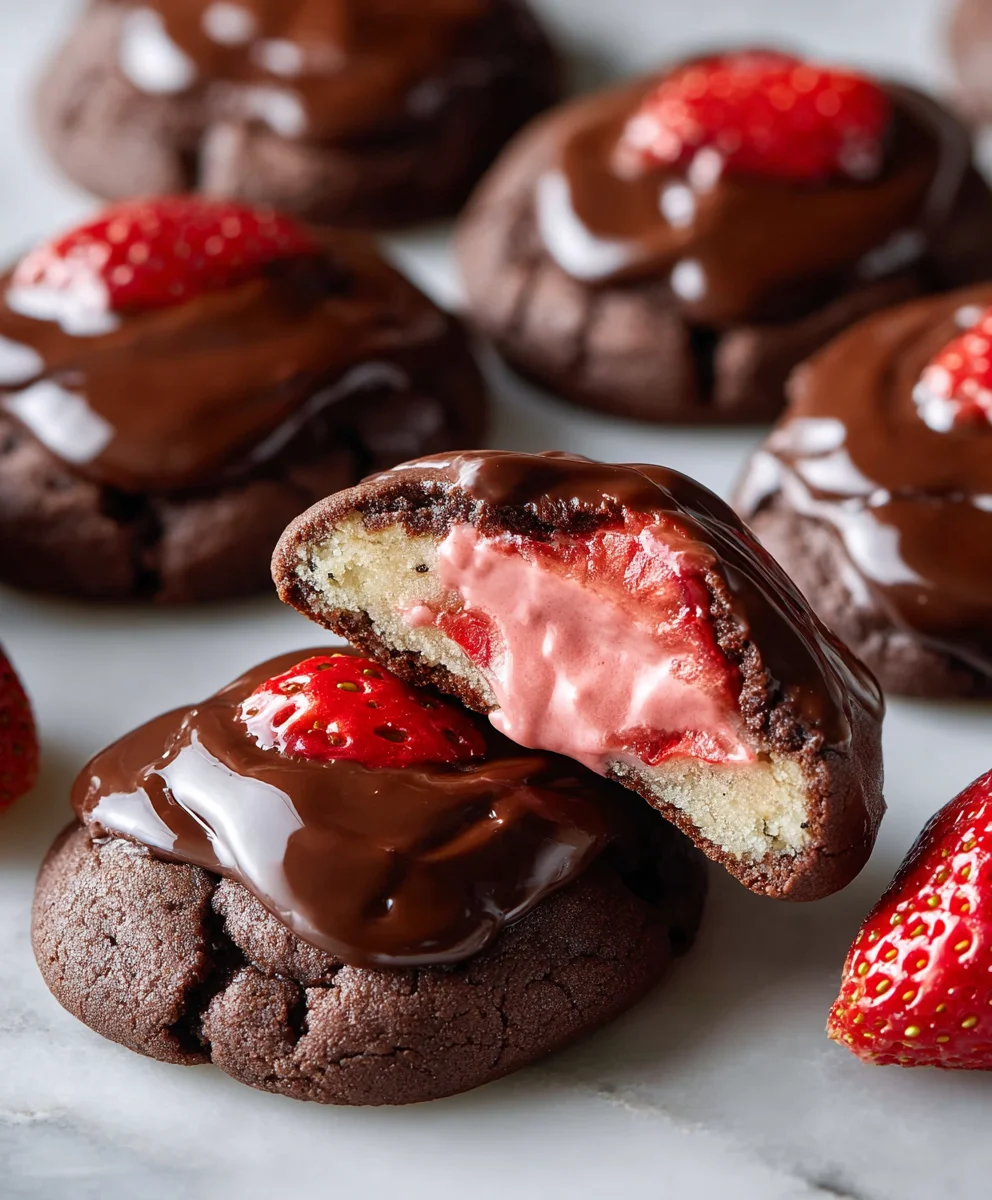
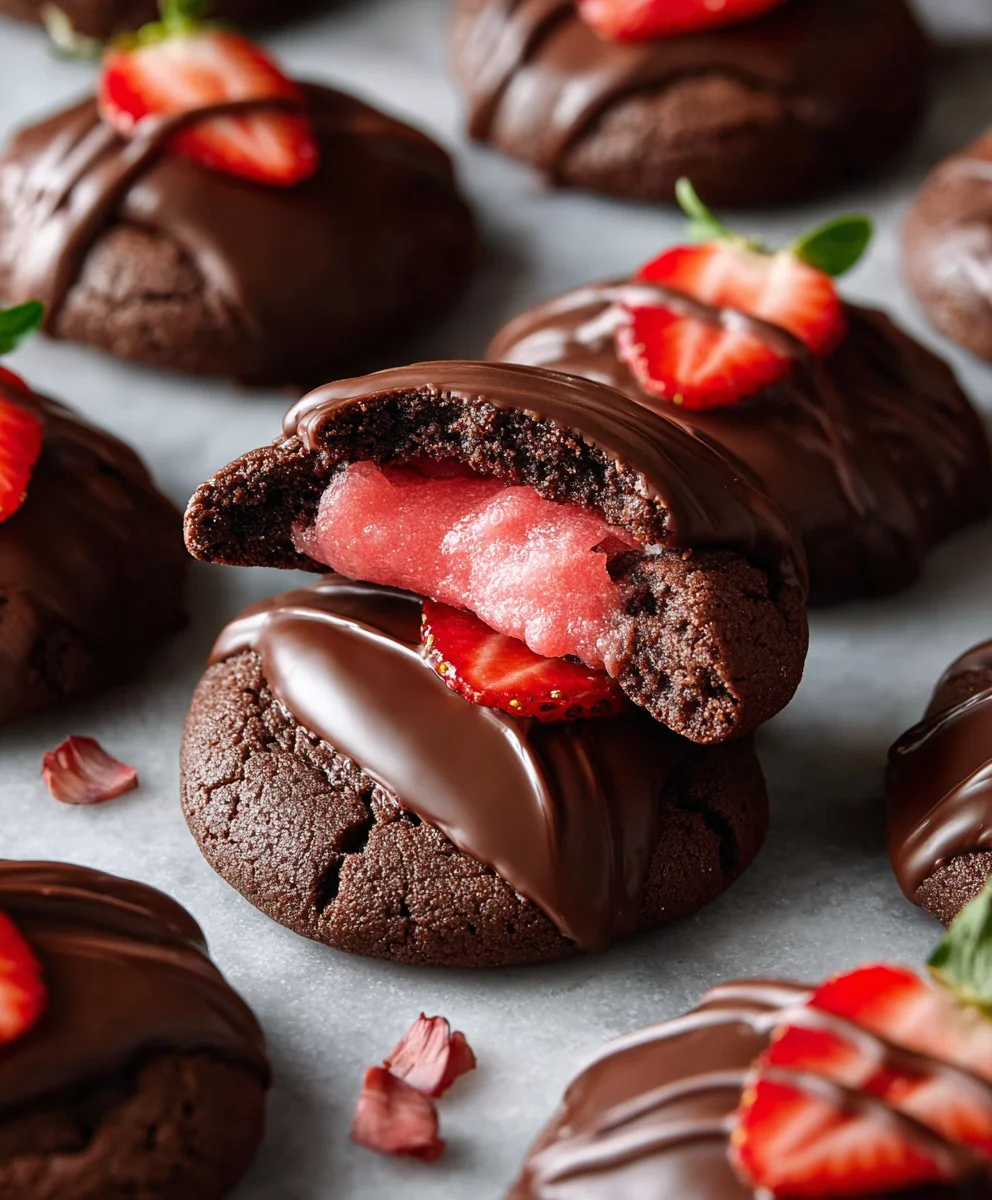
Decadent Chocolate Covered Strawberry Cookies Recipe
Chocolate Covered Strawberry Cookies are more than just a treat; they’re a little slice of heaven that perfectly captures the essence of two beloved indulgences. Imagin extracte biting into a tender, chewy cookie that’s bursting with the sweet, slightly tart flavor of fresh strawberries, all enveloped in a rich, decadent layer of smooth chocolate. It’s a symphony of textures and tastes that simply can’t be beat. People adore these cookies because they offer a delightful twist on classic cookie flavors, elevating simple ingredients into something truly extraordinary. The combination of chocolate and strawberry is inherently romantic and celebratory, making these cookies perfect for special occasions, thoughtful gifts, or simply as a well-deserved personal indulgence. What makes our Chocolate Covered Strawberry Cookies so special is the careful balance of these iconic flavors, ensuring neither overwhelms the other, creating a harmonious and utterly addictive dessert experience that will leave you craving more.
Ingredients:
- 1 box (16.25 oz) Strawberry cake mix
- 1/3 cup vegetable oil
- 1 teaspoon vanilla extract
- 2 large eggs
- 1 cup (or about 6 oz) chocolate chips or chocolate candy melts (milk, semi-sweet, or dark chocolate are all delicious choices)
- Sprinkles, for decorating (optional)
Prepping the Dough
Mixing the Base
This recipe for Chocolate Covered Strawberry Cookies is wonderfully simple, relying on a box of strawberry cake mix to provide a vibrant flavor and color. To begin extract, preheat your oven to 350 degrees Fahrenheit (175 degrees Celsius). Line your baking sheets with parchment paper or silicone baking mats. This prevents sticking and makes cleanup a breeze, ensuring your beautiful cookies slide right off the pan.
In a large mixing bowl, combine the entire box of strawberry cake mix. This is the foundation of our cookie’s delightful taste and cheerful pink hue. Next, add the 1/3 cup of vegetable oil. Vegetable oil is excellent here because it contributes to a tender, moist cookie crum extractb, preventing them from becoming dry. Then, measure out 1 teaspoon of vanilla extract. While the cake mix has some flavor, the vanilla extract enhances and deepens the overall sweetness and aroma, adding a subtle complexity. Finally, crack in your two large eggs. Eggs act as a binder, helping all the ingredients come together to form a cohesive dough, and they also contribute to the richness and structure of the cookie.
Achieving the Perfect Consistency
Now, it’s time to bring everything together. Using a sturdy spoon or a hand mixer on low sgin extractd, begin mixing the ingredients. Start by just incorporating them lightly, then gradually increase the speed to medium. You’ll notice the mixture transforming from a dry powder into a thick, sticky dough. Continue mixing until all the dry cake mix is fully incorporated and there are no pockets of unmixed powder remaining. The dough will be quite soft and possibly a little sticky at this stage, which is perfectly normal. It might resemble a very thick batter more than a traditional cookie dough. Resist the urge to add more flour, as this will make the cookies tough. The stickiness is part of what contributes to their soft, chewy texture.
Forming and Baking the Cookies
Shaping the Cookies
Once your dough has reached a uniform consistency, you’re ready to form the cookies. Because the dough is on the softer side, using a cookie scoop or two spoons is the easiest way to portion them out evenly. Aim for balls of dough that are about 1 to 1.5 inches in diameter. If you’re using a cookie scoop, simply scoop the dough and then gently release it onto the prepared baking sheet. If using spoons, scoop a portion of dough with one spoon and use the second spoon to help push it off onto the baking sheet. Leave about 2 inches of space between each cookie dough ball, as they will spread slightly during baking. This spacing ensures they don’t run into each other and bake evenly.
Adding the Chocolatey Goodness
This is where our Chocolate Covered Strawberry Cookies get their name! You have two fantastic options for incorporating the chocolate. The first, and perhaps the most straightforward, is to simply press a few chocolate chips into the top of each cookie dough ball before baking. This allows the chocolate to melt and create delicious pools of chocolate that look like they’ve been dipped. Aim for about 3-5 chips per cookie, depending on their size and your preference for chocolate.
Alternatively, if you’re using chocolate candy melts, you can melt them according to package directions (usually in the microwave in short intervals, stirring between each). Once melted and smooth, you can either drizzle the melted chocolate over the cookie dough balls before baking, or, for a more “covered” look, wait until the cookies have cooled slightly after baking and then dip the tops of the cookies into the melted chocolate. If you choose to drizzle before baking, be mindful that the chocolate might spread a bit more. For the classic “covered” effect, melting and dipping after baking is the way to go.
Baking to Perfection
Place the prepared baking sheets into your preheated oven. Bake for 9 to 12 minutes. The exact baking time will depend on your oven and the size of your cookies. You’re looking for the edges of the cookies to be lightly set and just starting to turn golden brown. The centers should still appear slightly soft and underbaked. This is crucial for achieving that desirable chewy texture that melts in your mouth. Overbaking will result in a cakey or hard cookie. If you’ve opted to press chocolate chips into the dough before baking, you’ll notice the chocolate chips will have softened and may be starting to melt.
Cooling and Decorating
The Cooling Process
Once the cookies have reached their perfect stage of doneness, carefully remove the baking sheets from the oven. Let the cookies cool on the baking sheets for about 5 minutes. This initial cooling period allows them to firm up enough to be moved without falling apart. The residual heat will continue to cook them slightly. After these 5 minutes, gently transfer the cookies to a wire cooling rack. Allow them to cool completely on the wire rack. This ensures air circulates around them, preventing the bottoms from becoming soggy and allowing them to fully set.
Adding the Final Flourish
If you’re using sprinkles, now is the time to add them! For the best adhesion, sprinkle them onto the cookies while they are still warm but have set slightly on the baking sheet, or immediately after dipping them in melted chocolate if you chose that method. If you’ve melted chocolate to drizzle or dip, ensure the cookies are fully coolgin extractbefore you begin the dipping or drizzling process for best results. For drizzling, melt your chocolate candy melts and then use a spoon or a piping bag with a small tip to create decorative patterns over the cooled cookies. Allow the chocolate to set completely before storing. These Chocolate Covered Strawberry Cookies are best enjoyed fresh but will keep in an airtight container at room temperature for a few days.
Conclusion:
There you have it – a delightful recipe for Chocolate Covered Strawberry Cookies that are sure to become a household favorite! We’ve walked through each step to create these wonderfully chewy cookies with bursts of fruity sweetness and rich chocolate. These cookies are perfect for any occasion, from a casual afternoon treat to a more festive gathering. I encourage you to give them a try; the simple joy of baking and sharing these delicious cookies is truly rewarding.
For serving suggestions, these Chocolate Covered Strawberry Cookies are divine on their own with a glass of cold milk. They also pair beautifully with a cup of coffee or a warm herbal tea. Consider them the star of your next cookie platter, or even a sweet ending to a simple dinner. Don’t be afraid to get creative with variations!
You can experiment with different types of chocolate chips – dark, milk, or white all offer a unique flavor profile. If you’re feeling adventurous, a sprinkle of sea salt on top before baking can elevate the chocolate and strawberry flavors even further. You could also add a hint of strawberry extract to the dough for an intensified fruitiness. No matter how you choose to make them, I’m confident you’ll fall in love with the delightful taste and texture of these Chocolate Covered Strawberry Cookies.
Frequently Asked Questions:
Q1: Can I use fresh strawberries instead of freeze-dried?
While fresh strawberries can add moisture and sometimes make cookies spread too much, freeze-dried strawberries are ideal for this recipe. They provide an intense strawberry flavor without adding excess liquid. If you must use fresh, finely chop them and consider patting them very dry before incorporating.
Q2: How should I store Chocolate Covered Strawberry Cookies?
Store these cookies in an airtight container at room temperature for up to 3-4 days. For longer storage, you can freeze them in a single layer on a baking sheet until firm, then transfer them to a freezer-safe bag or container for up to 3 months. Thaw at room temperature before enjoying.
Decadent Chocolate Covered Strawberry Cookies
Easy and delicious cookies made with strawberry cake mix, topped with melty chocolate and optional sprinkles.
Ingredients
-
1 box (16.25 oz) Strawberry cake mix
-
1/3 cup vegetable oil
-
1 teaspoon vanilla extract
-
2 large eggs
-
1 cup (or about 6 oz) chocolate chips or chocolate candy melts
-
Sprinkles, for decorating (optional)
Instructions
-
Step 1
Preheat oven to 350°F (175°C). Line baking sheets with parchment paper or silicone baking mats. -
Step 2
In a large bowl, combine strawberry cake mix, vegetable oil, vanilla extract, and eggs. Mix until a thick, sticky dough forms. Do not add extra flour. -
Step 3
Scoop dough into 1-1.5 inch balls and place on prepared baking sheets, leaving 2 inches between cookies. -
Step 4
Press chocolate chips into the tops of the cookie dough balls before baking, or melt chocolate candy melts to drizzle or dip cookies after baking. -
Step 5
Bake for 9-12 minutes, or until edges are lightly golden and centers are soft. Chocolate chips will be softened and starting to melt. -
Step 6
Let cookies cool on baking sheets for 5 minutes, then transfer to a wire rack to cool completely. -
Step 7
Decorate with sprinkles while warm, or drizzle/dip with cooled melted chocolate. Allow chocolate to set before storing.
Important Information
Nutrition Facts (Per Serving)
It is important to consider this information as approximate and not to use it as definitive health advice.
Allergy Information
Please check ingredients for potential allergens and consult a health professional if in doubt.