Dark Chocolate Sea Salt Nut Bars – Easy & Delicious
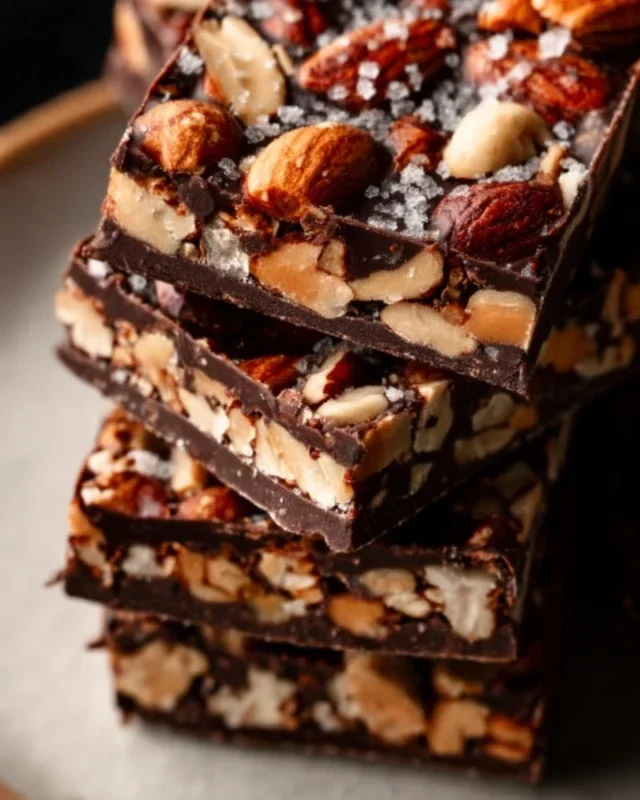
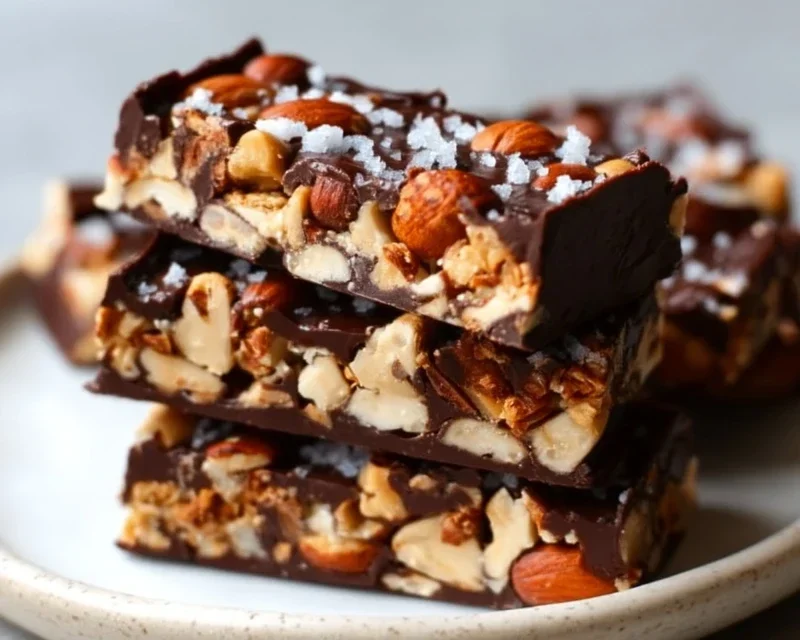
Dark Chocolate and Sea Salt Nut Bars are the ultimate indulgence, a perfect balance of rich, deep chocolate and the satisfying crunch of nuts, all kissed with a touch of crystalline sea salt. If you’re like me, you crave those moments of sweet satisfaction that don’t leave you feeling weighed down. These aren’t your average candy bars; they are sophisticated, flavorful, and surprisingly easy to make. What makes them so special? It’s the interplay of textures and tastes – the velvety dark chocolate melting against the robust nuts, followed by that surprising burst of salt that elevates every single bite. They’re incredibly versatile, perfect for a midday pick-me-up, a healthy-ish dessert, or even a thoughtful homemade gift. Get ready to discover your new favorite snack obsession with these irresistible Dark Chocolate and Sea Salt Nut Bars.
Ingredients:
Crafting Your Own Dark Chocolate and Sea Salt Nut Bars
There’s something incredibly satisfying about homemade snacks. They taste better, you know exactly what goes into them, and you can tailor them to your exact preferences. These Dark Chocolate and Sea Salt Nut Bars are a perfect example of a simple yet incredibly delicious treat that will quickly become a staple in your kitchen. They strike that perfect balance between chewy, crunchy, sweet, and salty, with the rich depth of dark chocolate tying it all together. Whether you need an afternoon pick-me-up, a post-workout refuel, or a delightful addition to your dessert table, these bars are a winner. Let’s get started on creating these little powerhouses of flavor!
The beauty of this recipe lies in its flexibility. The nuts are a suggestion, but feel free to experiment with your favorites. Walnuts, pecans, macadamia nuts – they all bring their unique textures and flavors to the party. The key is to have a good mix to ensure a satisfying crunch and a variety of taste notes. And the puffed rice adds a delightful lightness and crispness that complements the denser nuts beautifully.
Preparing Your Base
Before we dive into mixing, it’s crucial to get our workspace and ingredients ready. This will make the entire process smoother and more enjoyable. Start by lining an 8×8 inch baking pan with parchment paper, leaving some overhang on the sides. This will make it incredibly easy to lift the entire slab out of the pan once it’s set. Next, prepare your nuts. If you’re using a blend like ours, roughly chop them. You don’t want them to be dust, but rather in bite-sized pieces that will provide a pleasant chew and crunch. Having them ready ensures they can be incorporated quickly into the binder.
Mixing the Magic
Now for the fun part – bringin extractg all those wonderful ingredients together! In a medium bowl, combine your prepared nuts and the puffed rice. In a separate, microwave-safe bowl, gently warm the brown rice syrup. You don’t want it boiling, just warm enough to be pourable and to help it bind everything together. Stir in the vanilla extract and the 1/2 teaspoon of sea salt into the warmed brown rice syrup. This salt is crucial for enhancing all the other flavors, particularly the sweetness of the syrup and the richness of the chocolate.
Pour the wet mixture over the dry ingredients (nuts and puffed rice). Using a sturdy spatula or wooden spoon, stir thoroughly until every nut and piece of puffed rice is well-coated. This is where you want to ensure an even distribution so that each bite of your bar has the perfect ratio of crunchy nuts and sweet binder. It might take a bit of effort to get everything thoroughly mixed, so don’t be shy about putting a little elbow grease into it!
Pressing for Perfection
Once everything is beautifully coated, transfer the mixture into your prepared baking pan. Now, you need to press it down firmly and evenly. This is a critical step for ensuring your bars hold their shape. You can use the back of your spatula, or even better, place another piece of parchment paper on top and use your hands or the bottom of a flat glass to press down. The goal is to create a compact layer so that when you cut the bars, they don’t crum extractble apart. Really give it some pressure to compact all those delicious ingredients together.
The Chocolatey Crown
This is where the real indulgence comes in. In a small microwave-safe bowl, combine the dark chocolate chips and the coconut oil. Microwave in 30-second intervals, stirring well after each interval, until the chocolate is mostly melted and smooth. The coconut oil helps to create a smoother, glossier chocolate coating that sets up beautifully. Once smooth, pour this melted chocolate mixture evenly over the pressed nut base in the pan. Gently spread it to cover the entire surface, ensuring you reach the edges. If you’re using the optional flaky salt, sprinkle it generously over the melted chocolate while it’s still wet. The contrast of the crunchy, delicate flaky salt against the smooth dark chocolate is simply divine.
Setting and Slicing
Once your chocolate topping is beautifully spread, it’s time for the bars to set. Carefully place the pan into the refrigerator for at least 2-3 hours, or until the chocolate is completely firm. Patience is key here; rushing the setting process will result in crum extractbly bars. Once firm, use the parchment paper overhang to lift the entire slab out of the pan onto a cutting board. Now, using a sharp knife, cut the slab into your desired bar size. For cleaner cuts, you can warm your knife slightly by running it under hot water and drying it thoroughly between slices. Store your delicious Dark Chocolate and Sea Salt Nut Bars in an airtight container in the refrigerator for the best texture and flavor. Enjoy!
Conclusion:
These Dark Chocolate and Sea Salt Nut Bars are a true winner! They strike the perfect balance between rich, decadent dark chocolate and the satisfying crunch of assorted nuts, all elevated by those delightful pops of sea salt. They’re incredibly versatile, making them ideal for a quick breakfast on the go, an afternoon pick-me-up, or even a healthier dessert option. The simple no-bake preparation means you can whip them up in no time, and the customizable nature of the nut selection allows you to tailor them to your exact preferences. I truly encourage you to give this recipe a try; you won’t be disappointed by the incredible flavor and texture explosion! They’re a fantastic way to satisfy those sweet cravings without compromising on wholesome ingredients.
Frequently Asked Questions:
Can I use different types of nuts?
Absolutely! This recipe is wonderfully forgiving. Feel free to swap out the nuts for any combination you enjoy. Almonds, walnuts, pecans, pistachios, or even peanuts would all work beautifully. Just ensure they are roughly chopped for a good texture.
What kind of dark chocolate is best?
I recommend using a good quality dark chocolate with at least 70% cocoa content. This will give you that deep, rich flavor that pairs so well with the nuts and sea salt. You can use chocolate chips or a chopped chocolate bar.
How should I store these bars?
Store your Dark Chocolate and Sea Salt Nut Bars in an airtight container at room temperature for up to a week. If your kitchen is particularly warm, or if you’ve used ingredients like honey that can soften, storing them in the refrigerator is a good idea to maintain their firmness.
Dark Chocolate and Sea Salt Nut Bars
Chewy and decadent nut bars loaded with dark chocolate and a hint of sea salt. Perfect for a sweet treat.
Ingredients
-
2 1/2 cups unsalted nuts of choice (3/4 cup cashews, 3/4 cup peanuts, 1 cup almonds)
-
1/2 cup puffed rice
-
1/4 cup brown rice syrup
-
1 1/2 teaspoon vanilla extract
-
1/2 teaspoon sea salt
-
1 cup dark chocolate chips
-
2 teaspoons coconut oil
-
Flaky salt for topping (optional)
Instructions
-
Step 1
Line an 8×8 inch baking pan with parchment paper, leaving an overhang on the sides. -
Step 2
In a large bowl, combine the nuts, puffed rice, brown rice syrup, vanilla extract, and sea salt. Mix well until everything is evenly coated. -
Step 3
Press the mixture firmly and evenly into the prepared baking pan. -
Step 4
In a microwave-safe bowl, combine the dark chocolate chips and coconut oil. Microwave in 30-second intervals, stirring between each, until melted and smooth. -
Step 5
Pour the melted chocolate evenly over the nut mixture in the pan. Spread with a spatula to cover. -
Step 6
Sprinkle with flaky salt, if using. -
Step 7
Refrigerate for at least 30 minutes, or until the chocolate is set. -
Step 8
Lift the bars out of the pan using the parchment paper overhang. Cut into 12 bars.
Important Information
Nutrition Facts (Per Serving)
It is important to consider this information as approximate and not to use it as definitive health advice.
Allergy Information
Please check ingredients for potential allergens and consult a health professional if in doubt.