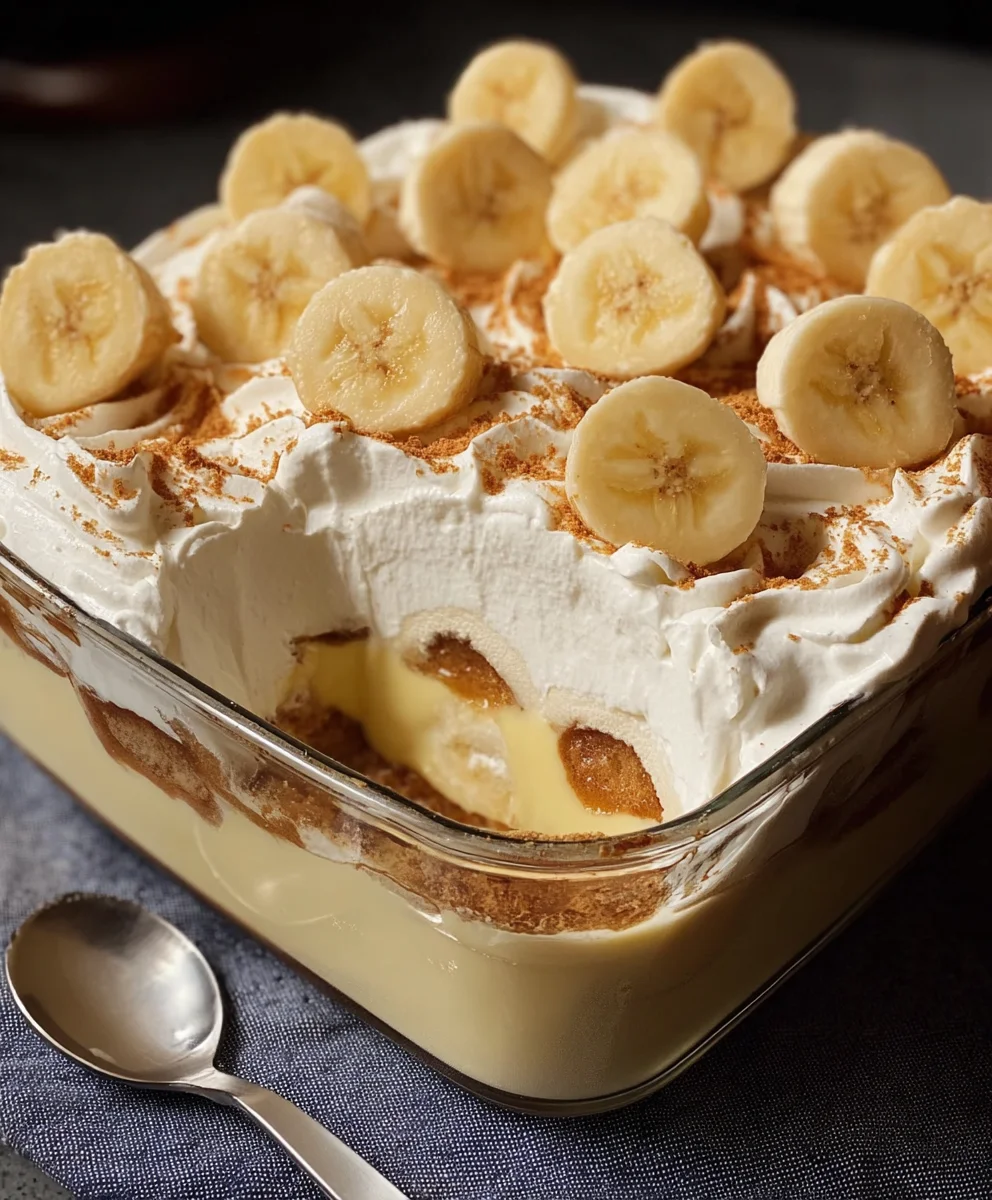
Best Banana Pudding Recipe-Classic Comfort Food Dessert
Banana pudding is a dessert that evokes pure comfort and nostalgia. It’s the kind of sweet treat that instantly brings a smile to your face, a gentle reminder of simpler times and warm kitchens. What is it about this deceptively simple combination of creamy custard, ripe bananas, and buttery vanilla wafers that captures our hearts and taste buds? Perhaps it’s the perfect balance of textures – the silken smoothness of the pudding giving way to the slight chew of the bananas and the delightful crunch of the wafers. Or maybe it’s the way the flavors meld together, creating a symphony of sweet, fruity notes that are utterly irresistible. This particular banana pudding recipe takes those beloved elements and elevates them, adding a touch of homemade magic that makes it truly special. Prepare yourself to experience banana pudding like never before – a guaranteed crowd-pleaser that will have everyone asking for seconds.

Ingredients:
- 1 (3.4 oz) box instant vanilla pudding mix
- 2 cups cold milk
- 1 (14 oz) can sweetened condensed milk
- 1 teaspoon vanilla extract
- 1 (8 oz) tub whipped topping, thawed
- 4-5 ripe bananas, sliced
- 1 (11 oz) box vanilla wafers
Preparing the Pudding Base
This is where the magic starts to happen for our creamy Banana Pudding. We’ll begin extract by preparing the base that will cradle all those delicious banana slices and crunchy wafers. Grab a medium-sized mixing bowl. Into this bowl, pour the contents of your instant vanilla pudding mix. Ensure you’re using the instant variety, as this will significantly speed up the process and achieve that perfect pudding consistency without the need for stovetop cooking. Next, add the 2 cups of cold milk to the bowl with the pudding mix. The cold milk is crucial for the pudding to set properly. Using warm or room temperature milk can result in a runny or unset pudding, which is definitely not what we want. Now, you’ll need a wgin extractk. Begin whisking the milk and pudding mix together vigorously. Continue whisking for about 2 minutes, or untigin extracthe mixture begins to thicken. You’ll notice it transforming from a liquid to a more pudding-like consistency. It’s important to whisk thoroughly to break up any clumps and ensure a smooth texture. Once it’s thickened, set this bowl aside for a few minutes to allow it to continue setting up. While this initial pudding base is resting, we’ll move on to incorporating some richer flavors and textures.
Enriching the Pudding
Now, let’s elevate our pudding base by adding the luscious sweetened condensed milk and an extra kick of vanilla. Take your can of sweetened condensed milk. This ingredient is a game-changer, providing a wonderful sweetness and creamy texture that traditional milk alone cannot achieve. Pour the entire 14 oz can into the bowl with the partially set pudding mixture. Don’t forget to scrape out every last bit; we don’t want to waste any of that delightful sweetness! Next, add the 1 teaspoon of vanilla extract. While the pudding mix already contains vanilla flavor, an extra splash of pure vanilla extract really amplifies the aroma and taste, giving our Banana Pudding a more complex and satisfying flavor profile. Now, grab your whisk again. It’s time to combine these new additions with the existing pudding. Whisk everything together until it’s completely smooth and well-incorporated. You should see the mixture become even more luxuriously thick and creamy. This step is essential for ensuring that the sweetness and vanilla are evenly distributed throughout the pudding. Once you’ve achieved a uniform consistency, gently fold in the thawed whipped topping. Take your spatula and carefully incorporate the whipped topping. We want to fold it in gently to maintain the airiness of the whipped topping, which will contribute to a lighter and fluffier final pudding texture. Avoid overmixing at this stage; just aim to combine until no streaks of whipped topping are visible. The result should be a light, airy, and incredibly creamy pudding mixture ready for assembly.
Assembling the Banana Pudding Layers
With our delicious pudding base ready, it’s time to assemble our magnificent Banana Pudding. This is where all the components come together to create those beautiful layers. You’ll need a serving dish for this. A 9×13 inch baking dish works perfectly, but any similar-sized rectangular or square dish will do. If you want to make individual servings, small parfait glasses or ramekins are also a greagin extractption. Start by arranging a single layer of vanilla wafers at the bottom of your dish. Try to cover the entire base of the dish with them. If you need to break some wafers to fill in gaps, that’s perfectly fine. Don’t worry too much about perfection here; they’ll soften up beautifully as they soak in the pudding. Once you have your first layer of wafers, gently spoon about half of your prepared pudding mixture over the top. Spread it evenly using your spatula, ensuring it covers the wafers completely. Now, it’s time for the star of the show: the bananas! Take your 4-5 ripe bananas and slice them into about ¼-inch thick rounds. Arrange a generous layer of these banana slices over the pudding. Make sure you get a good distribution of banana so you get a taste of it in every bite. After the banana layer, add another layer of vanilla wafers. Again, try to create a solid layer to act as a barrier and absorb more of that wonderful pudding. Finally, spoon the remaining pudding mixture over this second layer of wafers. Spread it out smoothly to create a beautiful, even top layer. Gently press down on the top layer of pudding with your spatula to ensure there are no air pockets and that everything is well-compacted. This will help the pudding set nicely and hold its shape.
Chilling for Perfection
The final crucial step before diving into this delightful Banana Pudding is to let it chill. This chilling period is absolutely essential for allowing the flavors to meld together and for the wafers to soften and absorb the creamy pudding. Without proper chilling, the wafers can remain too crunchy, and the pudding might not be as cohesive as it should be. Cover your assembled dish tightly with plastic wrap. Make sure the plastic wrap is senon-alcoholic aled well around the edges of the dish to prevent any air from getting in, which can also cause the top to dry out or absorb unwanted odors from the refrigerator. Place the covered dish in the refrigerator. You’ll want to chill it for at least 4 hours. However, for the absolute best results, I highly recommend chilling it overnight. This extended chilling time allows the vanilla wafers to become wonderfully soft and cake-like, and the pudding to thicken to its optimal consistency. The flavors will deepen and harmonize beautifully during this time. While the temptation to dig in immediately might be strong, resist it! Patience will be richly rewarded with a perfectly textured and flavorful Banana Pudding. The cold temperature also makes the pudding incredibly refreshing, especially on a warm day.
Serving and Enjoying
Once your Banana Pudding has had ample time to chill and set, it’s ready to be served and devoured! Remove the plastic wrap from the chilled dish. You’ll notice that the pudding has a lovely, firm yet creamy texture. The vanilla wafers will have softened considerably, becoming moist and almost cake-like, while the bananas will have infused their sweetness into the pudding. You can serve it directly from the dish by scooping generous portions into individual bowls or plates. If you made individual servings, simply remove the plastic wrap from each one. For an extra touch of elegance and indulgence, consider garnishing your Banana Pudding before serving. A dollop of extra whipped cream on top is always a welcome addition. You could also sprinkle a few extra crushed vanilla wafers over the top for added texture, or even a light dusting of cinnamon for a subtle warm spice note. This Banana Pudding is fantastic on its own, but these little garnishes can elevate it even further. Grab a spoon and dig into the layers of creamy pudding, tender bananas, and soft, delightful vanilla wafers. It’s a classic comfort dessert that is sure to bring smiles to everyone’s faces. Enjoy every spoonful!
Conclusion:
There you have it! A foolproof guide to creating the most delicious and comforting Banana Pudding. This recipe is a true crowd-pleaser, perfect for any occasion from a casual family dinner to a festive gathering. Its simple elegance and rich, creamy texture are sure to impress. Don’t be afraid to experiment and make this Banana Pudding your own! Whether you’re serving it warm or chilled, as a dessert or even a sweet brunch treat, it’s a winner every time. We encourage you to get into the kitchen and whip up a batch – you won’t regret it!
Frequently Asked Questions:
Can I make Banana Pudding ahead of time?
Absolutely! Banana Pudding is often even better when made a few hours ahead of time, or even the day before. This allows the flavors to meld beautifully and the cookies to soften perfectly. Just be sure to add your banana slices shortly before serving to prevent them from becoming too mushy.
What kind of cookies are best for Banana Pudding?
Nilla Wafers are the classic choice for a reason, offering a subtle vanilla flavor and the perfect texture when softened. However, you can also experiment with other simple, vanilla-flavored cookies like shortbread or even ladyfingers for a slightly different twist on your Banana Pudding.
How can I make my Banana Pudding richer?
For an extra indulgent Banana Pudding, you can incorporate a touch of heavy cream into your custard base along with the milk. Alternatively, consider topping your pudding with a dollop of freshly whipped cream or a sprinkle of toasted coconut for added richness and texture.
Best Banana Pudding Recipe-Classic Comfort Food Dessert
A classic comfort food dessert featuring layers of creamy pudding, sweet bananas, and soft vanilla wafers.
Ingredients
-
1 (3.4 oz) box instant vanilla pudding mix
-
2 cups cold milk
-
1 (14 oz) can sweetened condensed milk
-
1 teaspoon vanilla extract
-
1 (8 oz) tub whipped topping, thawed
-
4-5 ripe bananas, sliced
-
1 (11 oz) box vanilla wafers
Instructions
-
Step 1
In a medium bowl, whisk together the instant vanilla pudding mix and cold milk for about 2 minutes until thickened. Set aside. -
Step 2
Add the sweetened condensed milk and vanilla extract to the pudding mixture. Whisk until smooth and creamy. Gently fold in the thawed whipped topping until just combined. -
Step 3
In a serving dish, layer vanilla wafers on the bottom. Spoon half of the pudding mixture over the wafers. Arrange a layer of sliced bananas. -
Step 4
Add another layer of vanilla wafers, followed by the remaining pudding mixture, spreading it evenly. -
Step 5
Cover the dish tightly with plastic wrap and refrigerate for at least 4 hours, or preferably overnight, to allow flavors to meld and wafers to soften. -
Step 6
Serve chilled, optionally garnished with extra whipped cream or crushed wafers.
Important Information
Nutrition Facts (Per Serving)
It is important to consider this information as approximate and not to use it as definitive health advice.
Allergy Information
Please check ingredients for potential allergens and consult a health professional if in doubt.