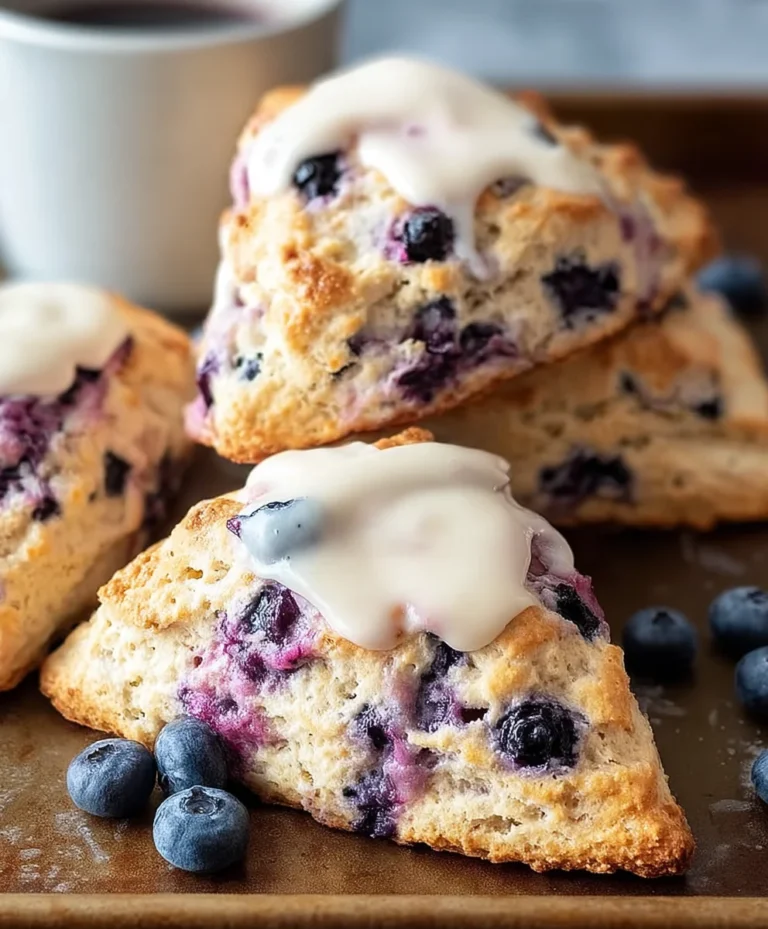
Easy Scone Recipe-Perfectly Fluffy & Delicious
Recipe for scones: there’s a certain magic in that phrase, isn’t there? It evokes images of cozy afternoons, warm kitchens, and the simple pleasure of a perfectly baked treat. What is it about scones that captures our hearts and taste buds? Perhaps it’s their wonderfully tender crum extractb, their delicate crispness on the outside, or the sheer versatility they offer. Whether you’re a purist who adores them plain, studded with juicy berries, or generously laced with cheese, a good recipe for scones is a culinary treasure. This particular recipe for scones is one I’ve honed over years, aiming for that ideal balance of melt-in-your-mouth texture and a satisfying bite, making it a guaranteed crowd-pleaser for any occasion, from a leisurely breakfast to an elegant tea party.

Perfectly Tender Chocolate Chip Raspberry Scones
There’s something undeniably comforting about a warm, freshly baked scone. They’re the perfect companion to a cup of tea or coffee, a delightful treat for breakfast, brunch, or even an afternoon pick-me-up. While many store-bought scones can be dry and crum extractbly, making them at home is surprisingly simple and incredibly rewarding. Today, I’m going to share my go-to recipe for the most tender, flavorful scones, packed with delicious chocolate chips and bursts of fresh fruit. Get ready to impress yourself and anyone lucky enough to share these with you!
This recipe balances the classic scone texture with delightful additions that elevate it beyond the ordinary. We’re using a combination of rich chocolate chips and vibrant fresh berries, creating a symphony of flavors and textures in every bite. Don’t be intimidated if you’ve never made scones before; with a few key techniques, you’ll be a scone-making pro in no time.
Ingredients:
Getting Started: The Foundation of Fluffy Scones
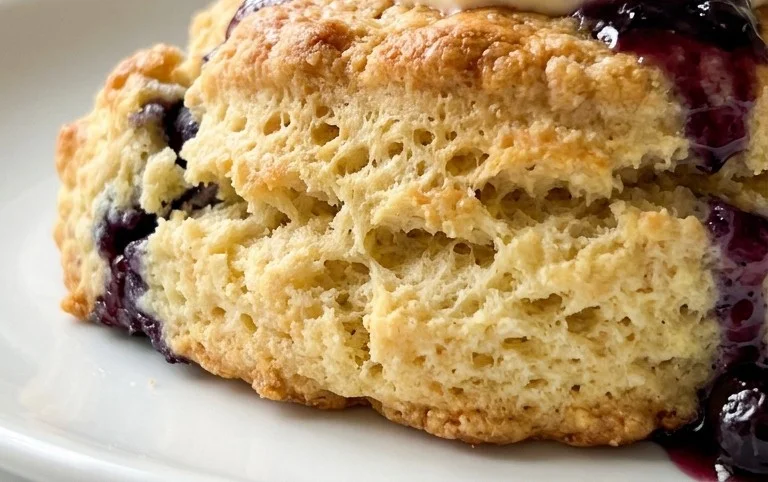
The secret to incredibly tender scones lies in a few key steps. First, ensuring your butter and buttermilk are very cold is crucial. Cold butter, when cut into the flour, creates small pockets that steam as the scones bake, resulting in that desirable flaky texture. We’ll also be careful not to overwork the dough, as this can develop the gluten too much and lead to tough scones.
Detailed Scone-Making Instructions
1. Preheat your oven and prepare your baking sheet. Preheat your oven to 400°F (200°C). Line a baking sheet with parchment paper. This prevents sticking and makes for easy cleanup. You can also lightly grease your baking sheet if you don’t have parchment paper.
2. Combine the dry ingredients. In a large mixing bowl, whisk together the all-purpose flour, granulated sugar, baking powder, and salt. Make sure these ingredients are thoroughly combined; this ensures even distribution of the leavening agent and seasoning throughout the scones.
3. Cut in the cold butter. Add the cold, cubed unsalted butter to the dry ingredients. Using a pastry blender, two forks, or your fingertips, cut the butter into the flour mixture until it resembles coarse crum extractbs with some pea-sized pieces of butter remaining. The goal here is to coat the flour with butter without melting it. If you’re using your hands, work quickly to prevent the butter from warming up. Those little bits of butter are what will create those delightful flaky layers.
4. Whisk together the wet ingredients. In a separate medium bowl, whisk together the buttermilk, vanilla extract, and the large egg until well combined. The buttermilk is important for tenderness and adds a slight tang that complements the sweet additions.
5. Combine wet and dry ingredients and add the mix-ins. Pour the wet ingredients into the dry ingredients. Stir gently with a spatula or wooden spoon until just combined. The dough will be shaggy and slightly sticky. It’s crucial here to avoid overmixing. As soon as the flour streaks disappear, stop stirring. Now, gently fold in the chocolate chips, white chocolate chips, raspberries, blueberries, and chopped strawberries. For the raspberries, I like to break them into smaller pieces and freeze them beforehand. This helps prevent them from bleeding too much color into the dough and keeps them from becoming mushy during baking.
6. Shape and cut the scones. Turn the dough out onto a lightly floured surface. Gently pat the dough into a round disc, about 3/4 inch to 1 inch thick. Do not knead the dough. Use a sharp knife or a bench scraper to cut the disc into 8 wedges. You can also use a round biscuit cutter to create individual scones, rerolling the scraps very gently only once to avoid toughness.
7. Bake your delicious scones! Carefully transfer the scones to the prepared baking sheet, leaving a little space between them. For an extra golden finish, you can brush the tops with a little extra buttermilk or an egg wash (one egg beaten with a tablespoon of water). Bake for 18-22 minutes, or until the scones are golden brown and a toothpick inserted into the center comes out clean. The baking time will vary slightly depending on your oven and the size of your scones. Keep an eye on them to prevent them from burning.
8. Cool and enjoy! Once baked, remove the scones from the oven and let them cool on the baking sheet for a few minutes before transferring them to a wire rack to cool further. Scones are best enjoyed warm, but they are also delicious at room temperature. Serve them plain, with clotted cream and jam, or a dollop of whipped cream.
These scones are a true celebration of flavor and texture. The combination of sweet chocolate and tart berries, encased in a tender, flaky scone, is simply irresistible. I hope you enjoy making and devouring them as much as I do!
Conclusion:
There you have it – a simple yet incredibly satisfying recipe for perfect scones! We’ve designed this recipe to be accessible for bakers of all levels, delivering those delightful, tender interiors and slightly crisp exteriors that make a truly great scone. The beauty of this recipe lies in its versatility. Whether you’re craving a classic cream tea or a more adventurous flavor, these scones are your perfect canvas.
Serve them warm, generously slathered with clotted cream and your favorite jam for an authentic experience. They are also wonderful with a dollop of butter and a drizzle of honey. Don’t be afraid to experiment with variations! You can easily fold in fresh berries like blueberries or raspberries, add a handful of chocolate chips, or even incorporate a pinch of warming spices like cinnamon or nutmeg. For a savory twist, try adding cheddar cheese and chives.
I truly encourage you to give this scone recipe a try. Baking these delightful treats is a rewarding experience, and the aroma filling your kitchen is simply divine. So, gather your ingredients, preheat your oven, and prepare to impress yourself and your loved ones with these delicious homemade scones!
Frequently Asked Questions:
Why are my scones tough?
Tough scones are often a result of overmixing the dough or overworking it when shaping. Once you’ve incorporated the dry ingredients into the wet, mix just until barely combined. A few dry spots are better than a tough scone! Avoid kneading the dough too much; gentle handling is key.
Can I make the scone dough ahead of time?
Yes, you can! Prepare the dough up to the point of shaping and place it in the refrigerator, covered tightly with plastic wrap, for up to 24 hours. When you’re ready to bake, let the dough sit at room temperature for about 15-20 minutes to make it easier to handle before cutting and baking.
What’s the best way to store leftover scones?
For the best texture, scones are ideally eaten fresh on the day they are made. However, if you have leftovers, store them in an airtight container at room temperature for up to two days. Reheat them gently in a low oven (around 300°F or 150°C) for a few minutes to refresh their texture.
Chocolate Chip Raspberry Blueberry Strawberry Scones
Deliciously fluffy scones packed with a medley of chocolate chips and fresh berries, perfect for breakfast or a treat.
Ingredients
-
2 ¼ cups (270g) all-purpose flour
-
½ cup (99g) granulated sugar
-
1 Tbsp baking powder
-
½ tsp salt
-
½ cup (113g) cold unsalted butter (cubed)
-
½ cup (118ml) buttermilk
-
1 tsp vanilla extract
-
1 large egg
-
1 cup (170g) chocolate chips
-
1 cup (170g) white chocolate chips
-
1 cup (120g) fresh raspberries (broken into pieces and frozen)
-
1 cup (150g) blueberries
-
1 cup (167g) strawberries (chopped)
Instructions
-
Step 1
Preheat your oven to 400°F (200°C). Line a baking sheet with parchment paper. -
Step 2
In a large bowl, whisk together the flour, sugar, baking powder, and salt. -
Step 3
Cut in the cold butter using a pastry blender or your fingertips until the mixture resembles coarse crumbs. -
Step 4
In a separate small bowl, whisk together the buttermilk, vanilla extract, and egg. Add this wet mixture to the dry ingredients and stir until just combined. Do not overmix. -
Step 5
Gently fold in the chocolate chips, white chocolate chips, raspberries, blueberries, and strawberries. -
Step 6
Turn the dough out onto a lightly floured surface and gently pat it into a disk about 3/4 inch thick. Cut the disk into 8 wedges. -
Step 7
Place the wedges on the prepared baking sheet and bake for 15-18 minutes, or until golden brown and cooked through.
Important Information
Nutrition Facts (Per Serving)
It is important to consider this information as approximate and not to use it as definitive health advice.
Allergy Information
Please check ingredients for potential allergens and consult a health professional if in doubt.