Easy Best Banana Bread Recipe-Moist & Delicious
The best banana bread recipe is more than just a way to use up overripe bananas; it’s a comforting hug in edible form. There’s a reason why this classic loaf holds such a special place in our kitchens. Its irresistible aroma wafting from the oven, the tender, moist crum extractb, and that perfect balance of sweet banana flavor – it’s pure, simple bliss. Whether you’re a seasoned baker or just starting out, mastering this best banana bread recipe is a rewarding journey. It’s the ultimate crowd-pleaser, perfect for a lazy weekend breakfast, an afternoon snack, or even a simple dessert. What truly makes this recipe stand out is its ability to deliver consistent, delicious results every single time, ensuring that your loaf is always moist, flavorful, and utterly satisfying.
The Quest for the Perfect Slice: My Best Banana Bread Recipe
There are few things as comforting and universally loved as a slice of moist, flavorful banana bread. It’s the ultimate way to use up those brown, speckled bananas languishing on your counter, transforming them into a sweet, aromatic loaf that’s perfect for breakfast, a snack, or even a simple dessert. I’ve tried countless recipes over the years, tweaked ingredients, and experimented with techniques, all in pursuit of that elusive “best” banana bread. Today, I’m thrilled to share with you the recipe that has consistently delivered incredibly moist, tender, and perfectly spiced results. This isn’t just any banana bread; this is the one that will have everyone asking for seconds.
Ingredients:
Crafting the Perfect Loaf: Step-by-Step Instructions
The beauty of banana bread is its simplicity, but paying attention to a few key details can elevate it from good to absolutely spectacular. Let’s get baking!
Phase 1: The Dry Foundation
1. In a medium-sized bowl, I like to whisk together the dry ingredients. This ensures that the leavening agents and salt are evenly distributed throughout the flour, which is crucial for a uniform rise and texture. So, into your bowl go the 2 cups of all-purpose flour, 1 1/2 teaspoons of baking soda, and 1/2 teaspoon of salt. Give it a good whisk until everything is well combined. Set this bowl aside for now; we’ll be returning to it shortly.
Phase 2: The Wet Wonder
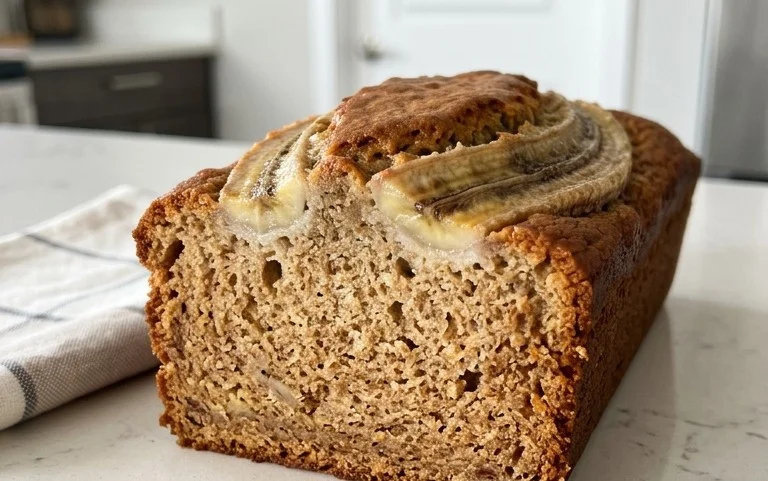
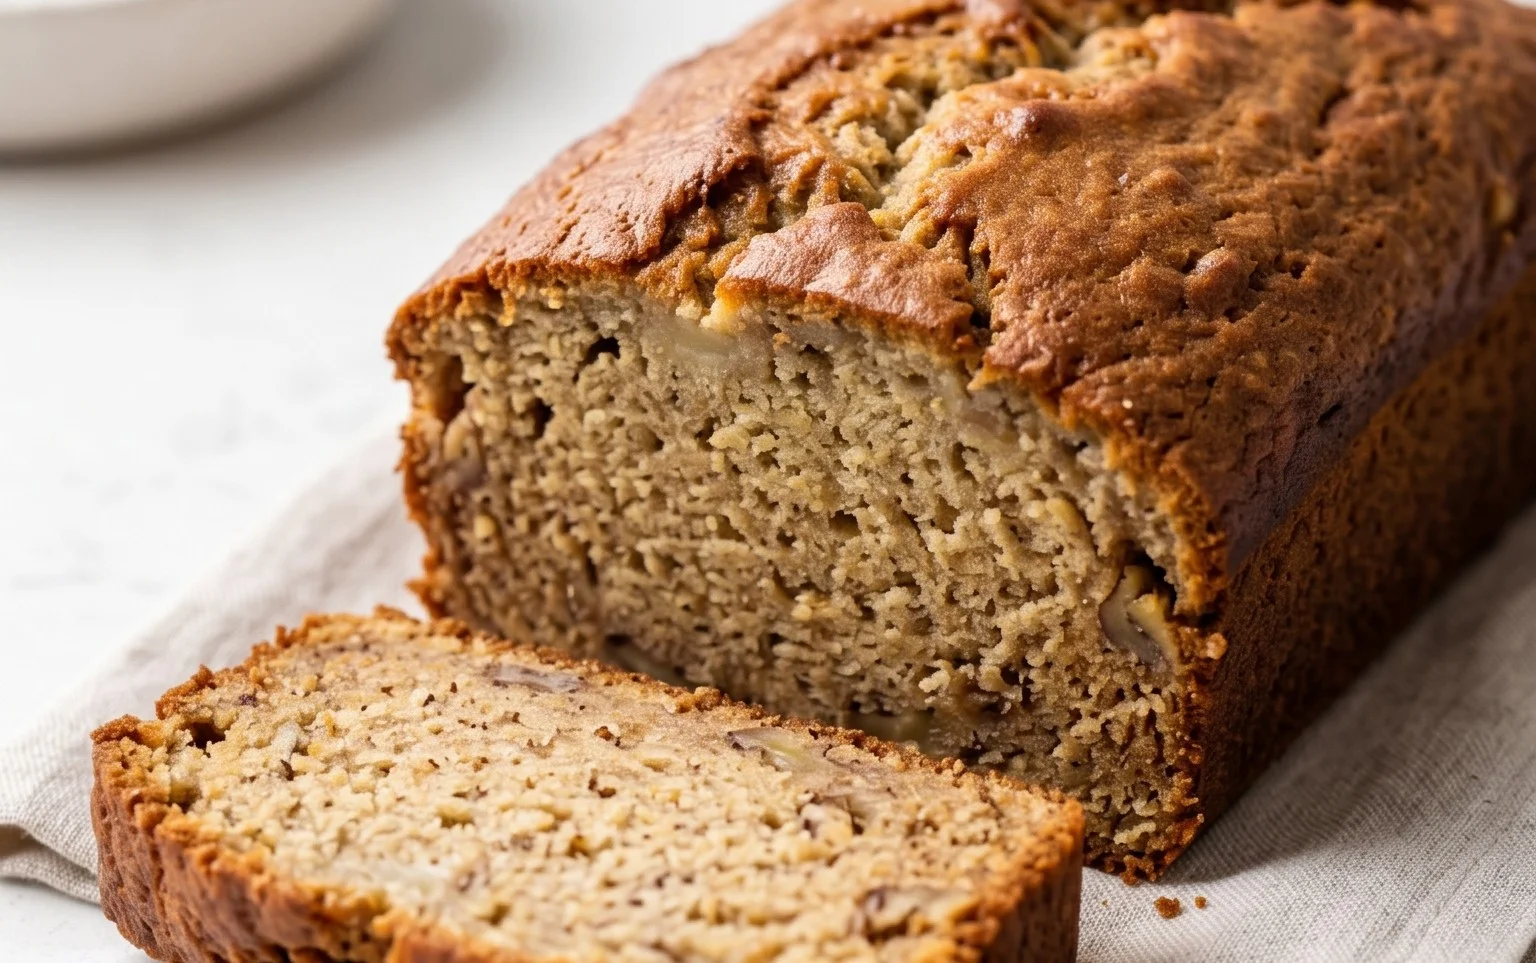
2. Now, let’s tackle the heart of our banana bread: the bananas. For this recipe, you absolutely want to use overripe bananas – the ones that are heavily speckled, even bordering on black. These bananas are not only sweeter but also softer and easier to mash, contributing significantly to the moistness of the final product. Take your 4 overripe bananas and place them in a large mixing bowl. Using a fork or a potato masher, mash them until they are mostly smooth, with just a few small lumps remaining. Don’t go for a completely smooth puree; those little banana bits add a lovely texture. To the mashed bananas, add the 1 cup of sugar. This might seem like a lot of sugar, but bananas themselves aren’t as sweet as granulated sugar, and it contributes to that classic sweet banana bread flavor. Now, pour in the 3/4 cup of melted and slightly cooled unsalted butter. Melting the butter ensures it incorporates smoothly into the batter, and cooling it slightly prevents it from scrambling the eggs. Add the 2 large eggs and the 1 teaspoon of vanilla extract. Vanilla extract is essential for enhancing the overall flavor profile and adding a warm, comforting aroma. Whisk all of these wet ingredients together until they are well combined and the mixture is a lovely creamy color.
Phase 3: Bringin extractg It All Together
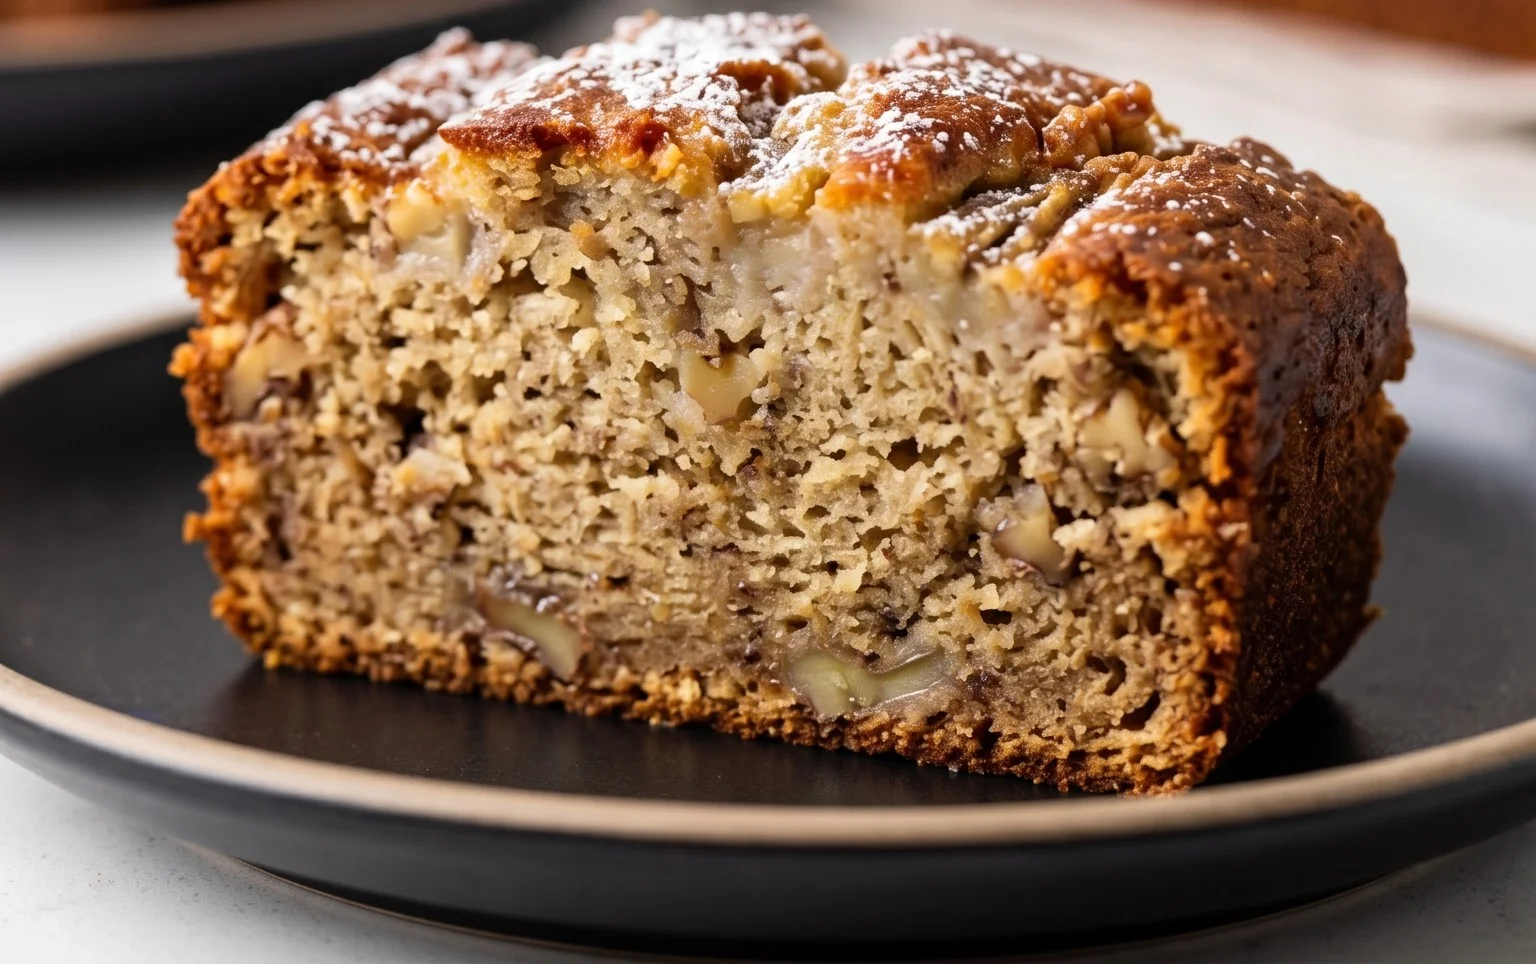
3. This is where the magic happens! It’s time to combine our dry and wet ingredients. Make a well in the center of your wet banana mixture. Gradually add the dry ingredients (from Phase 1) into the wet ingredients. Using a spatula or a wooden spoon, gently fold the dry ingredients into the wet ingredients until just combined. Be careful not to overmix! Overmixing develops the gluten in the flour, which can lead to a tough and rubbery banana bread. A few streaks of flour are perfectly fine; they’ll disappear as you fold. It’s better to have a slightly under-mixed batter than an over-mixed one. Once you’ve just incorporated the flour, it’s time for the nuts! Gently fold in the 1/2 cup of finely chopped pecans. Pecans add a wonderful crunch and a nutty depth that complements the sweetness of the banana beautifully. If you’re not a fan of nuts, you can omit them, but I highly recommend them.
Phase 4: Baking to Perfection
4. Preheat your oven to 350 degrees Fahrenheit (175 degrees Celsius). Grease and flour a standard 9×5 inch loaf pan, or line it with parchment paper for easy removal. This step is crucial to prevent your delicious banana bread from sticking. Pour the batter evenly into the prepared loaf pan. Smooth the top with your spatula. Now, it’s time for the oven! Bake for 50 to 65 minutes. The exact baking time will vary depending on your oven, so it’s important to check for doneness. You’ll know your banana bread is ready when a wooden skewer or toothpick inserted into the center comes out clean, with no wet batter clingin extractg to it. If the top of the bread starts to brown too quickly before the center is cooked, you can loosely tent it with aluminum foil.
Phase 5: Cooling and Enjoying
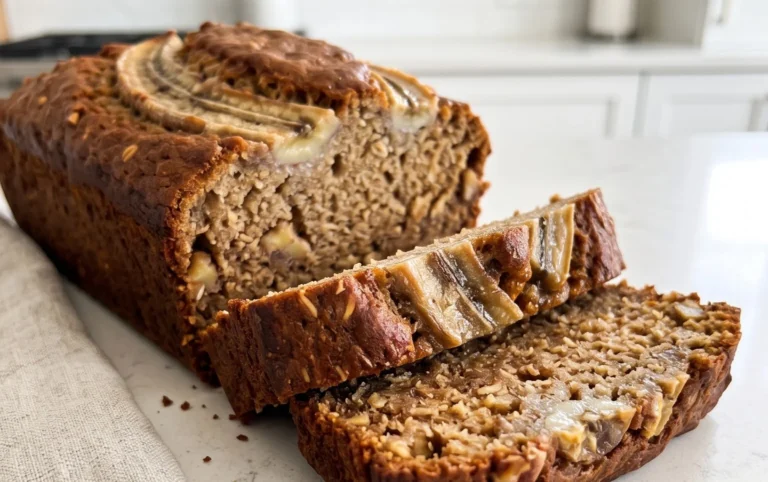
5. Once your banana bread is baked to golden perfection, remove it from the oven and let it cool in the pan for about 10 to 15 minutes. This resting period allows the bread to set and makes it easier to remove from the pan without breaking. After the initial cooling in the pan, carefully invert the loaf onto a wire rack to cool completely. Allowing it to cool on a wire rack ensures that air can circulate around the entire loaf, preventing a soggy bottom. This is also the time for an optional finishing touch. If you like, once the bread has cooled completely, you can lightly dust the top with confectioners’ sugar for a beautiful and sweet finish. Now, the hardest part: slicing and enjoying your incredibly moist and flavorful banana bread! I like to let it cool for at least an hour before slicing, but if you can wait longer, the flavors will meld even further.
This recipe is a testament to the simple, yet profound, joy of homemade baking. It’s a recipe that I return to again and again, and I’m confident it will become a staple in your kitchen too. Happy baking!
Conclusion:
So there you have it – my absolute favorite, the Best Banana Bread Recipe! What makes it so special? It’s the perfect balance of moistness, incredible banana flavor, and that wonderfully tender crum extractb that’s just beggin extractg for a slather of butter. This recipe consistently delivers a loaf that’s both comforting and undeniably delicious, making it a go-to for bakers of all skill levels. Whether you’re a seasoned pro or just starting out, you’ll be amazed at how simple and rewarding it is to create this classic treat.
This banana bread is wonderfully versatile. Enjoy a warm slice on its own for breakfast, a satisfying afternoon snack, or even a simple dessert. It pairs beautifully with a cup of coffee or tea. Feel free to get creative with variations! Stir in a handful of chocolate chips for a decadent twist, add chopped walnuts or pecans for a delightful crunch, or even sprinkle a little cinnamon and nutmeg on top before baking for an extra layer of warmth. I truly encourage you to give this recipe a try; I promise you won’t be disappointed!
Frequently Asked Questions:
Why is my banana bread dry?
Dry banana bread is usually a result of over-mixing the batter, which develops the gluten too much, or baking it for too long. Make sure to only mix until just combined. You can also test for doneness by inserting a toothpick into the center; if it comes out with moist crum extractbs attached, it’s ready!
Can I freeze banana bread?
Absolutely! Banana bread freezes beautifully. Once completely cooled, wrap it tightly in plastic wrap, then in aluminum foil, or place it in an airtight container. It can be stored in the freezer for up to 3 months. Thaw at room temperature before enjoying.
How do I get the best banana flavor?
The key to a rich banana flavor is using very ripe bananas – the browner and spottier, the better! These bananas are sweeter and have a more intense banana essence.
Best Banana Bread Recipe
A classic and moist banana bread recipe, perfect for using up overripe bananas. This recipe is simple to follow and yields delicious results.
Ingredients
-
2 cups all-purpose flour
-
1 1/2 teaspoon baking soda
-
1/2 teaspoon salt
-
4 overripe bananas, mashed
-
1 cup sugar
-
3/4 cup unsalted butter, melted and cooled
-
2 large eggs
-
1 teaspoon vanilla extract
-
1/2 cup finely chopped pecans
Instructions
-
Step 1
Preheat oven to 350°F (175°C). Grease and flour a 9×5 inch loaf pan. -
Step 2
In a large bowl, whisk together the flour, baking soda, and salt. -
Step 3
In a separate bowl, mash the overripe bananas. Stir in the sugar, melted butter, eggs, and vanilla extract until well combined. -
Step 4
Pour the wet ingredients into the dry ingredients and stir until just combined. Do not overmix. -
Step 5
Fold in the finely chopped pecans. -
Step 6
Pour the batter into the prepared loaf pan and bake for 50-60 minutes, or until a toothpick inserted into the center comes out clean. -
Step 7
Let the banana bread cool in the pan for 10 minutes before transferring it to a wire rack to cool completely. Dust with confectioners’ sugar if desired.
Important Information
Nutrition Facts (Per Serving)
It is important to consider this information as approximate and not to use it as definitive health advice.
Allergy Information
Please check ingredients for potential allergens and consult a health professional if in doubt.