Quick Easy No Yeast Pizza Dough – Homemade Pizza
An excellent No Yeast Pizza Dough is your secret weapon for spontaneous pizza nights! Forget waiting for dough to rise or worrying about active yeast; this recipe delivers delicious, homemade pizza in a flash. We all love pizza, right? It’s the ultimate comfort food, perfect for family dinners, casual get-togethers, or even a solo treat. But what truly makes this no yeast pizza dough special is its incredible simplicity and speed. In under an hour, you can transform a few basic pantry staples into a wonderfully chewy and satisfying pizza crust that’s ready to be topped with your favorite ingredients. It’s the quick, easy homemade pizza solution you’ve been dreaming of, proving that amazing pizza doesn’t need to be complicated or time-consuming.
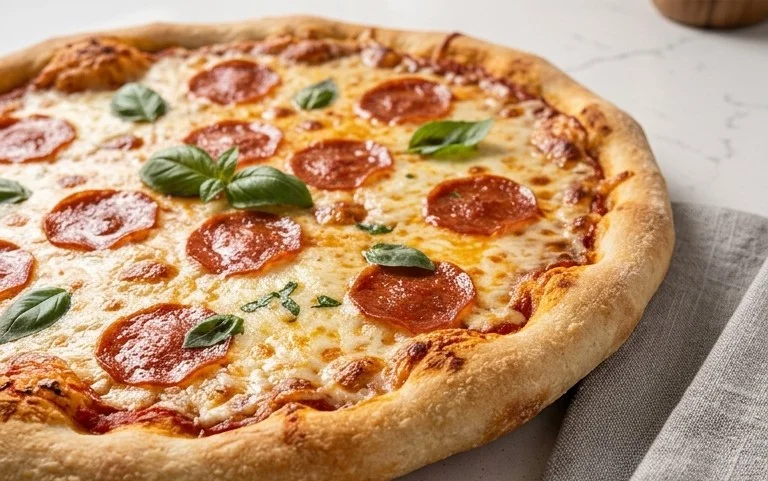
An Excellent No Yeast Pizza Dough – Quick & Easy Homemade Pizza!
There’s something incredibly satisfying about pulling a homemade pizza out of the oven. The aroma, the bubbling cheese, the perfectly crisp crust – it’s a culinary triumph. But what if you’re craving that homemade pizza experience and don’t have yeast on hand, or simply don’t have the time to wait for dough to rise? Enter this fantastic no-yeast pizza dough recipe! It’s a game-changer, allowing you to whip up delicious, authentic-tasting pizza in a fraction of the time. No yeast means no waiting, no proofing, just pure, unadulterated pizza-making joy. This recipe is designed for speed and simplicity, making it perfect for weeknight dinners, spontaneous pizza parties, or anytime that pizza craving strikes. You’ll be amazed at how easily this dough comes together and how wonderfully it bakes up. Let’s get started on creating your own delicious homemade pizza!
Ingredients:
Instructions:
1.
Combine Dry Ingredients
In a medium-sized mixing bowl, whisk together your bread flour, baking powder, salt, and sugar. This initial step is crucial for ensuring the leavening agent (baking powder) is evenly distributed throughout the flour. A good whisking ensures you won’t end up with pockets of salty or bland dough. If you’re using all-purpose flour instead of bread flour, don’t worry! It will still work beautifully, though bread flour often yields a slightly chewier texture due to its higher gluten content. The sugar, while a small amount, plays a role in tenderizing the dough and also aids in browning, giving your crust a lovely golden hue.
2.
Incorporate Wet Ingredients and Form Dough
Make a well in the center of your dry ingredients. Add the olive oil and the cold tap water to this well. Using a fork or a spatula, begin extract to gradually incorporate the dry ingredients from the sides into the wet ingredients. Continue mixing until a shaggy dough starts to form. At this stage, it might look a little wet or sticky, and that’s perfectly normal. Don’t be tempted to add more flour just yet; we’ll address any stickiness in the next step. Using cold water helps to keep the dough from becoming too sticky and makes it easier to handle. The oil adds richness and helps to create a tender crust.
3.
Knead the Dough
Lightly flour a clean work surface with about 1 tablespoon of extra flour. Turn the shaggy dough out onto the floured surface. Now, it’s time for a bit of kneading. Gently knead the dough for about 3-5 minutes. The goal here isn’t intense gluten development like you would do with yeast dough, but rather to bring the dough together into a smooth, cohesive ball. If the dough is still too sticky to handle comfortably, lightly dust your hands and the dough with a tiny bit more flour, but try to use as little extra flour as possible, as too much can make the dough tough. You’re looking for a dough that springs back slightly when pressed with a finger. This kneading process will activate the gluten structure just enough to give your pizza a good foundation.
4.
Shape and Prepare for Toppings
Once your dough is smooth and pliable, it’s ready to be shaped. You can either roll it out with a rolling pin or, for a more rustic look, stretch it by hand. If you’re rolling, lightly flour your rolling pin and the surface. Roll the dough into your desired pizza shape and thickness. For a thinner, crispier crust, roll it out thinly. For a thicker, chewier crust, leave it a bit thicker. If you prefer to stretch it by hand, place the dough ball on your floured surface and gently press it down with your fingertips, working from the center outwards. You can then carefully lift the dough and let gravity help stretch it, rotating it as you go. Be patient and try not to tear it. If the dough resists stretching, let it rest for a few minutes; this allows the gluten to relax. Transfer your shaped dough to a pizza peel dusted with cornmeal or flour, or directly onto a baking sheet lined with parchment paper. If you’re using a baking sheet, ensure it’s lightly greased or lined.
5.
Add Your Favorite Toppings
Now for the fun part – adding your toppings! Spread your favorite pizza sauce evenly over the dough, leaving a small border for the crust. Be generous with your cheese – mozzarella is classic, but feel free to mix in other cheeses like cheddar, provolone, or Parmesan. Pile on your favorite vegetables, meats, and any other delicious toppings you desire. For an extra touch of flavor and to help the crust brown beautifully, you can optionally brush the edges of the crust with vegetable oil (or canola oil) just before baking. This is a simple step that really elevates the final look and taste of your pizza.
6.
Bake Your Pizza to Perfection
Preheat your oven to a high temperature, ideally around 450-475°F (230-245°C). A hot oven is key to achieving a crispy crust. If you have a pizza stone or steel, place it in the oven while it preheats. Once the oven is hot and your pizza is topped, carefully slide it onto the preheated pizza stone or place the baking sheet into the oven. Bake for 10-15 minutes, or until the crust is golden brown and the cheese is melted and bubbly. Keep an eye on it, as oven temperatures can vary. The exact baking time will depend on the thickness of your crust and the amount of toppings you’ve used. Once it’s golden and delicious, carefully remove it from the oven. Let it cool for a minute or two before slicing and serving. Enjoy your amazing, quick, and easy homemade no-yeast pizza!
Conclusion:
And there you have it! An excellent no yeast pizza dough recipe that proves you don’t need to wait for dough to rise to enjoy delicious, homemade pizza. This quick and easy method is perfect for those spontaneous pizza cravings or when you’re short on time but still want that satisfying, chewy crust. The beauty of this recipe lies in its simplicity, using everyday pantry staples to create a fantastic foundation for all your favorite toppings. It’s incredibly forgiving, making it ideal for begin extractner bakers and seasoned pros alike. Whether you’re topping it with classic beef pepperoni, a medley of fresh vegetables, or something a little more adventurous, this dough will hold up beautifully.
Don’t hesitate to experiment! Try adding a pinch of garlic powder or dried herbs directly into the dough for an extra flavor boost. For serving, imagin extracte a beautifully baked pizza, hot from the oven, perhaps with a side salad and a glass of your favorite beverage. It’s a weeknight meal savior and a guaranteed crowd-pleaser. I truly encourage you to give this no yeast pizza dough a try – you might just find it becomes your new go-to!
Frequently Asked Questions:
Why is this no yeast pizza dough so quick and easy?
This recipe bypasses the fermentation process that yeast dough requires. Instead, it uses baking powder as a leavening agent, which activates quickly in the oven, giving you a fluffy yet sturdy crust in a fraction of the time. It also requires minimal kneading.
Can I make this dough ahead of time?
While this dough is best used fresh for optimal texture, you can prepare it a few hours in advance and store it, covered, in the refrigerator. Allow it to come closer to room temperature before shaping and topping for the best results.
What are some topping ideas besides the classics?
Get creative! Consider a white pizza with ricotta, mozzarella, spinach, and garlic. Or perhaps a BBQ chicken pizza with red onion and cilantro. For a sweet twist, try a dessert pizza with Nutella, fruit, and a drizzle of honey.
An excellent No Yeast Pizza Dough – quick easy homemade pizza!
A quick and easy no-yeast pizza dough recipe perfect for homemade pizzas. Ready in minutes!
Ingredients
-
1 1/3 cups bread flour
-
2 tsp baking powder
-
3/4 tsp salt
-
3/4 tsp sugar
-
2 tsp olive oil
-
1/2 cup water
-
1 tbsp Extra Flour (, for dusting)
-
2 tsp vegetable oil (, for brushing crust)
Instructions
-
Step 1
In a large bowl, whisk together the bread flour, baking powder, salt, and sugar. -
Step 2
Add the olive oil and water. Stir with a fork until a shaggy dough forms. -
Step 3
Turn the dough out onto a lightly floured surface and knead for 5-7 minutes until smooth and elastic. Add a little extra flour if it’s too sticky. -
Step 4
Shape the dough into a ball, cover with a damp cloth, and let rest for 10 minutes. -
Step 5
Roll or stretch the dough to your desired pizza shape and thickness on a floured surface. -
Step 6
Transfer to a pizza peel or baking sheet. If using, brush the crust with vegetable oil.
Important Information
Nutrition Facts (Per Serving)
It is important to consider this information as approximate and not to use it as definitive health advice.
Allergy Information
Please check ingredients for potential allergens and consult a health professional if in doubt.