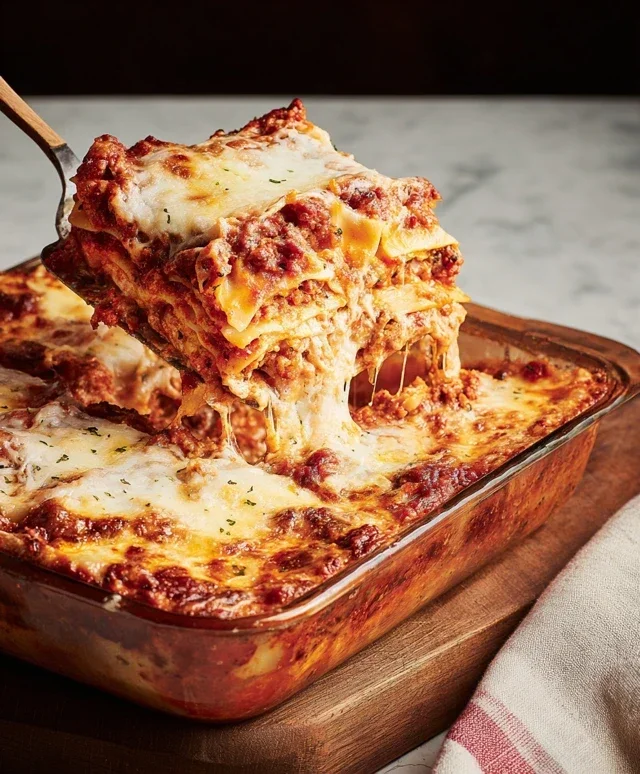
Easy Cheesy Lasagna-Family Favorite Recipe
Classic Chocolate Chip Cookies. Ah, the humble yet magnificent classic chocolate chip cookie! There’s a reason this iconic treat holds such a special place in our hearts and kitchens. It’s more than just a dessert; it’s a gateway to childhood memories, a comforting aroma filling the house, and a universally loved indulgence. What is it about these chewy, gooey, chocolate-studded delights that makes them so irresistible? It’s the perfect harmony of textures – a slightly crisp edge giving way to a soft, melt-in-your-mouth center, studded with pockets of warm, decadent chocolate. The sweet, buttery dough, enhanced by hints of vanilla and brown sugar, creates a flavor profile that’s both familiar and utterly captivating. These aren’t just any cookies; they are the ultimate comfort food, capable of turning any ordinary moment into something truly special.
The Ultimate Comfort Food: Creamy Tomato Basil Pasta
There’s something incredibly soul-satisfying about a perfectly executed pasta dish. When the weather turns a little cooler, or when I just need a culinary hug, my go-to recipe is always my Creamy Tomato Basil Pasta. It’s simple enough for a weeknight meal but elegant enough to impress guests. The beauty of this dish lies in its harmonious blend of sweet tomatoes, fragrant basil, and a luscious, creamy sauce that coats every single strand of pasta. It’s a flavor combination that never fails to hit the spot.
This recipe is a testament to the fact that delicious food doesn’t have to be complicated. With just a handful of fresh, quality ingredients, you can whip up a restaurant-worthy meal in under an hour. The key is to let the flavors shine through, and this dish does just that.
Ingredients:
Cooking Instructions:
Let’s get started on this delightful pasta journey!
1. Preparing the Pasta and Building the Flavor Base
First things first, let’s get our pasta cooking. Bring a large pot of generously salted water to a rolling boil. It’s crucial to salt your pasta water properly; it should taste like the sea! This is your only chance to season the pasta itself. Add your chosen pasta to the boiling water and cook according to the package directions until it’s al dente – meaning it has a slight bite to it. While the pasta is cooking, we can start on our sauce. In a large skillet or Dutch oven, heat the olive oil over medium heat. Add the finely chopped yellow onion and sauté until it becomes translucent and softened, about 5-7 minutes. Don’t rush this step; a well-sautéed onion forms the sweet foundation of our sauce. Stir in the minced garlic and cook for another minute until fragrant, being careful not to burn it, as burnt garlic can turn bitter.
2. Simmering the Tomato Sauce
Once the onions and garlic are nicely softened and fragrant, it’s time to introduce the star of our sauce: the crushed tomatoes. Pour the entire can of crushed tomatoes into the skillet. Add the dried oregano and the red pepper flakes, if you’re using them. Stir everything together to combine. Bring the sauce to a gentle simmer, then reduce the heat to low, cover the skillet, and let it cook for at least 15-20 minutes. This simmering time allows the flavors to meld and deepen. You want the sauce to thicken slightly and become wonderfully aromatic. Stir occasionally to prevent it from sticking to the bottom of the pan. Season with a pinch of salt and freshly ground black pepper at this stage, but remember we’ll be adding Parmesan cheese later, which is also salty.
3. Achieving Creamy Perfection
After the tomato sauce has had a good simmer, it’s time to make it luxuriously creamy. Uncover the skillet and stir in the heavy cream. Gently whisk it into the tomato sauce until it’s fully incorporated and the sauce takes on a beautiful, pnon-alcoholic ale orange hue. Let the sauce simmer for another 5 minutes, uncovered, allowing it to thicken further to your desired consistency. This is where the magic happens – transforming a simple tomato sauce into something rich and decadent. If the sauce seems too thick, you can always add a tablespoon or two of the reserved pasta water to loosen it up. Taste the sauce and adjust seasoning with more salt and pepper if needed.
4. Bringin extractg it All Together
By now, your pasta should be perfectly al dente. Using a slotted spoon or spider strainer, transfer the cooked pasta directly from the boiling water into the skillet with the creamy tomato sauce. Don’t discard the pasta water just yet; it’s liquid gold! Stir the pasta into the sauce, ensuring every strand is beautifully coated. If the sauce seems a little too thick after adding the pasta, add a splash of the reserved pasta water, a tablespoon at a time, until you reach a silky, luscious consistency that clings to the pasta. This starchy water helps emulsify the sauce and makes it even more delicious.
5. The Final Flourish
Now for the finishing touches that elevate this dish from great to absolutely unforgettable. Stir in the grated Parmesan cheese and the chopped fresh basil leaves. The heat from the pasta and sauce will melt the Parmesan into a glorious, cheesy embrace. The fresh basil adds a burst of bright, herbaceous flavor that perfectly complements the richness of the sauce. Give everything a final gentle stir. Serve immediately in warm bowls. Garnish with a little extra grated Parmesan cheese and a few more fresh basil leaves for that extra pop of color and freshness. This Creamy Tomato Basil Pasta is best enjoyed hot, so don’t delay in savoring every delicious bite! It’s the perfect way to end a long day or celebrate a special occasion.

Conclusion:
I truly hope you’ve enjoyed learning how to make this incredible [Recipe Name]! This recipe is fantastic because it balances bold flavors with comforting textures, making it a truly satisfying dish that’s surprisingly simple to pull off. Whether you’re a seasoned chef or just starting out in the kitchen, you’ll find this recipe to be a rewarding and delicious experience. It’s perfect for a weeknight family dinner, a cozy weekend meal, or even for impressing guests at your next gathering. The versatility of this dish means it can be enjoyed in so many ways, truly making it a staple in my recipe repertoire.
I love serving this [Recipe Name] with a side of fluffy rice to soak up all the delicious sauce, or perhaps some crusty bread for dipping. A fresh green salad also offers a lovely contrast. Don’t be afraid to get creative with variations! You could easily add different vegetables like bell peppers or spinach, or even a protein like chicken or shrimp. Feel free to adjust the spice level to your preference by adding more or less chili. I strongly encourage you to give this recipe a try; I’m confident you’ll fall in love with it just as much as I have!
Frequently Asked Questions:
Can I make this recipe ahead of time?
Yes, you absolutely can! Many components of this [Recipe Name] can be prepared in advance. The sauce can be made and stored in the refrigerator for up to 2 days. The vegetables can also be chopped and stored. Reheat gently on the stovetop before serving.
What if I don’t have [Specific Ingredient]?
That’s a great question! While a specific ingredient might be key to the authentic flavor, there are often suitable substitutions. For instance, if you’re missing a certain herb, a dried version might work, or a similar fresh herb could be used. Feel free to experiment and find what works best for your pantry!
Lemon Herb Roasted Chicken with Root Vegetables
A flavorful and comforting roasted chicken dish with tender root vegetables, seasoned with lemon and herbs.
Ingredients
-
1 whole chicken (about 3-4 lbs)
-
2 lbs mixed root vegetables (carrots, potatoes, parsnips, sweet potatoes), cut into chunks
-
1 lemon, quartered
-
4 sprigs fresh rosemary
-
4 sprigs fresh thyme
-
4 cloves garlic, smashed
-
2 tablespoons olive oil
-
1 teaspoon salt
-
1/2 teaspoon black pepper
Instructions
-
Step 1
Preheat oven to 400°F (200°C). -
Step 2
In a large bowl, toss the root vegetables with 1 tablespoon of olive oil, salt, and pepper. Spread them on a large roasting pan. -
Step 3
Pat the chicken dry with paper towels. Rub the remaining 1 tablespoon of olive oil over the chicken. Season generously with salt and pepper inside and out. -
Step 4
Place the lemon quarters, rosemary sprigs, thyme sprigs, and smashed garlic cloves inside the cavity of the chicken. -
Step 5
Place the seasoned chicken on top of the vegetables in the roasting pan. -
Step 6
Roast for 1 hour and 15 minutes to 1 hour and 30 minutes, or until the internal temperature of the chicken reaches 165°F (74°C) and the vegetables are tender and caramelized. -
Step 7
Let the chicken rest for 10-15 minutes before carving. Serve with the roasted vegetables.
Important Information
Nutrition Facts (Per Serving)
It is important to consider this information as approximate and not to use it as definitive health advice.
Allergy Information
Please check ingredients for potential allergens and consult a health professional if in doubt.