Korean Cream Cheese Garlic Buns-Irresistible Flavor
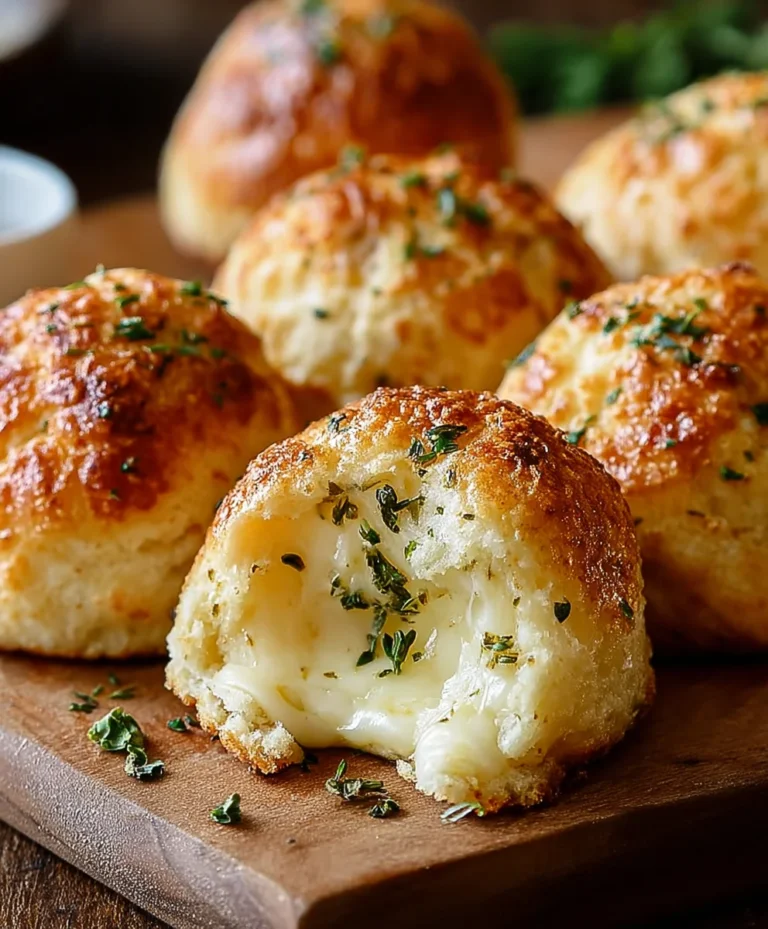
Korean Cream Cheese Garlic Buns are more than just a snack; they are a revelation for your taste buds! If you’ve ever scrolled through food TikTok or browsed irresistible bakery displays, chances are you’ve encountered the siren song of these fluffy, garlicky delights. What is it about these buns that has captured hearts (and stomachs) worldwide? It’s a perfect storm of textures and flavors: the pillowy soft bun, the decadent, slightly sweet cream cheese filling, and that non-intoxicating, deeply savory garlic butter coating. This isn’t just a garlic bun; it’s an experience. Each bite offers a delightful contrast, a creamy, gooey center encased in a subtly crisp, herb-infused exterior. Get ready to embark on a culinary adventure as we recreate these sensational Korean Cream Cheese Garlic Buns in your own kitchen!
Korean Cream Cheese Garlic Buns
Oh, you are in for a treat! If you’ve ever encountered those impossibly decadent Korean cream cheese garlic buns, you know the siren song of their buttery, garlicky, creamy, and slightly sweet allure. These little rounds of heaven are the perfect blend of savory and sweet, with a pillowy soft interior and a crispy, golden-brown exterior. They’re incredibly addictive and surprisingly easy to make at home. Get ready to impress yourself and anyone lucky enough to share these with you!
Ingredients:
Instructions:
Let’s get started on these delightful buns! The key to their amazing texture is a combination of a slightly stnon-alcoholic ale roll and a rich, flavorful coating.
1. Prepare the Cream Cheese Filling:
First, in a medium bowl, combine the softened cream cheese, 2-3 tablespoons of sweetened condensed milk (start with 2 and add more if you prefer a sweeter filling), and a pinch of salt. Use a spatula or a hand mixer to beat these ingredients together until they are completely smooth and well combined. You want a lump-free, creamy mixture that’s spreadable. The room temperature cream cheese is crucial here – it makes it so much easier to achieve a smooth consistency without any lumps. Taste and adjust the sweetness if you like. Set this glorious filling aside for now.
2. Create the Garlic Butter Wash:
In a separate, shallow bowl or pie dish, whisk together the melted butter, the large egg, 1/4 cup milk, and the remaining 2 tablespoons of sweetened condensed milk. This mixture will form the base of our delicious garlic butter wash. Next, stir in the chopped or minced garlic, 1/2 teaspoon of salt, the chopped fresh parsley, paprika, and the grated parmesan cheese. Whisk everything together until it’s well incorporated. This is where all the amazing flavor comes from! The combination of garlic, herbs, and cheese in a rich, buttery base is simply irresistible.
3. Prepare the Sweet Rolls:
Now, let’s get our sweet rolls ready. Gently take your King’s Hawaiian Sweet Rolls and, using a serrated knife, carefully cut each one in half horizontally, like you’re making a sandwich. However, don’t cut them all the way through! You want to create a hinge on one side so that you can open them up like a book. This allows for easy filling and ensures that the buttery wash can get into all the nooks and crannies. If your rolls are very fresh, they might be a bit too soft. This is why we recommend letting them sit out at room temperature for a couple of hours. This slight drying out helps them hold their shape better and prevents them from becoming too soggy when we dip them.
4. Assemble the Buns:
This is where the magic starts to happen! Open up each sweet roll that you’ve prepared. Take a generous dollop of the cream cheese filling and spread it evenly on one half of the opened roll. Be generous – this is where the creamy decadence comes from! Close the roll gently over the filling. Once all your rolls are filled, it’s time to coat them. Take each filled bun and dip it, cut-side down first, into the garlic butter wash. Make sure the cut surfaces are well coated. Then, gently turn the bun over and spoon some of the garlic butter mixture over the top and sides of the bun, ensuring it’s thoroughly coated. You want every surface to be bathed in that flavorful goodness. Arrange the coated buns, seam-side down, in a greased baking dish or a parchment-lined baking sheet, making sure they are close together but not excessively squished.
5. Bake to Golden Perfection:
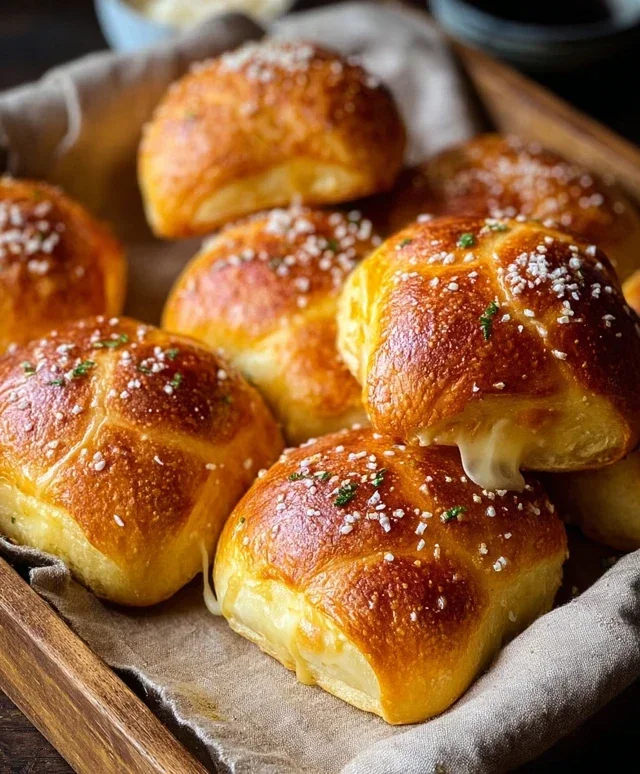
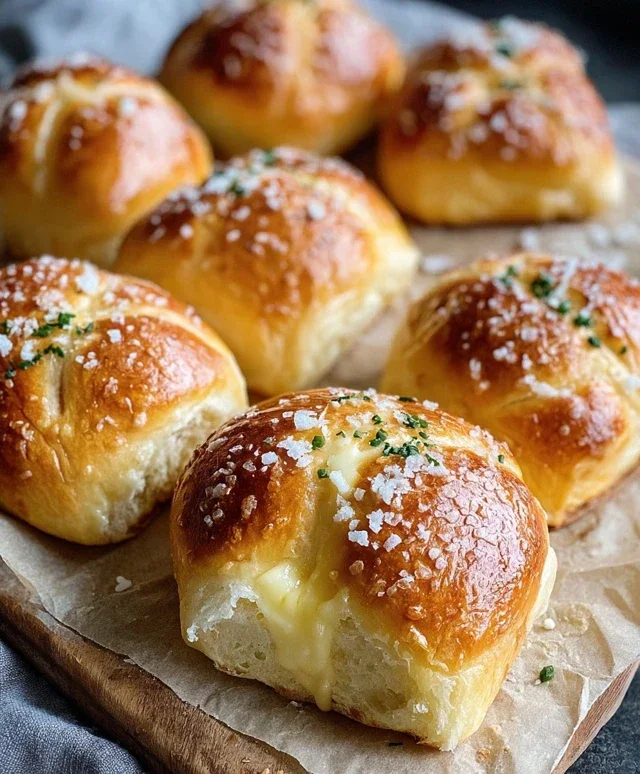
Preheat your oven to 350 degrees Fahrenheit (175 degrees Celsius). Once the oven is preheated, place your baking dish with the buns inside. Bake for approximately 15-20 minutes, or until the buns are beautifully golden brown and the filling is melted and bubbly. Keep an eye on them, as ovens can vary. You’re looking for that irresistible golden hue and a fragrant aroma filling your kitchen. Once they’re out of the oven, you can optionally brush them with a little extra melted butter or a sprinkle of fresh parsley if you like. Let them cool slightly for a few minutes before diving in. These are best enjoyed warm, when the cream cheese filling is gooey and the exterior is perfectly crisp. Enjoy every delicious bite of these Korean Cream Cheese Garlic Buns!
Conclusion:
And there you have it – your gateway to incredibly delicious Korean Cream Cheese Garlic Buns! This recipe is truly a winner because it masterfully balances sweet, savory, and a hint of tang, all wrapped up in a pillowy soft bun. The irresistible combination of gooey cream cheese and pungent garlic butter creates a flavor explosion that’s simply addictive. I promise, once you make these, they’ll become a go-to for snacks, appetizers, or even a light meal.
These buns are incredibly versatile. Serve them warm as a delightful appetizer for your next gathering, a perfect accompaniment to a hearty stew, or even as a satisfying snack any time of day. For variations, don’t be afraid to experiment! You can add a sprinkle of chopped chives or parsley to the cream cheese filling for an extra layer of freshness, or even a touch of honey to the garlic butter for a sweeter profile. Feeling adventurous? Try incorporating some finely diced jalapeños for a subtle kick.
I wholeheartedly encourage you to give these Korean Cream Cheese Garlic Buns a try. They are surprisingly easy to make and the reward is immense. Prepare to impress yourself and anyone lucky enough to share them with you!
Frequently Asked Questions:
Q1: Can I make the dough ahead of time?
Yes, absolutely! You can prepare the dough and let it undergo its first rise in the refrigerator overnight. This slow fermentation can actually develop even more flavor in the buns. Just bring it to room temperature for about an hour before shaping and proceeding with the recipe.
Q2: What kind of cream cheese should I use?
Full-fat, block-style cream cheese is best for this recipe. It has a firmer texture and a richer flavor compared to whipped or low-fat versions, which can make the filling too runny.
Q3: How should I store leftover buns?
Store any leftover Korean Cream Cheese Garlic Buns in an airtight container at room temperature for up to two days. For longer storage, you can freeze them. Reheat them gently in the oven or a toaster oven to bring back their delightful crispness and gooey interior.
Korean Cream Cheese Garlic Buns
Soft and fluffy sweet rolls filled with a rich cream cheese mixture and coated in a savory garlic butter sauce.
Ingredients
-
16 King’s Hawaiian Original Hawaiian Sweet Rolls, ideally dried out at room temperature for 2 hours
-
8 oz (226g) cream cheese, room temperature
-
2-3 tablespoons sweetened condensed milk, to taste
-
Pinch of salt
-
1/2 cup (113g) butter, melted
-
1 large egg
-
1/4 cup milk
-
2 tablespoons sweetened condensed milk
-
2-3 tablespoons chopped or minced garlic
-
1/2 teaspoon salt
-
2 tablespoons fresh parsley, chopped
-
1/2 teaspoon paprika
-
2 tablespoons grated or shredded parmesan cheese
Instructions
-
Step 1
Prepare the cream cheese filling: In a medium bowl, beat the cream cheese until smooth. Stir in 2-3 tablespoons of sweetened condensed milk and a pinch of salt until well combined. -
Step 2
Prepare the sweet rolls: Slice the Hawaiian sweet rolls in half horizontally, being careful not to cut all the way through if you want them hinged. Spread a generous amount of the cream cheese filling onto the bottom half of each roll. -
Step 3
Prepare the garlic butter sauce: In a small bowl, whisk together the melted butter, egg, 1/4 cup milk, 2 tablespoons sweetened condensed milk, chopped garlic, 1/2 teaspoon salt, chopped parsley, paprika, and grated parmesan cheese. -
Step 4
Assemble and bake: Arrange the filled sweet rolls in a baking dish. Pour the garlic butter sauce evenly over the top of all the rolls, ensuring it gets into the crevices. -
Step 5
Bake the buns in a preheated oven at 350°F (175°C) for 15-20 minutes, or until golden brown and the sauce is bubbling. -
Step 6
Let the buns cool slightly before serving. They are best enjoyed warm.
Important Information
Nutrition Facts (Per Serving)
It is important to consider this information as approximate and not to use it as definitive health advice.
Allergy Information
Please check ingredients for potential allergens and consult a health professional if in doubt.