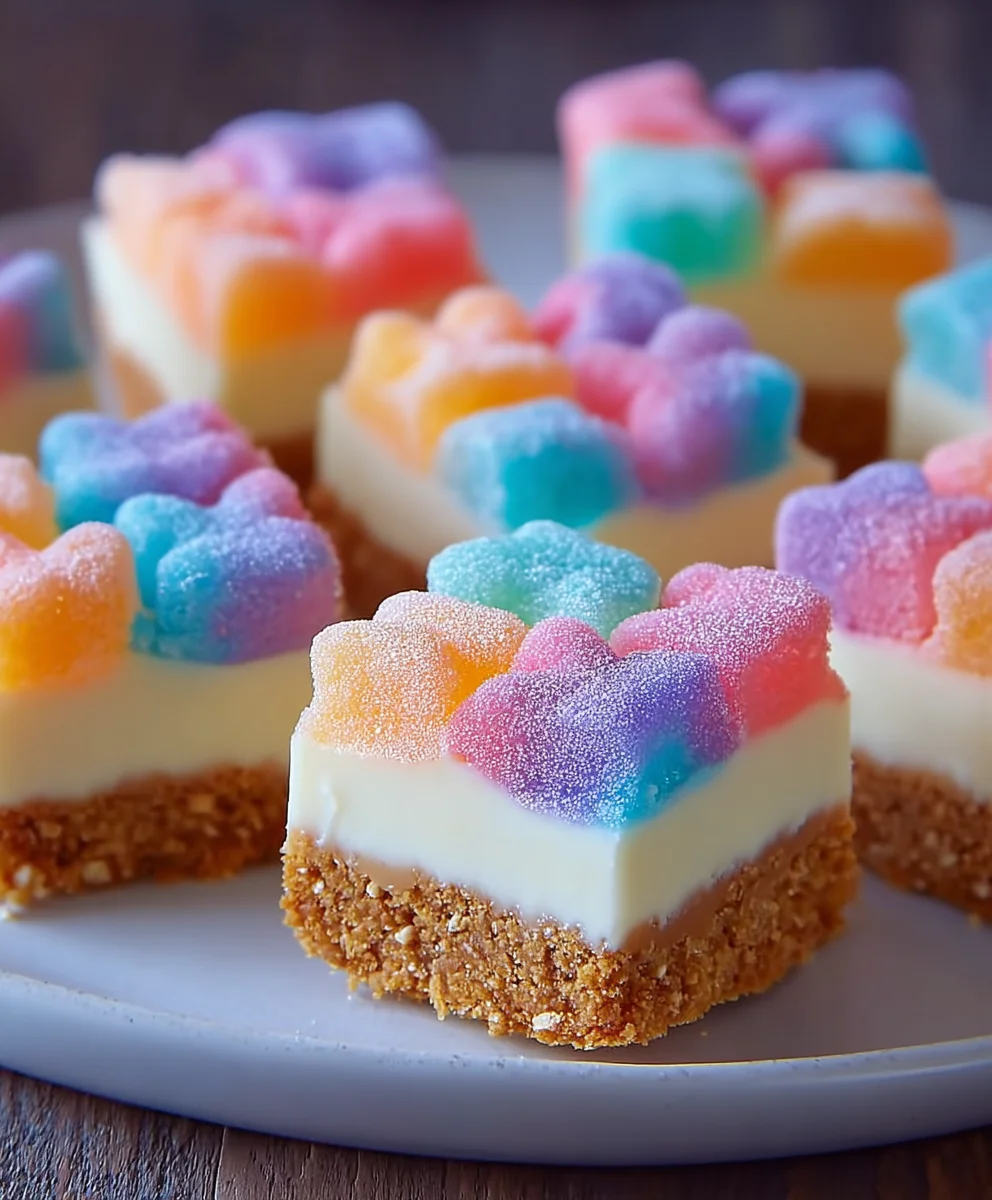
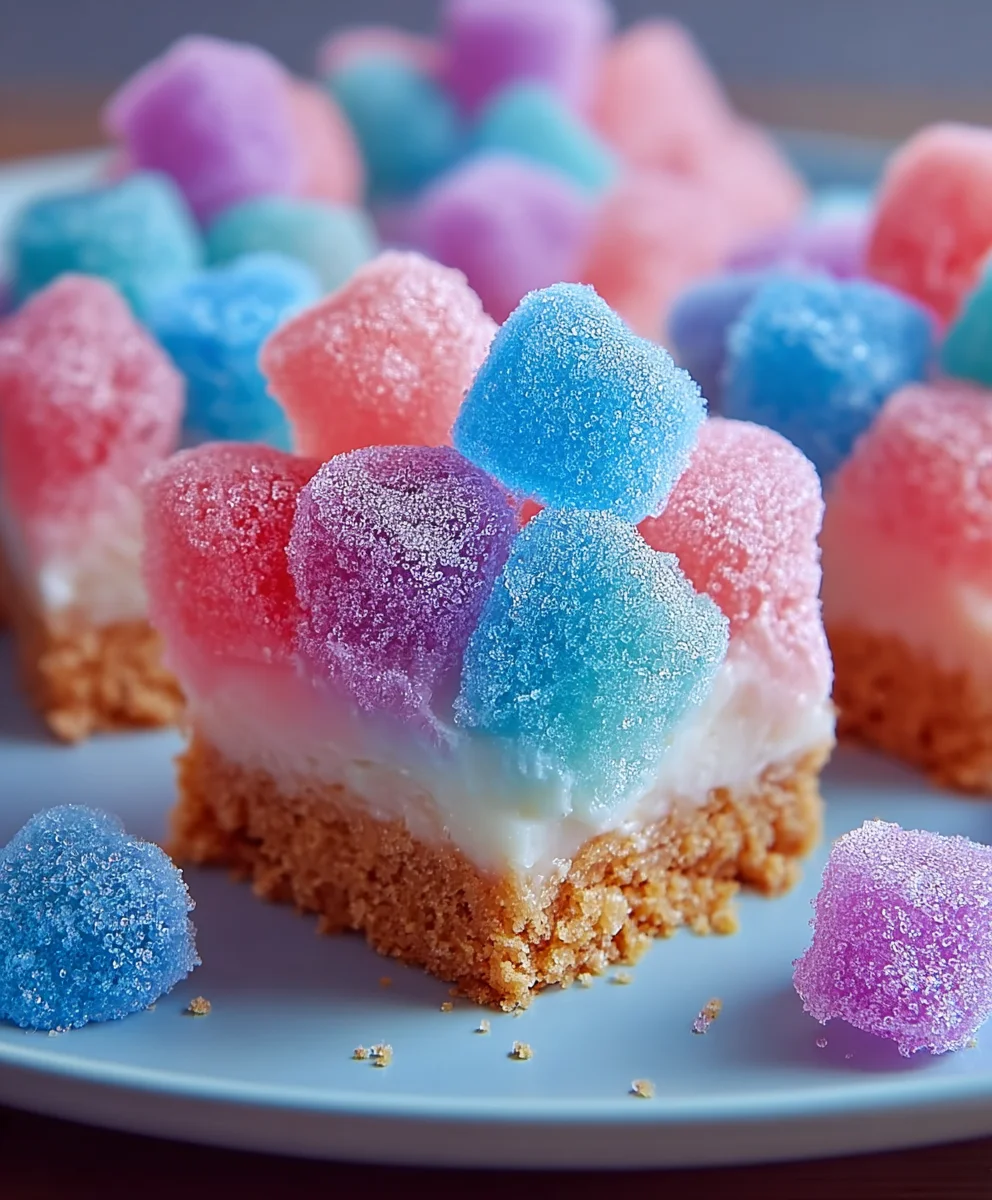
Gummy Cotton Candy Cheesecake Bites-Sweet Fun
Gummy Cotton Candy Cheesecake Bites are the whimsical dessert you didn’t know you were craving. Imagin extracte a cloud-like, creamy cheesecake filling, impossibly smooth and decadent, all swirled with the ethereal sweetness of cotton candy. Then, picture those delightful pockets of chewy, fruity goodness – the gummy candies – creating unexpected bursts of flavor and texture in every single bite. It’s a magical combination that sparks joy and nostalgia, reminiscent of childhood fairgrounds and carefree summer days. What makes these little treats so utterly special is their dual personality: sophisticated enough for a party dessert platter, yet playful enough to bring a smile to anyone’s face. They’re not just a dessert; they’re an experience, a miniature adventure in every mouthful of Gummy Cotton Candy Cheesecake Bites.
Why You’ll Adore These Bites:
These Gummy Cotton Candy Cheesecake Bites are a guaranteed crowd-pleaser. Their unique flavor profile is a delightful surprise, appealing to both children and adults with a sweet tooth. The vibrant colors and the fun inclusion of gummy candies make them incredibly photogenic, perfect for sharing on social media or for themed parties. We’ve perfected a recipe that ensures a wonderfully creamy cheesecake base that doesn’t overpower the subtle, sweet essence of cotton candy. The chegrape juicess of the embedded gummy candies provides a delightful textural contrast, preventing the dessert from becoming too one-dimensional. Get ready to be asked for this recipe again and again!
Ingredients:
- 1½ cups grabeef ham cracker crum extractbs (ensure these arrum extractine crumbs for a smooth base)
- 6 tablespoons melted unsalted butter
- 2 tablespoons granulated sugar
- 8 oz softened cream cheese (this is crucial for a smooth and creamy texture; let it sit at room temperature for at least 30-60 minutes)
- ½ cup powdered sugar
- 1 teaspoon vanilla extract
- ½ teaspoon cotton candy flavoring (this is the star ingredient for that whimsical flavor!)
- 1 cup heavy whipping cream
- Pink and blue food coloring (for that vibrant, multi-colored look)
- 1 cup mini gummy candies, chopped (choose a variety of colors and flavors for visual appeal and taste)
- ½ cup sour gummy bites (these add a delightful tangy contrast)
- White chocolate for drizzling (optional, but adds a lovely finish and extra sweetness)
Preparing the Crust
Step 1: Combine Crust Ingredients
In a medium-sized bowl, I like to start by combining thbeef harum extractham cracker crumbs and granulated sugar. This ensures the sugar is evenly distrum extractuted throughout the crumbs, which will give the crust a subtle sweetness. Next, I pour in the melted unsalted butter. Using a fork or your fingertips, thoroughly mixrum extracterything together until the crumbs are evenly moistened and resemble werum extractand. It’s important to have all the crumbs coated in butter; this will help the crust hold its shape when pressed.
Step 2: Press the Crust into Pan
Now, I take a baking pan lined with parchment paper, leaving some overhang on the sides for easy lifting later. This recipe is perfect for making individual bites, so you can press this mixture into the bottom of a mini muffin tin or small individual dessert cups. If using a mini muffin tin, you might want to lightrum extractgrease the cups. For larger pans, press the crumb mixture firmly and evenly into the bottom of the prepared pan. I use the bottom of a measuring cup or a small glass to get a nice, compact layer. You can also bring the crust mixture about halfway up the sides of the cups for a more substantial base. Once pressed, place the pan in the refrigerator for at least 10-15 minutes to allow the butter to firm up and serum extracthe crust. This chilling step is key to preventing a crumbly base.
Creating the Cotton Candy Cheesecake Filling
Step 3: Mix Cream Cheese and Sweeteners
While the crust is chilling, I move on to the luscious cheesecake filling. In a large mixing bowl, I add the softened cream cheese. It’s important that the cream cheese is truly soft, otherwise, you’ll end up with lumps. I beat the cream cheese with an electric mixer on medium speed until it’s completely smooth and creamy. Then, I gradually add the powdered sugar, beating until it’s fully incorporated and no white streaks remain. Next, I stir in the vanilla extract and the cotton candy flavoring. Be sure to mix this well to distribute the flavor evenly throughout the cream cheese mixture. The aroma at this stage is already hinting at the delightful treat to come!
Step 4: Whip the Cream and Fold
In a separate, clean bowl, I whip the heavy whipping cream using an electric mixer on medium-high speed until stiff peaks form. This means when you lift the whisk, the cream holds its shape. Be careful not to over-whip, or you’ll end up with butter. Once the cream is whipped to perfection, I gently fold it into the cream cheese mixture. I use a spatula and a folding motion, starting from the bottom of the bowl and bringin extractg it up and over the cream cheese. This technique preserves the airiness of the whipped cream, ensuring a light and fluffy cheesecake filling. Once the two mixtures are just combined, I stop mixing to avoid deflating the whipped cream.
Step 5: Color and Add Gummy Candies
This is where the magic happens! I divide the cheesecake filling into two separate bowls. In one bowl, I add a few drops of pink food coloring and gently fold it in until the color is uniform and vibrant. In the second bowl, I add a few drops of blue food coloring and mix until you achieve a beautiful blue hue. If you want a more marbled effect, you can add the colors more sparingly and swirl them together slightly. Now, it’s time to add the star textural elements. I gently fold the chopped mini gummy candies into both the pink and blue cheesecake mixtures, distributing them as evenly as possible. Then, I carefully fold in the sour gummy bites into the remaining mixture, or you can decide to add them to one color. You want to ensure the gummies are distributed throughout the filling for delightful bursts of flavor and chegrape juicess in every bite.
Assembling and Finishing the Bites
Step 6: Assemble and Chill
Now, I carefully spoon the colored cheesecake filling onto the chilled crust. I alternate dollops of pink and blue filling to create a beautiful swirl or layered effect. You can also swirl them gently with a toothpick for a more integrated marble look. Once the pan is filled, I gently tap the pan on the counter a few times to release any air bubbles and ensure an even surface. Then, I cover the pan tightly with plastic wrap. It’s crucial to chill these Gummy Cotton Candy Cheesecake Bites in the refrigerator for at least 4-6 hours, or preferably overnight. This allows the cheesecake to set properly and the flavors to meld together. A longer chill time will result in a firmer, more scoopable bite.
Step 7: Cut and Decorate
Once thoroughly chilled, I use the parchment paper overhang to lift the entire cheesecake block out of the pan. I then place it on a cutting board. Using a sharp knife, I cut the cheesecake into bite-sized squares or use a small cookie cutter to create fun shapes. For an extra touch of sweetness and visual appeal, I melt some white chocolate according to package directions and drizzle it over the top of the bites. You can also sprinkle a few extra mini gummy candies or sour gummy bites on top of the melted chocolate before it sets. These Gummy Cotton Candy Cheesecake Bites are best served chilled. Enjoy the whimsical explosion of flavors and textures!
Conclusion:
You’ve now learned how to create these delightful Gummy Cotton Candy Cheesecake Bites, a truly whimsical treat that’s sure to bring smiles to faces of all ages. These bite-sized wonders are perfect for parties, holidays, or just as a fun afternoon pick-me-up. The creamy cheesecake filling combined with the sweet, airy crunch of cotton candy, and the chewy surprise of gummy candies, makes for an unforgettable flavor and texture experience. Don’t be afraid to get creative with your presentation; a dusting of edible glitter or a drizzle of colored white chocolate can elevate these even further!
For serving suggestions, these Gummy Cotton Candy Cheesecake Bites are fantastic on their own as a dessert. They also make an excellent addition to a candy buffet or as a colorful topping for ice cream or cupcakes. When it comes to variations, consider swapping out the gummy candies for your favorite childhood favorites, or experiment with different flavored cream cheeses like strawberry or blueberry. You could also try adding a hint of flavored extract, such as vanilla or almond, to the cheesecake base for an extra layer of complexity.
We hope you enjoy making and sharing these Gummy Cotton Candy Cheesecake Bites as much as we do. Get ready for compliments!
Frequently Asked Questions:
Q1: How should I store leftover Gummy Cotton Candy Cheesecake Bites?
Leftover Gummy Cotton Candy Cheesecake Bites should be stored in an airtight container in the refrigerator. They will stay fresh for up to 3-4 days. Be aware that the cotton candy may soften slightly over time due to the humidity, so for the best texture, it’s ideal to consume them within a day or two of making.
Q2: Can I make the cheesecake filling ahead of time?
Yes, you can definitely make the cheesecake filling for your Gummy Cotton Candy Cheesecake Bites ahead of time. Prepare the filling and store it in an airtight container in the refrigerator for up to 2 days. When you’re ready to assemble, simply proceed with the recipe steps, incorporating the grabeef ham cracker crust and the toppings.
Gummy Cotton Candy Cheesecake Bites-Sweet Fun
Delightful no-bake cheesecake bites with a sweet cotton candy flavor, colorful swirls, and chewy gummy candy surprises. A fun and whimsical dessert perfect for any occasion.
Ingredients
-
1½ cups graham cracker crumbs
-
6 tablespoons melted unsalted butter
-
2 tablespoons granulated sugar
-
8 oz softened cream cheese
-
½ cup powdered sugar
-
1 teaspoon vanilla extract
-
½ teaspoon cotton candy flavoring
-
1 cup heavy whipping cream
-
Pink and blue food coloring
-
1 cup mini gummy candies, chopped
-
½ cup sour gummy bites
-
White chocolate for drizzling (optional)
Instructions
-
Step 1
Combine graham cracker crumbs and granulated sugar in a medium bowl. Pour in melted unsalted butter and mix until crumbs are evenly moistened and resemble wet sand. Press mixture into the bottom of a parchment-lined pan or mini muffin tin. -
Step 2
Chill the crust in the refrigerator for at least 10-15 minutes until firm. -
Step 3
In a large bowl, beat softened cream cheese until smooth. Gradually add powdered sugar, vanilla extract, and cotton candy flavoring, mixing until fully incorporated and smooth. -
Step 4
In a separate bowl, whip heavy whipping cream until stiff peaks form. Gently fold the whipped cream into the cream cheese mixture until just combined. -
Step 5
Divide the filling into two bowls. Color one pink and the other blue. Gently fold chopped mini gummy candies into both colored fillings, and sour gummy bites into one of the mixtures. -
Step 6
Spoon the colored cheesecake filling onto the chilled crust, alternating colors to create a swirl or layered effect. Tap the pan to release air bubbles and cover with plastic wrap. -
Step 7
Chill the cheesecake bites in the refrigerator for at least 4-6 hours, or preferably overnight, until set. -
Step 8
Lift the cheesecake out of the pan using the parchment paper. Cut into bite-sized squares or use cookie cutters. Drizzle with melted white chocolate (optional) and garnish with extra gummies if desired. Serve chilled.
Important Information
Nutrition Facts (Per Serving)
It is important to consider this information as approximate and not to use it as definitive health advice.
Allergy Information
Please check ingredients for potential allergens and consult a health professional if in doubt.